
13218307
Tags-"Yes" Space nature backyard play family fun activities bonding outdoor play space outside
Make Your Backyard A Wonderful Family Hangout
Want to do something fun, but don’t want to leave your backyard?
Try some of these ideas to make changes to your yard. They range from the simple – making of a teepee – to the beautiful – making your own beach.
Many of these ideas look fairly easy for the novice to do. All look beautiful and personally… I like the fire pit. Check out the ideas below.
If You have some eyesores in your yard that you dont know what to do with
CLICK HERE for 25 Incredible Solutions
Plant Giant Allium Flowers
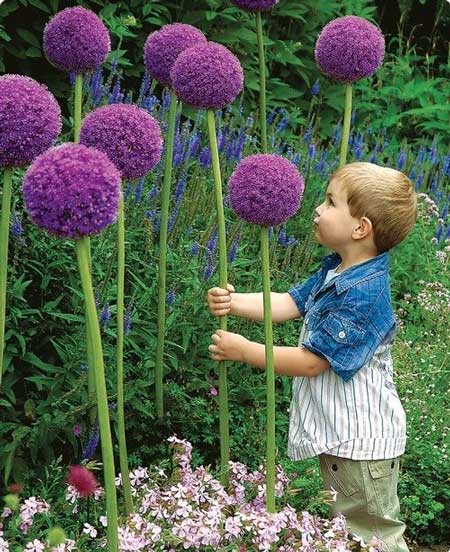
source: binbin.net
Create Your Own “Drive In” Backyard Theater
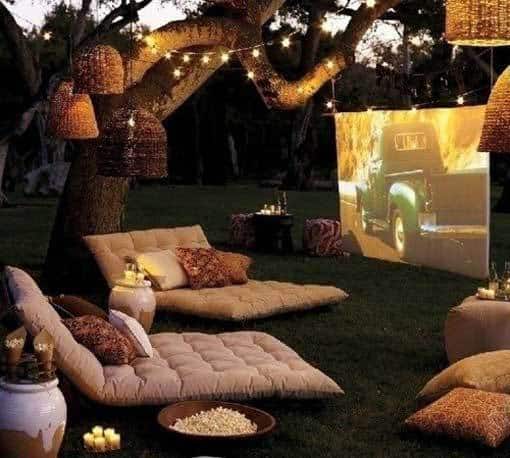
How To: giverslog.com
Patio Table With Built In Beer Cooler
Excellent detailed tutorial with lots of images!
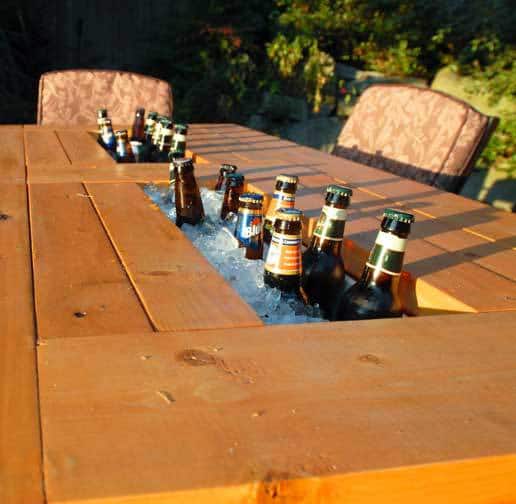
source: domesticated-engineer.com
Build A Tree House
People don’t do this much anymore and the kids will love it!
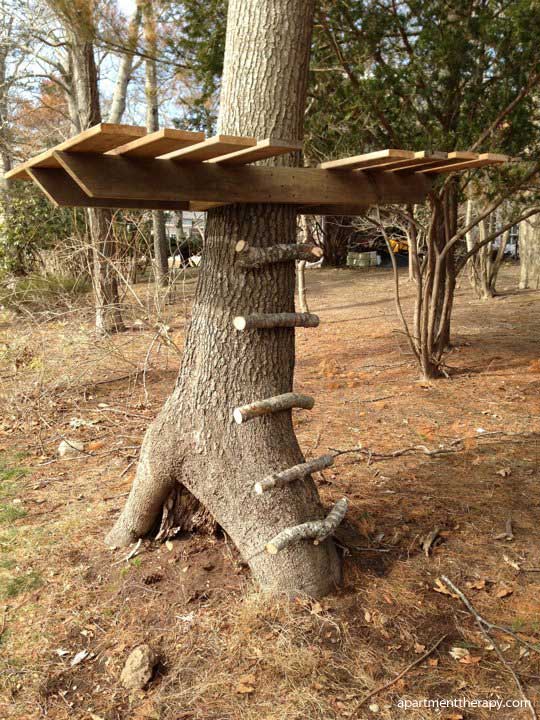
How To: apartmenttherapy.com
Bunk Bed Loft For Stargazing
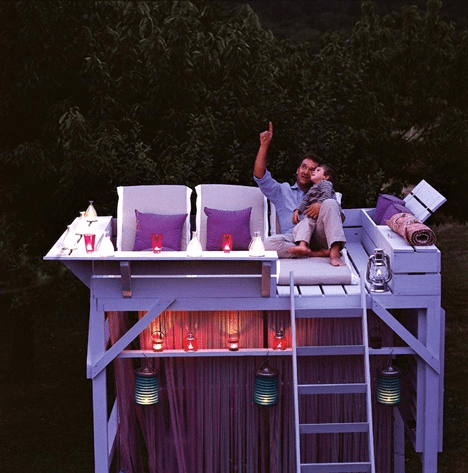
source: reddit
Drill Holes In Fence and Fill With Colorful Marbles
Cool idea when the sunlight hits them. More fencing ideas here.
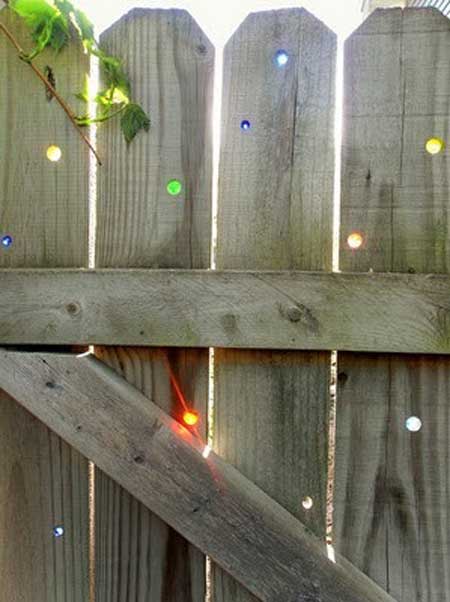
source: reddit.com
Make A Fire Pit
Very good tutorial!
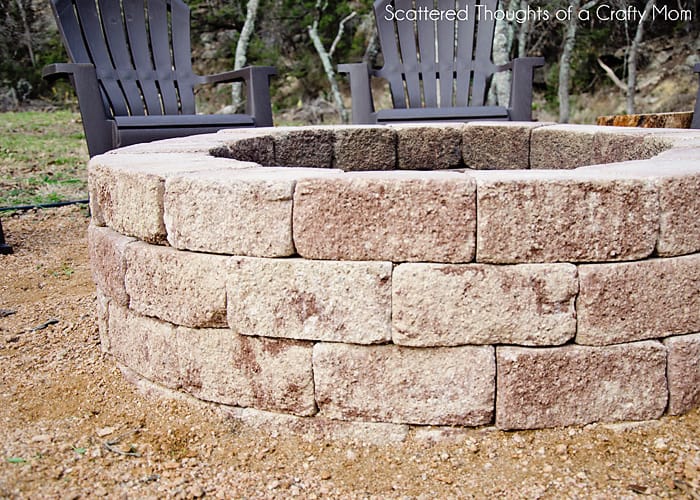
source: scatteredthoughtsofacraftymom.com
Personal Fire Pit You Can Make On The Cheap
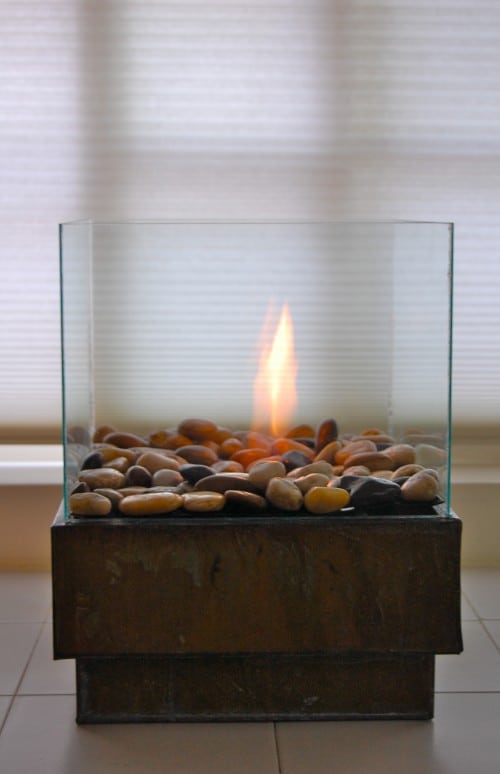
source: theartofdoingstuff.com
Perfect Addition For The Firepit – S’mores
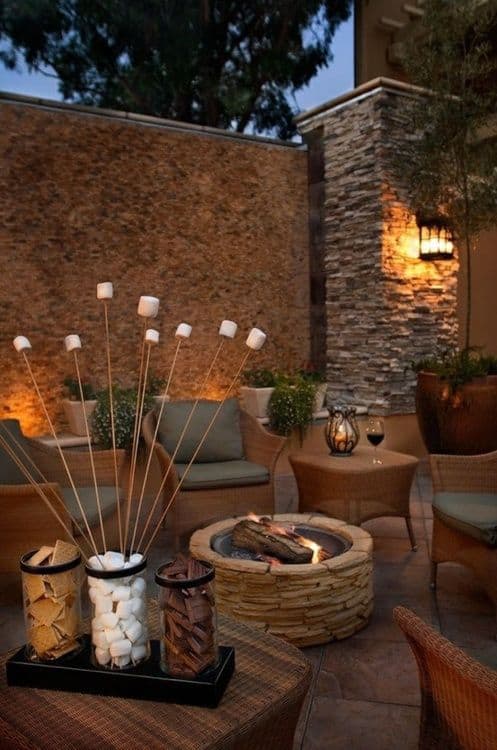
source: pinterest
Recycled Wine Bottle Tiki Torch
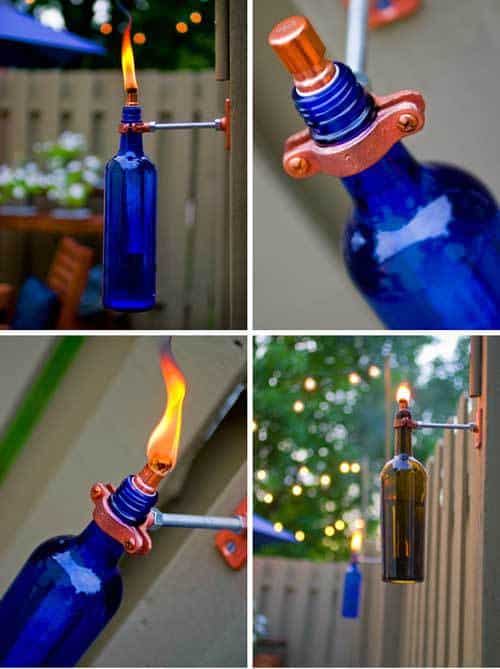
source: gerardotandco.com
Grow Your Own Sofa!
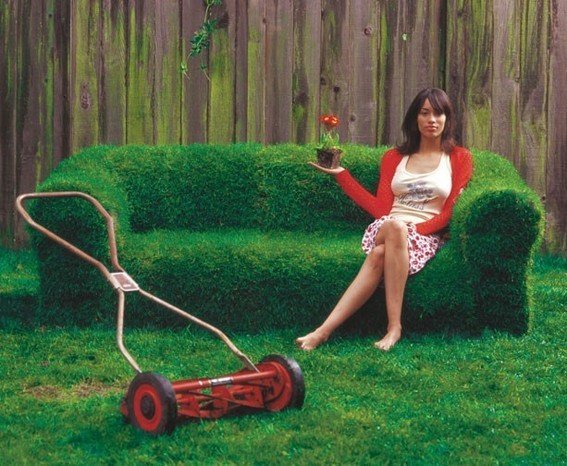
source: curbly.com
Make A Tent An Outdoor Reading Room
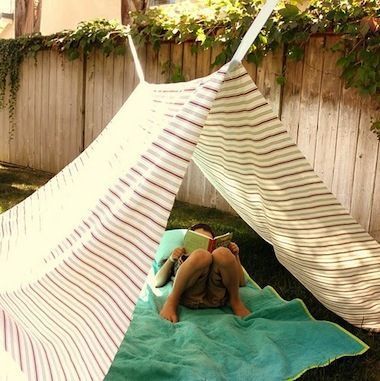
source: pinterest
Transform Old Wine Barrels
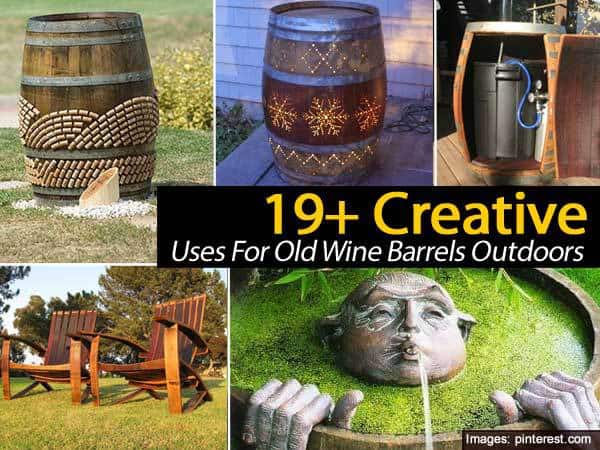
source: pinterest
Make A Whiskey-Barrel Water Garden
source: countryliving.com
Build A Gorgeous Pergola
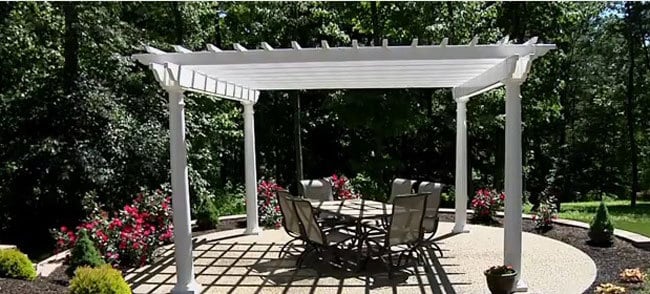
source: Lowes
Make A Charming Attractive Hammock Stand
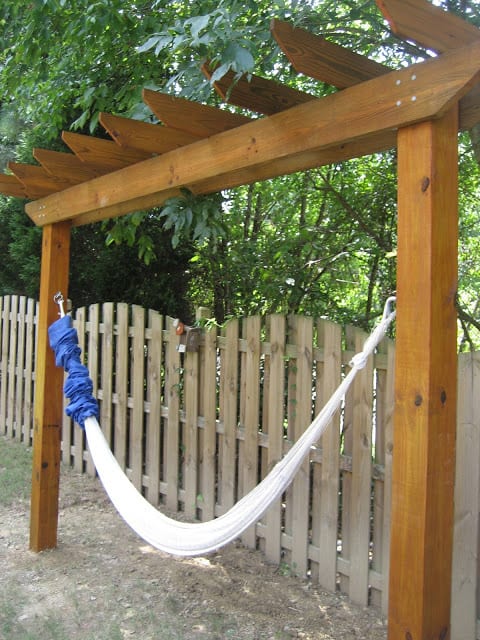
source: theindecisivelife.blogspot.com
Create A Stunning Fence To Enhance Your Landscape
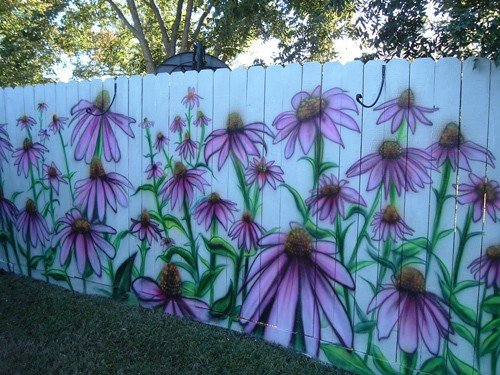
source: decorateyourfence.com
Make An Outdoor Farmhouse Table
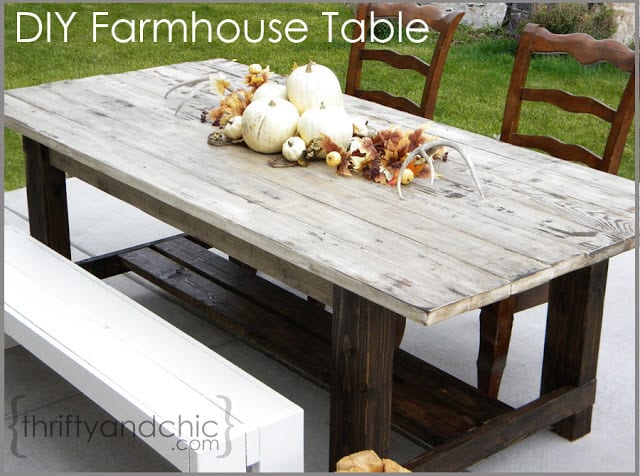
source: thriftyandchic.com
Build Sunset’s Classic Adobe Oven
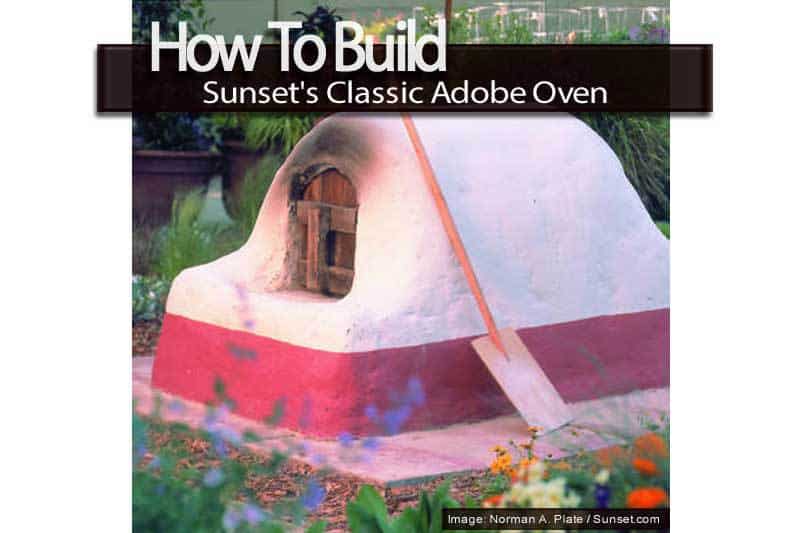
source: Sunset
Make A TeePee
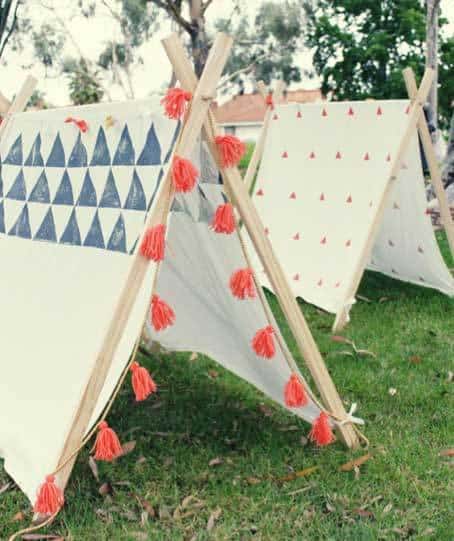
source: mom.me
Trampoline Driving Board
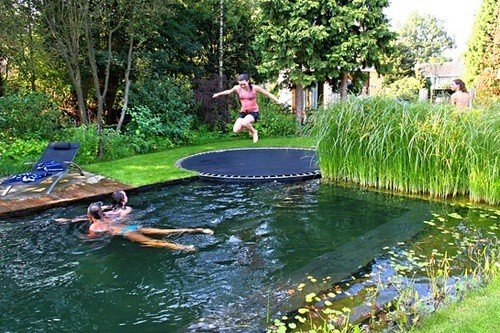
source: pinterest
Go Backyard Camping
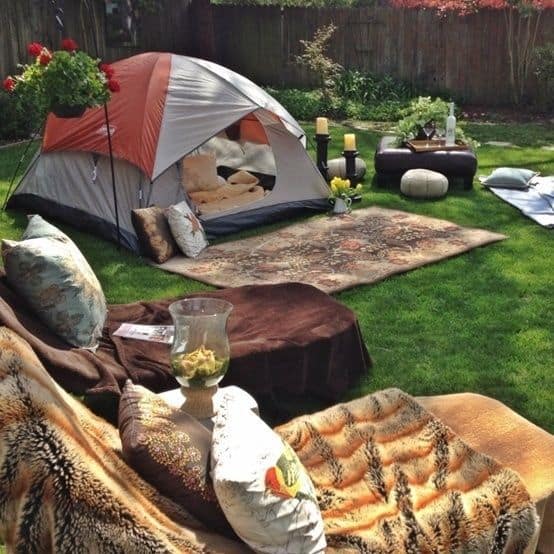
source: pinterest
Make Yourself A Backyard Beach
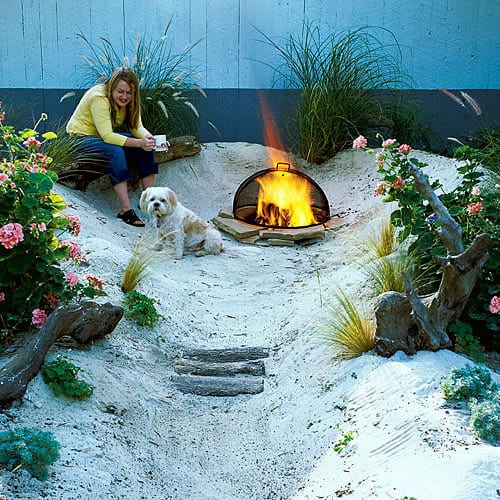
source: Sunset.com
Make A Hammock Swing
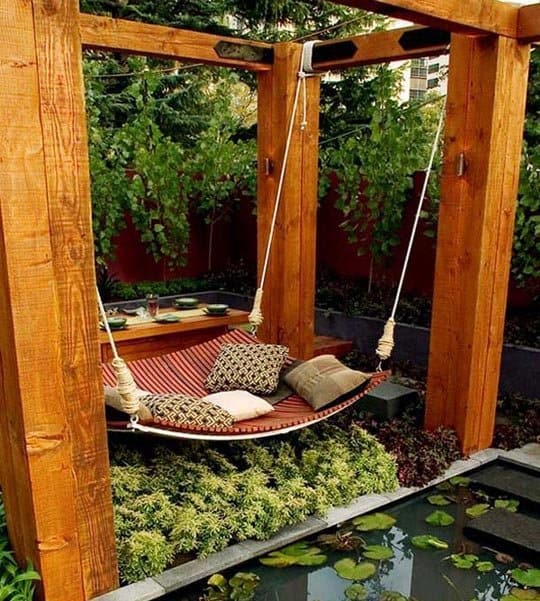
source: apartmenttherapy.com
Giant Outdoor Scrabble Set
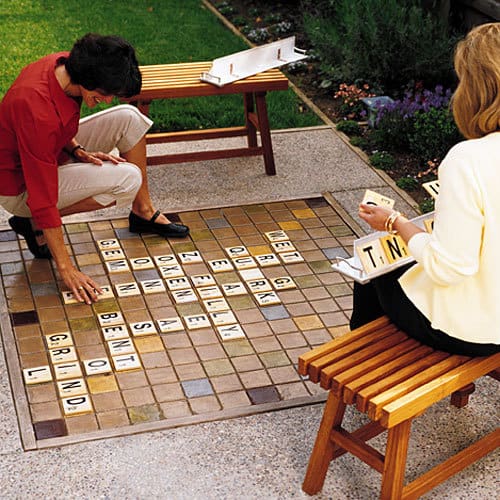
source: Sunset.com
5 TIPS FOR CREATING A FAMILY FRIENDLY OUTDOOR SPACE
1. Add an element of DIY for a family project
Each spring we try to come up with at least 1 new DIY element to add to our back patio, and then we get the kids involved with helping to make it! Having a project that your kids helped bring to life, gives them a sense of pride in the space you will share together.
Other DIY outdoor space projects include:
–DIY Rainbow Pallet Flower Garden
34 Incredible family and Moms space ideas
2. Curate a selection of store bought items that fit your style
I’m always on the lookout for items at the store that fit my budget, go well with my color pallete and my style...they “call my name”. I love to add a few new things to my outdoor living collection each year to give it a refreshed look.
This year I opted to recover the couch patterns in a navy blue fabric. I paired them with some outdoor cushions from the PC Outdoor Square Pillow collection in an aqua blue tropical fabric!
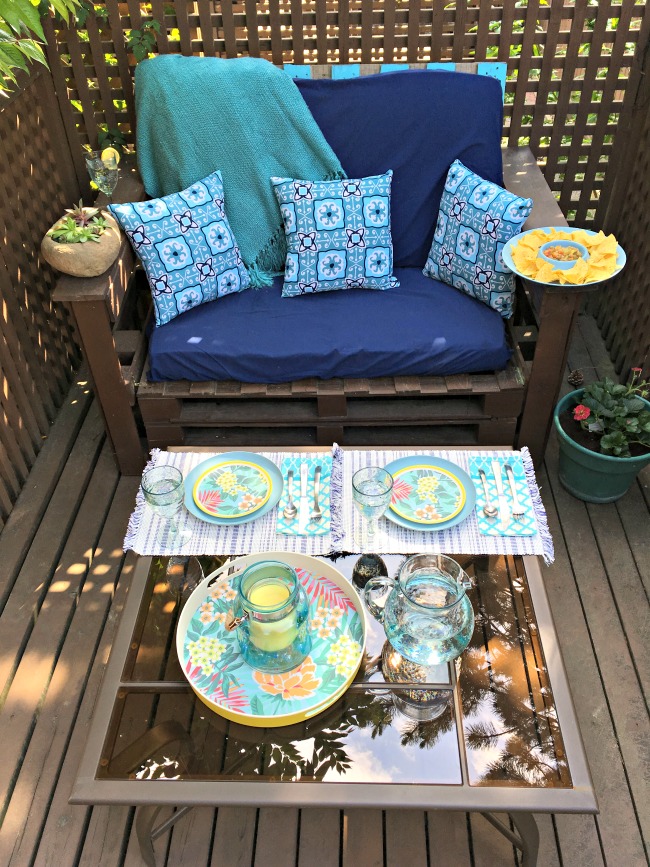
I love the mixing and matching of neutral items like this gorgeous lantern with pieces that are patterned like the bamboo fibre round tray.
3. Add some plants to liven up your outdoor space
Plants are not only a wonderful way to decorate your space, it’s also a great hobby to teach your kids. I love that my kiddos are growing up knowing how to garden. Our backyard garden is filled with a mixture of plants that I think are pretty (I adore succulents), combined with fresh herbs, veggies and berries! We try to keep our backyard space bee friendly with a variety of brightly colored flowers. We’ve taught the kids to not be afraid of bees, and instead to respect the job that they are doing, pollinating our garden, and to be respectful of their work, giving them their space.
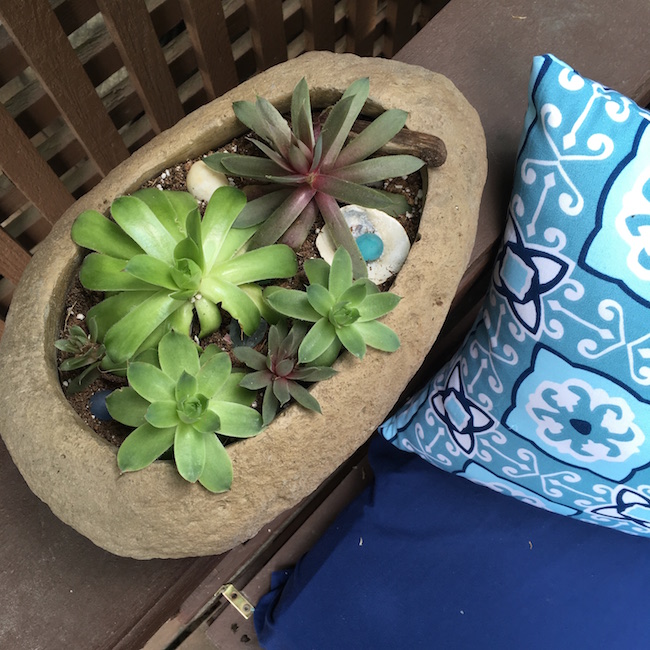
Kids learn a lot by knowing where their fruits and veggies come from. Get them involved helping in the garden by letting them help pick flowers in their favorite colors, seeds that they’d like to experiment growing, and fruit and veggie starts for their favorite foods.
If garden space is limited, their are a ton of plants that you can grow in containers– In fact, I can’t think of any of our plants that are in our garden that wouldn’t do well in a container!
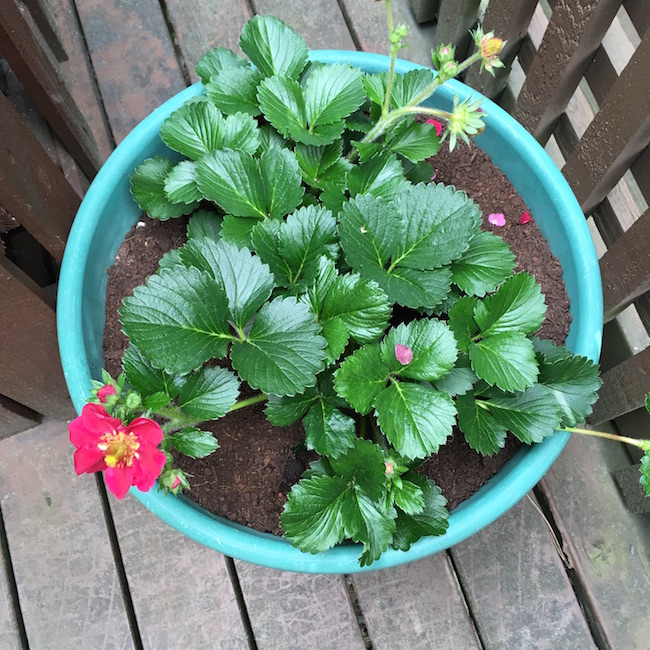
Other gardening ideas:
–5 Benefits of Gardening With Your Kids
–Tips to Create A Bee Friendly Garden and Create a Bee Bath
–12 Best Vegetables to Grow In Containers
–10 Fruits and Berries to Grow In Containers
4. Make sure it’s an area that every member of your family can enjoy
There’s nothing worse than setting up a gorgeous space and then having to hover over your kids making sure they don’t mess something up or break something. We rarely use glass outside so it doesn’t get broken (yet another reason that we love items in the PC Home outdoor collection! They are break free). We also want every family member to be able to find something fun to do in our outdoor space.
Bean loves reading, so we put lots of throw cushions on the couch so that she can get comfy and snuggle down with a good book. I often have my laptop with me, so we’ve run an extension cord so that we have power. The Hubs likes to enjoy a beer after the kids have gone to bed so we’ve put some outdoor lights outside. Turtle is always moving, so we have a “fun box” filled with outdoor activities like bubbles, a frisby, ball, and a baseball mitt and softball.
Other fun outdoor activities perfect for your outdoor space:
–5 DIY Wood Outdoor Games (Jenga, Dominoes and more!)
5. Start a pinterest board with inspiration, recipes and outdoor inspiration
Inspiration is all around us, so start a pinterest board to keep track of your favorite gardening, outdoor living and summer entertaining ideas! Whether it’s a delicious salsa recipe for your hubby to snarf down on, or a new outdoor patio set that you’d love for your birthday, you’ll be happy to have all of your inspiration in one place!
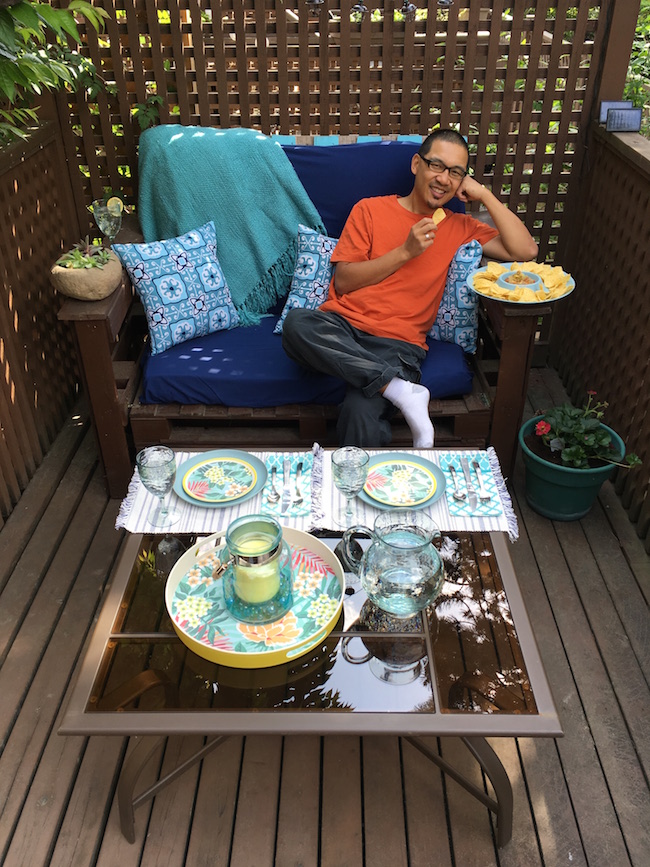
Personalize your family play space so each person has a spot geared to their age and special interest
Family Guide- Water Features-(Next) White Section
Family Guide -Backyard Ideas up to 5 years old -Lower Right Blue Box
Family Guide-Backyard Ideas 5 and above Lower Left Blue Box
Cool Water Play backyard Water park Water Activities
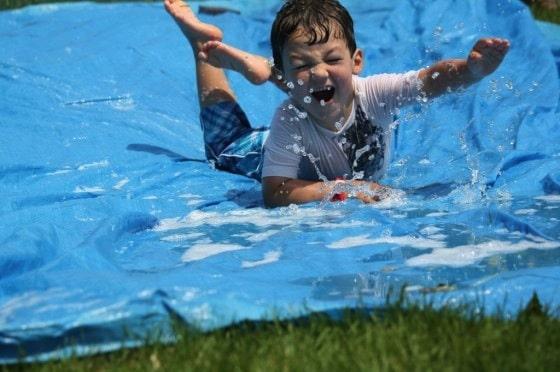
Water play is staple for getting our Curious Kids outside.
For littles ones, take it slow and easy until they are used to the new element.
Make sure the water temperature is close to the air temperature for little ones for their first pool experience.
Remember to drain your hoses on the ground until the sun heated water gives way to a child safe temperature.
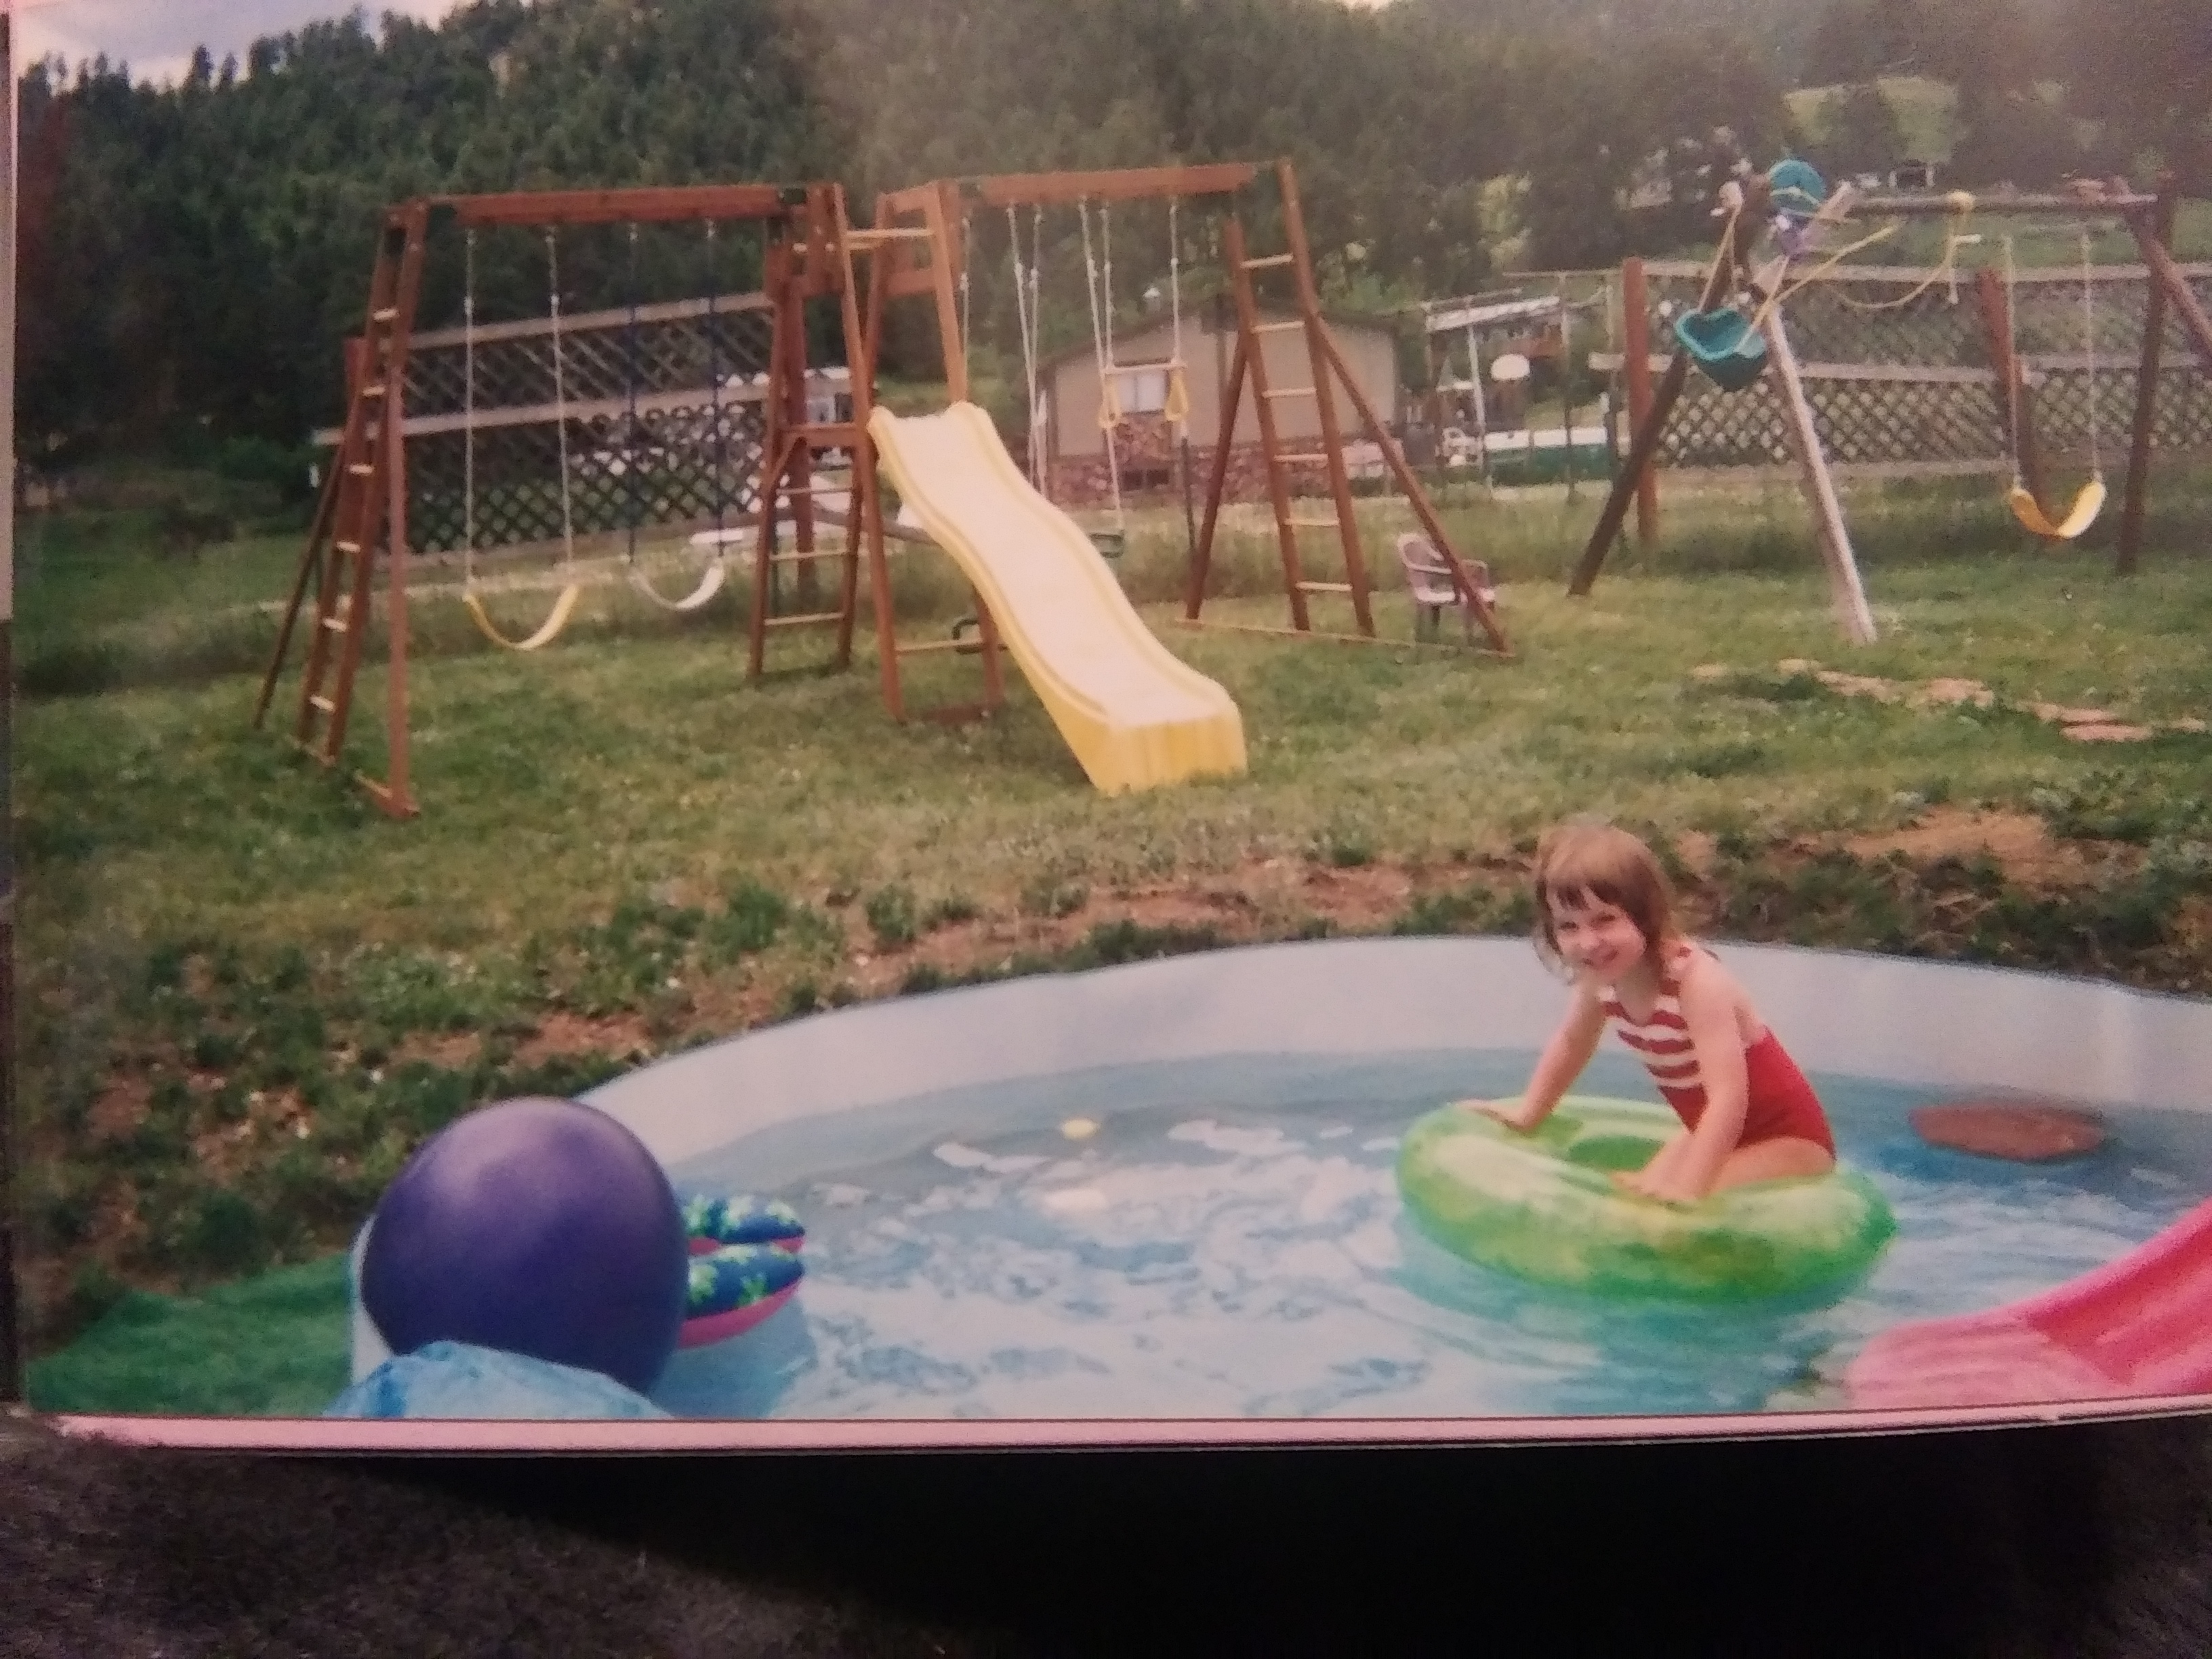
I always set up my backyard just like I did in my classroom - with cozy spaces for calming and relaxing when they need help with feeling centered or grounded and some wide open spaces for when they need to just cutloose.
Here in the pictures above you can see the miracles that water play can be both energizing and calming.
Oh and another tip- You can never have too many kiddie pools.
They have so many uses. Hope told me all about how a purple pool was better than the blue ones because the blue ones are fine for for swimming in water maybe even be an big ocean or for playing with sand.
But the purple ones can be a place to paint, or a farmers flower garden, a place to make a fluffy princess bed, a place for her toys or anything she wanted it to be...but she might need me to make somemore pixie dust or Koolaide ice cubes.
Family Water Park in the Backyard
Do It Yourself Backyard Water Park: Fun DIY Ideas & Tips
Are you looking for a fun and exciting way to enjoy your backyard during the summer months? Why not create your own do it yourself backyard water park? Not only is it a great way to beat the heat, but it also provides a unique and entertaining activity for family and friends. Plus, creating your own water park can be cost-effective and convenient, allowing you to customize the features and design to your liking.
Post Summary:
Creating your own do it yourself backyard water park can be a fun and cost-effective way to enjoy the summer months.
Customizing the features and design allows for a unique and entertaining activity for family and friends.
Ensuring safety and proper maintenance are key factors in creating a successful backyard water park.
Choosing the Right Water Features for Your DIY Water Park
Creating your own DIY water park is an exciting project for any homeowner. When selecting the right water features, it’s important to consider factors such as safety, space availability, and budget. Here are some fun ideas to get you started:
Water Features
Water Slide
A classic favorite that can be customized to fit your space and budget. You can choose from various sizes and materials, including inflatable or permanent options. Keep in mind that safety should always be a priority when selecting a water slide, especially for younger children.
Splash Pad
A great option for small children who may not be ready for swimming pools. Splash pads can be designed to fit any space and can include various features such as sprays, fountains, and jets. Make sure to use slip-resistant materials to prevent accidents.
Fountains and Waterfalls
Adding fountains and waterfalls can create a beautiful and relaxing atmosphere to your water park. These features can be customized to fit any theme, such as tropical or zen. Keep in mind that the size and sound of the feature will depend on the space and budget available.
When selecting your water features, make sure to read all safety guidelines and instructions for installation. It’s important to have a safe environment for everyone to enjoy.
Choosing the Right Water Features for Your DIY Water Park
Here are some additional tips to consider when choosing the right water features:
Consider the size of your backyard and the available space for the water park. Some features may take up more space than others.
Think about the age range of your family and guests. Some features may not be suitable for younger children or may require more supervision.
Keep your budget in mind and look for options that fit within your means.
Read reviews and do research on the features to ensure they are safe and reliable.
With the right water features, your DIY backyard water park will be the talk of the neighborhood. Get creative and have fun with the design!
Creating a Safe Environment for Your DIY Water Park
When it comes to creating your own water park, safety should always be a top priority. Ensuring a safe environment is essential to enjoying your backyard water park to the fullest extent. Follow these tips to create a safe and fun experience for your family and guests:
Proper Installation
1 -Ensure all water features are installed properly and securely to avoid any accidents or injuries.
2 -Follow manufacturer’s instructions when assembling water features to avoid any issues that may arise from improper assembly or installation.
3-Consider hiring a professional to install water features if you are unsure of how to install them properly.
Regular Maintenance
Keeping your water park well-maintained is key to ensuring its safety and longevity. Follow these maintenance tips:
Check and clean water filters regularly to ensure proper water circulation and quality.
Regularly test water quality to ensure safe pH and chlorine levels.
Inspect water features for any damage before and after use.
Drain and clean the water park regularly.
Supervision and Safety Equipment
While a water park can be a lot of fun, it’s important to be mindful of potential hazards. Take the following measures to ensure a safe environment:
Supervise children at all times while in or around the water park.
Make sure everyone using the water park knows how to swim or wears a life vest.
Install non-slip surfaces and pool alarms to alert you of any potential dangers.
Set boundaries for the water park area to avoid any accidents or injuries.
By following these DIY water park safety tips, you can create a fun and safe environment for everyone to enjoy. So grab your swimsuits and get ready to make a splash!
DIY Water Park Decorations and Themes
Make your DIY water park even more exciting with creative decorations and themes!
Transform your backyard into a tropical paradise with palm tree inflatables, beach balls, and tiki torches. Create a pirate adventure with a pirate ship float, treasure chest cooler, and eye patches for all your guests. Or, transform your water park into a carnival with colorful streamers, cotton candy machines, and carnival game stations.
Personalize your water park with custom signage, such as a welcome sign or “no running” reminder. Design personalized water park towels for each guest with fabric markers or iron-on transfers.
For a cost-effective DIY decoration, create balloon garlands by stringing balloons together and weaving in greenery or flowers for a natural touch.
Tip: Consider the ages and interests of your guests when choosing a theme and decorations for your water park.
Water Park Maintenance and Upkeep
Regular maintenance and upkeep are essential to keep your DIY water park in excellent condition and ensure the safety of everyone who uses it. Below is a checklist of tasks that should be performed to keep your water park running smoothly:
Task
Frequency
Clean filters
Once a week
Check water quality
Twice a week
Inspect equipment for damage
Once a month
Check for leaks
Once a month
Remove debris from the water
As needed
It is also important to winterize your DIY water park if you live in an area with cold winters. This involves draining all the water and protecting the water features from freezing temperatures.
If you encounter any issues with your DIY water park, refer to the user manual for troubleshooting tips. If the problem persists, it may be necessary to seek professional help. Don’t hesitate to ask for assistance to keep your water park safe and running smoothly.
Conclusion
Creating your own do it yourself backyard water park is a fun and exciting project that can bring endless hours of enjoyment for you and your family. With the right water features, decorations, and maintenance, your backyard can become a personalized water park that you can enjoy whenever you want.
Remember to prioritize safety when creating your DIY water park by following guidelines for proper installation, regular maintenance, and supervision of children. Use safety equipment and establish boundaries for the water park area to ensure a safe environment for everyone.
By choosing a theme and incorporating creative decorations, you can make your water park even more inviting and unique. And with regular maintenance and upkeep, you can ensure the longevity and safety of your water park for years to come.
So what are you waiting for? Start planning your own do it yourself backyard water park today and create a fun and personalized oasis in your own backyard. Enjoy the convenience and cost savings of having a water park at home, and create lasting memories with your family and friends.
FAQ
Q: What are the benefits of creating a do it yourself backyard water park?
A: Creating a DIY backyard water park offers cost savings and convenience compared to visiting a commercial water park. It allows you to customize the features and design to fit your space and preferences.
Q: What water features can I incorporate into my DIY water park?
A: You can choose from a variety of water features such as water slides, splash pads, fountains, and waterfalls. Consider factors like space availability, safety considerations, and budget when deciding which features to include.
Q: How can I create a safe environment for my DIY water park?
A: Ensure safety by properly installing water features, conducting regular maintenance, and supervising children. Use safety equipment like life vests and non-slip surfaces. Set boundaries for the water park area and establish appropriate water depths.
Q: What are some DIY water park decoration ideas and themes?
A: Decorate your water park with themes like tropical paradise, pirate adventure, or carnival. Use balloons, banners, and themed props for decorations. Consider DIY projects like custom signage or personalized water park towels for a personal touch.
Q: How should I maintain and upkeep my DIY water park?
A: Regular maintenance is essential for the longevity and safety of your water park. Clean filters, check water quality, and inspect equipment for damage. Winterize the water park to protect it during colder months. Troubleshoot common issues and seek professional help when needed.
These Fun and easy water play activities will keep toddlers and preschoolers entertained, learning and engaged for hours at home or in the classroom.
I’ve never met a kid who doesn’t love water play.
Even the smallest bin or bucket of water will keep my preschoolers and toddlers happy, splashing, stirring and pouring for hours.
In the warm weather, we spend hours playing outdoors, and I set up some form of water play set up in our backyard play space almost every day. It’s the first thing the hooligans gather around when they arrive, and they often spend the better part of the morning playing with whatever wet and wonderful activity I’ve set up.
Today, I’m sharing 25 of my favourite water play activities for you and your kids to try in your backyard.
If you’re looking for a guaranteed way to keep your tots entertained on a warm day, you’ll find all kinds of simple ideas for water bins, water tables, small worlds and water-sensory play in this collection.
Bonus: All of these activities are easy to set up, using things you already have around the house. And each one has been tried and tested here, and has received a big ol’ stamp of approval!
Simple, fun and inexpensive, these wonderful water activities are guaranteed to keep your kids learning, laughing and staying cool in the backyard this summer!
Be sure to grab our printable list of 100 Fun Things for Kids to Do at Home this Summer too! Your kids will never be bored again!
25+ FUN AND EASY WATER PLAY ACTIVITIES FOR KIDS
For your conviencience, this post contains affiliate links. As an Amazon associate, I earn from qualifying purchases.
Each description contains a clickable link which will take you to full post for the activity. Once there, you can simply press your “back” button to return to this post.
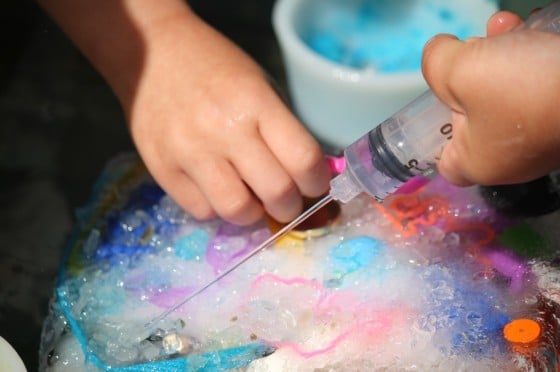
Ice Age Bin – Melting ice with salt and water is one of our favourite preschool science activities. You can keep your kids busy for ages excavating frozen treasures out of a block of ice.
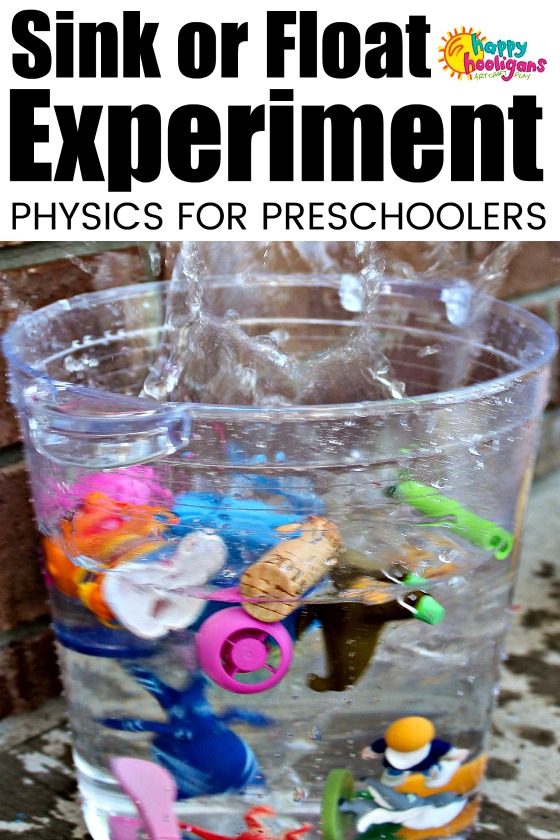
Sink or Float Experiment – This easy water play activity is a fun way to teach toddlers and preschoolers how to make predictions and draw conclusions about density and buoyancy.
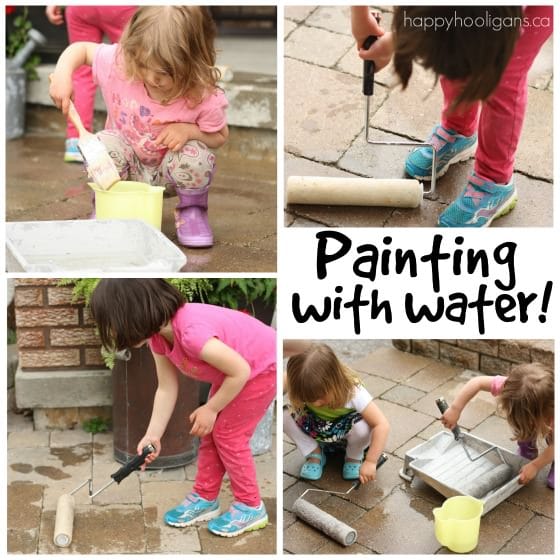
Painting with water is my favourite go-to activity for toddlers and preschoolers. The older kids love it too. You can use rollers and big paint brushes like you see in the photo above, or you can use smaller brushes so the kids can practice letter formation, spelling and printing skills.

A pretend play perfume factory is always a hit with kids who love making concoctions. Measuring, pouring, snipping leaves and flowers from the garden and exploring small instruments and glass bottles make this activity educational and fun.
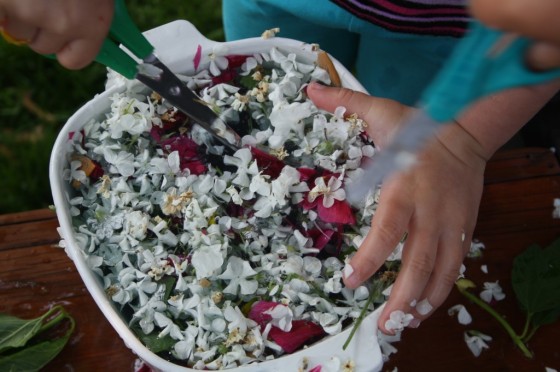
Garden Soup – here’s a great sensory activity for kids to do in the backyard. This activity has them exploring in the garden, creating concoctions, and strengthening fine motor skills while keeping cool.
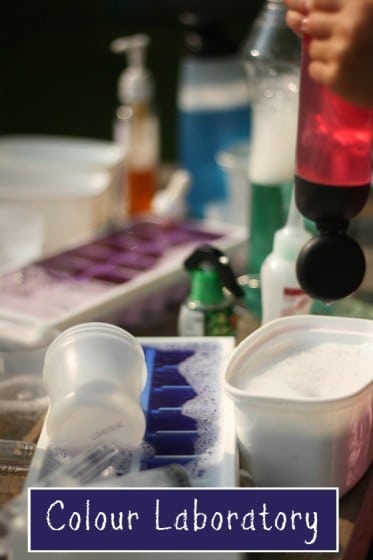
A colour-mixing laboratory is one of my toddlers’ and preschoolers’ favourite backyard activities. Science, water play, and gross-motor and fine-motor development all come together in this wonderful backyard activity.
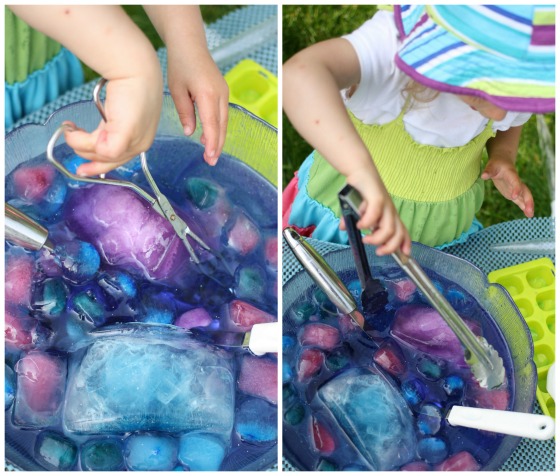
Frozen Fractals Soup: Fans of Disney’s “FROZEN” will love this ice and water activity! Ice and water never fail to keep the hooligans entertained.
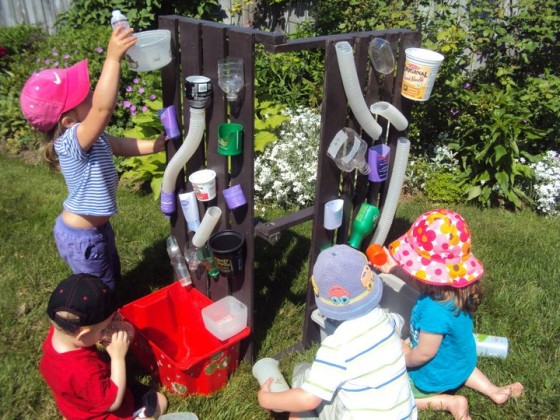
A backyard water wall is easy to make with a few recyclable containers. The hooligans have enjoyed hours of fun with this one over the years.
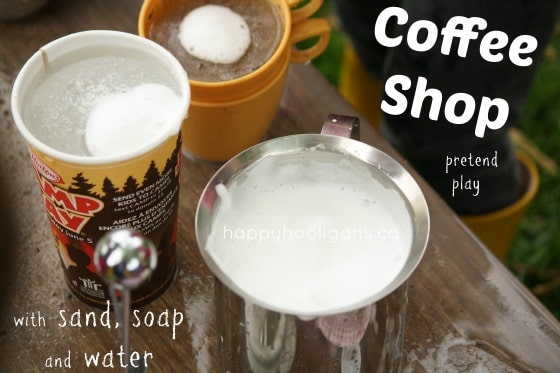
Sand, water and soap are all you need to set up a pretend coffee shop for your little ones. The hooligans ages 1-7 played with this for an entire morning.
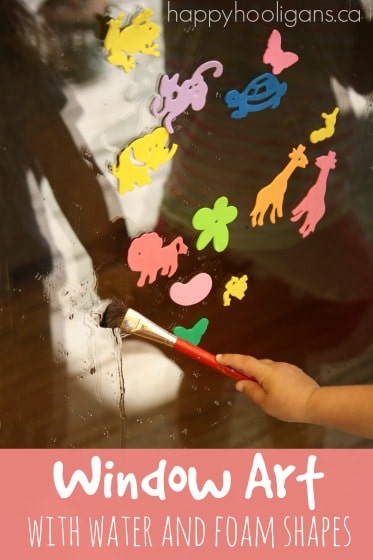
Water play doesn’t get any easier than this. Toddlers can create window art with foam shapes and a bowl of water.
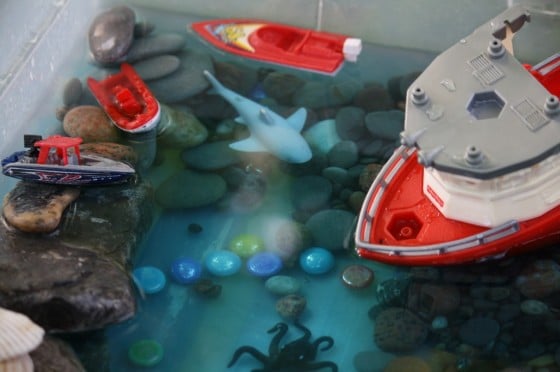
Create an under the sea small world with a bin of water and a few found items. My toddlers played with this one for hours.
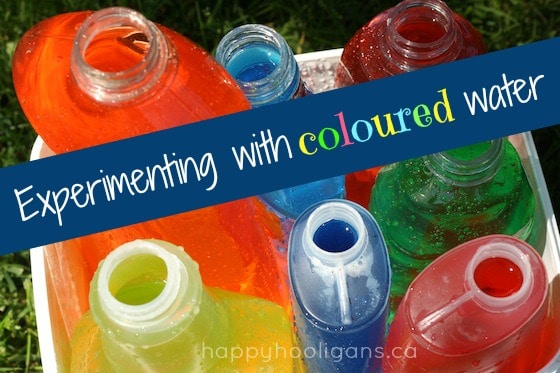
Kids can learn all about colours and colour mixing with this simple coloured water experiment. It’s great for fine-motor and gross-motor development as well.
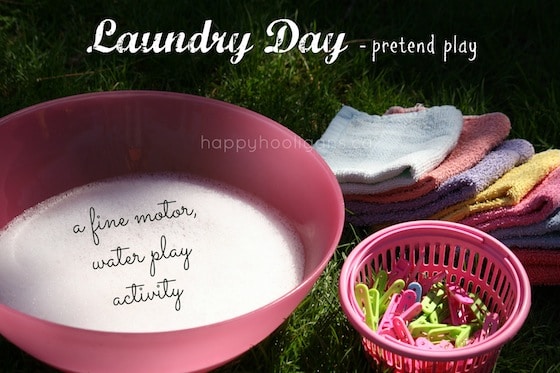
Laundry day pretend play: life skills, fine motor development and water play all wrapped up in one fun activity.
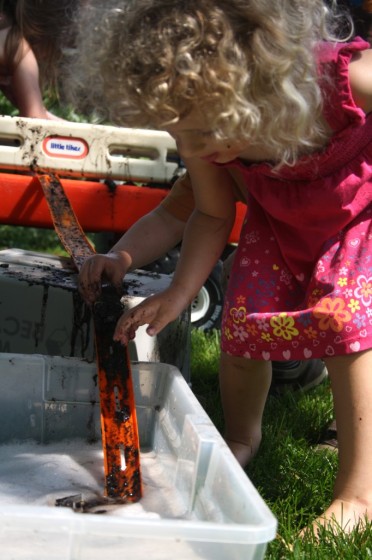
Set up a muddy car wash for a morning full of fun! Dirt, cars and soapy water! It will keep little car-lovers entertained for ages!
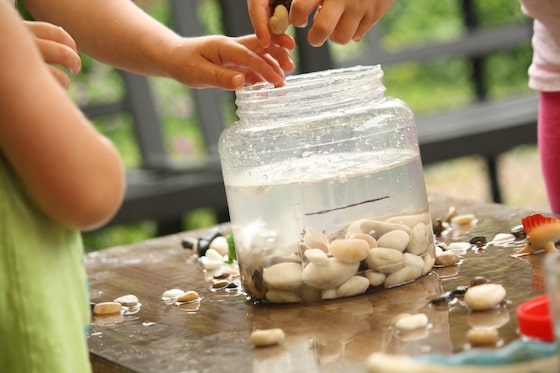
Using a container, water and some stones, you can teach children about water displacement with this fun and easy water displacement experiment.
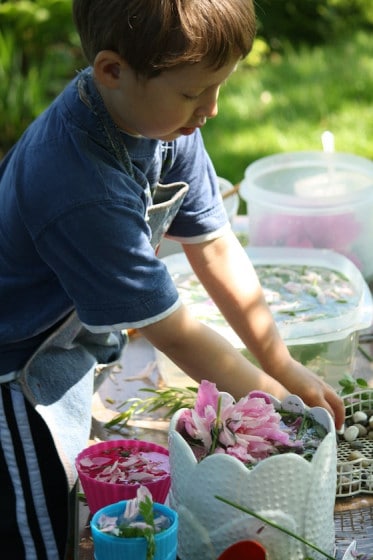
Got a garden full of herbs? Let the kids explore their textures and aromas by chopping them up into a big batch of sensory soup!
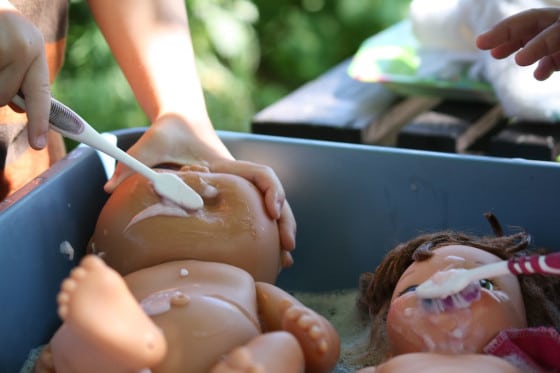
A baby doll bath station is the hooligans’ absolute favourite water play activity. It’s our go-to because it’s so easy to set up and it keeps the toddlers entertained for hours.
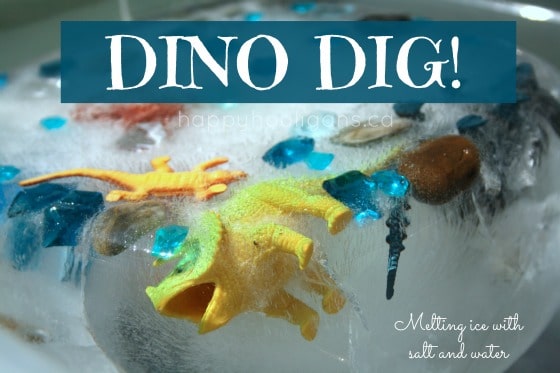
Our Dino Dig is an exciting dinosaur excavating activity always keeps preschoolers engaged until they’ve freed the very last dinosaur from the ice. This fun activity generally keeps my daycare kids busy for over an hour!
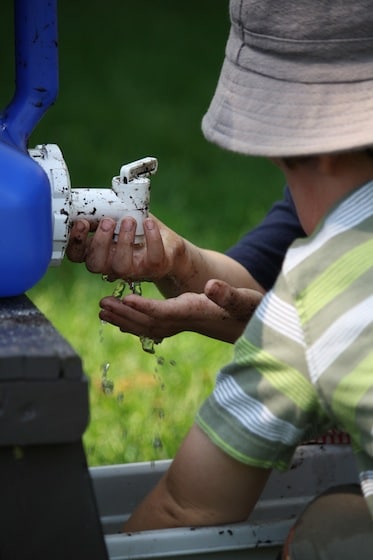
Here’s an easy and FREE way to add running water to any outdoor play space! It’s great for the sandbox, tea parties, mud kitchen and for washing up too!
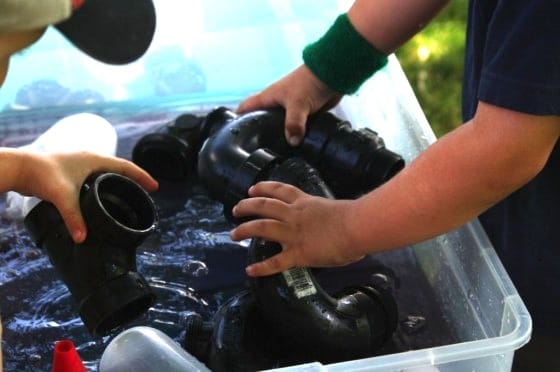
Set up a simple water works activity bin with a large bin of water and some funnels and PVC pipes. This activity kept the hooligans busy for ages one morning, scooping, pouring, assembling and splashing.
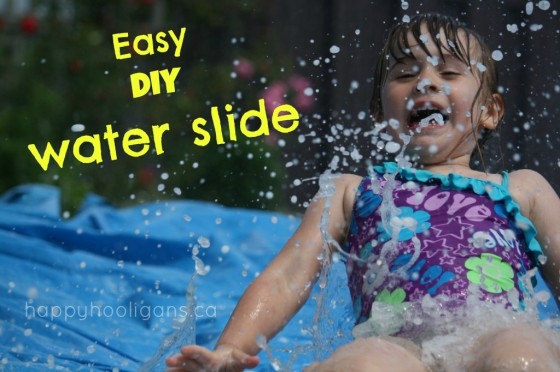
For the price of a camping tarp, you can make an awesome backyard water slide! This will keep the kids cool and having fun all day long!
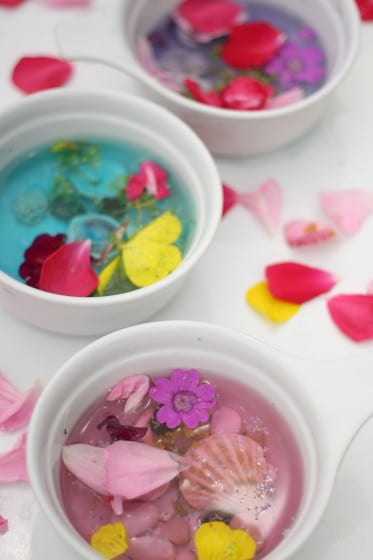
Snipping, scooping, pouring, stirring… This fairy soup activity is jam-packed with tons of fun, fine-motor development and learning!
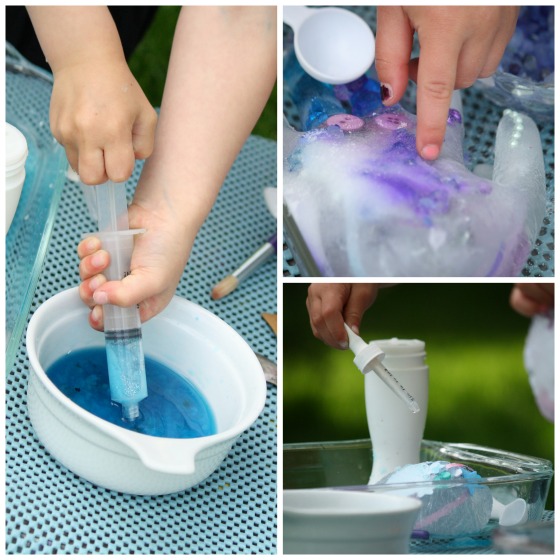
Here’s another ice and water activity that FROZEN fans will adore! Your kids will love Melting Elsa’s frozen hands with coloured salt and water.
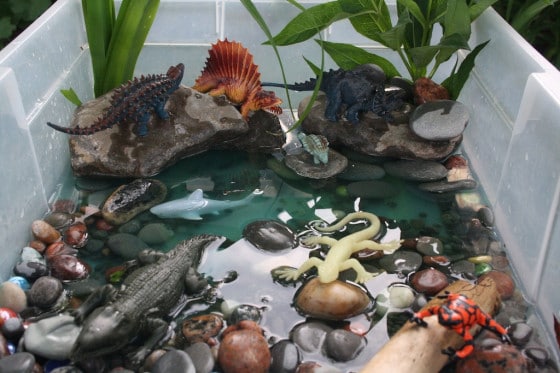
A dinosaur small world will keep dino-crazy kids busy for hours!
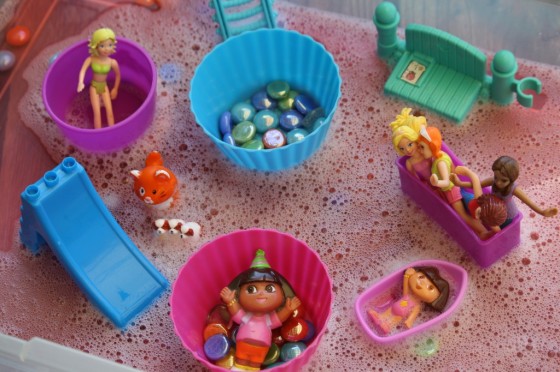
Throw a Polly Pocket pool party! Set up a fun water bin activity with your child’s favourite characters. Pollys, Lego men, Little People, or farm animals would all work well. The possibilities are endless here. You could add some waterbeads to your water bin for more sensory fun and excitement.
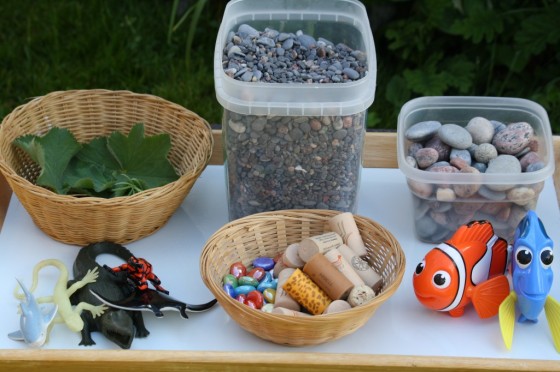
Set up an ocean sensory bin with a variety of found items and underwater toys.
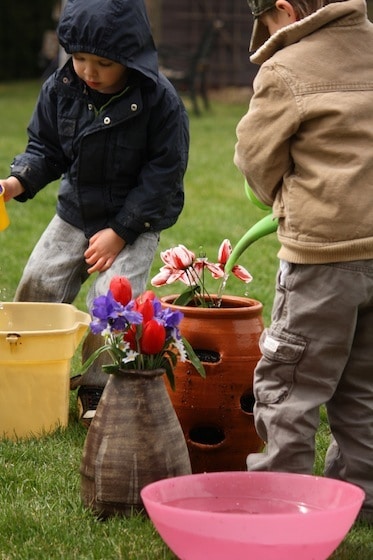
How about a pretend play flower shop where the kids can plant and water their own floral arrangements?
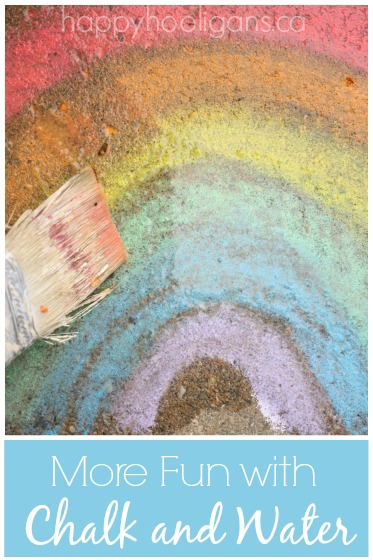
And lastly, painting with chalk and water is always popular with the hooligans. Round up some brushes and the sidewalk chalk and let them go to town decorating your porch or driveway!
Parents Guide for Preparing Play Space With Your Kids Help -
Age 5 and up
Let's get started- Providing a place to play and hideout

Dens, forts, and tree houses, are a place where children can have unstructured play and let their imagination soar. They learn how to use natural materials to build their own special place, often working as a team with siblings or friends.
It is a safe place where kids can make their own rules and decisions without adult interference. Educators say this helps children become more self confident and gain self esteem.
Forts are childrens’ little havens. They also learn how nature is a wonderful place for natural play.

Making a cubby or fort with older kids
Backyards and woodlands are havens for children’s creative play and imaginative adventures and the humble cubby house is often the central hub of these activities. So here’s how to create a cubby or play house for a woodland setting that could easily fit into any backyard.
I recently had lots of fun building a couple of bush cubby houses, one was for my friend’s two young boys who absolutely love being outside and the other was for their local kindergarten. The best thing is that they’re really easy to make and provide hours of fun for the kids.
So I thought that as a birthday present for the boys I would build them a bush cubby house that was camouflaged so that they could sit and watch the friendly visitors while being a little hidden. After all, cubby houses are a great place for children to have fun playing together, role-playing or planning to conquer their neighborhood or even the world.
Building Outdoor Forts With Kids
We are big fort builders over here. Even since I was little, scrap wood from our parents' projects spurred lots of conversation and a majority as to how to use them. I love a good old fort and there is nothing better than building an outdoor shelter with the kids. We are lucky to have several forests that have lots and lots of good branch stashes for fort building. We regularly truck out to the forest to play at an existing fort or build an entirely new one.
I love that fort building combines so many awesome things. Engineering, designing, planning, physics, math, collaboration, safety skills etc. The list really goes on. Plus, all the imaginative play that follows is worth the sweat it takes to build a fort from scratch. We have spent so many days building forts and playing in them for hours upon end. I love to pack some warm golden milk in thermoses and enjoy a warming beverage with the kids when we're done constructing our new shelter.
Our Tips for Building Outdoor Forts
I am by no means an expert fort builder. Rather I'm just a mom who thinks forts are super cool and I like to build them with my kids. So here are MY tips, not the definitive guide on fort building :)
Location, location, location.

Well, that’s what they say about finding a home and it applies to dens as well.
We began scouting the woods for the perfect spot. It took a little bit but we finally found it! A tree had fallen into a sturdy Y-shaped tree forming what would be the main spine – or frame – for the den. It was also an area where there were fallen branches and lots of sticks on the forest floor which we could use for the den’s structure. Soon my boys were determined to build the most amazing den ever. Of course, another requirement was to have good trees for climbing and swinging nearby. It took us quite a few expeditions into the woods to slowly put the frame together.
Start Small
If you're new to outdoor fort building, start small. Build a small stick fort for stuffed animals, a shelter for fairies or even a dinosaur hideout just for practice. Our favorite kind of fort is one where we simply lean large branches against a tree trunk. There isn't a ton of space, but a few small children can certainly fit.
I love that fort building combines so many awesome things. Engineering, designing, planning, physics, math, collaboration, safety skills etc. The list really goes on. Plus, all the imaginative play that follows is worth the sweat it takes to build a fort from scratch. We have spent so many days building forts and playing in them for hours upon end. I love to pack some warm golden milk in thermoses and enjoy a warming beverage with the kids when we're done constructing our new shelter.
3. Supplies


This is probably the hardest part about fort building a fort. Finding enough of the correctly sized branches can be a challenge. We actually start collections and sometimes it takes up to a year to collect all the pieces before we have enough to actually start a fort. The best time to gather supplies is after a windstorm! We also take "those perfect" branches that we find on hikes with us so we can add them to our fort stash. Our car was a roving fort supply machine.
4. Fort Inspiration
My favorite fort book, while rather antiquated, is this gem calledShelters, Shacks, and Shanties: The Classic Guide to Building Wilderness Shelters. Some of the shelters are rather complicated but I love how detailed the book is and how many fort designs it covers!Here’s how you can make one yourself. Use the following sites to help you decide which design works for you.
The Woodland Trust has two PDF guides you can download with instructions.
The Eden Project describes the stuff you need for a den.
Learn here the den commandments from the Forestry Commission.
Watch a video with den building tips by the National Trust.
Read the Guardian newspaper’s instructions on building a den.
A how to den/fort guide from Forest Holidays.
The National Trust and other sites offer den building activities if you’re looking for a place where your kids can go wild outdoors. My two had previously had some practice runs in how to build a den during their wildwood weekend.
Our fort will be an ongoing project during the spring and summer vacation – especially as they want to customize it with cones and other natural décor. A picnic is planned too. And they’ve already invited friends to visit them there this weekend. Yes, dens are a great place for kids to be unplugged and just enjoy the woods.
My favorite part of building was the camouflage layer
Personally I quite liked the look of the framework and I would have been happy to stop there to enjoy the beauty of the creation, but this wasn’t my art installation or cubby house! And besides, the boys were champing at the bit to get stuck into the fun bit for them – camouflaging and the creation of their new hiding space!
Essentially the plan is to cover the frame and make it look like one big bush! Any tree branches, sticks or hardwood prunings that you or your neighbors might have will be great. We made sure that we intertwined the branches as we added them to strengthen it and stop it from blowing off in the wind. For us the advantage of being on a bush block meant that we had a good supply of fallen branches and unwanted shrubs to use.
Pathway
The boys were keen to have a pathway to get to the cubby from the lawn, so with some spare edging we created the entrance path by digging a slight trench for the edging and then bringing the soil back against the edging. Alternatively you could use some relatively straight branches. Road-testing the new pathway
Let the fun times begin……
Success … now we’re off to conquer the world!
My work was now done and the boys’ fun was just starting. After adding more branches, within no time the boys were sitting down together, planning the interior, planning future extensions and I’m sure I heard them planning something about world domination!
So what do children learn from den building?
Den building out in the woods is loose parts play with natural elements, giving children a chance to connect with nature and enjoy the textures of the wood and bark. It’s gross motor play, involving their whole bodies and allowing them to exert lots of energy in lifting and carrying the wood, and running from place to place to collect more and explore the environment.
It takes lots of planning and coordination to lift and place large branches, and allows children to work on their engineering skills as they work out the best way to form a strong structure that will hold up well and allow them to get inside.
Fort building helps children learn to work together, building their team work and social skills. It’s not so easy or fun to build a den all alone! And since it’s a joint venture, there is no winning or losing and everyone feels equally as proud of the end product.
Making a den or fort also gives children a way to combine their creativity with outdoor play. Great for energetic children who are less keen on sit down crafts. How to design the den, how to decorate it? There are lots of ways for children to add a touch of personality and make it their own.
Of course, this activity is perfect for imaginary play too. Once the den is built it can become a house, a hidden hide away, a cave, a fortress or whatever their heart desires.It’s a simple and timeless no frills activity, with lots to enjoy and learn! Make them in your local woods, in the garden, or inside the home with other materials.
Why is it important
The famous naturalist, researcher and author E. O. Wilson said that it is a “fundamental trait of human nature” for children to want a hideaway. They are magical places where kids are not only inspired by nature but allow them to dream and make up their own worlds.
Another renowned US educator, David Sobel, wrote Children’s Secret Places: Exploring the Role of Forts, Dens and Bush houses in Middle Childhood to explain that: “In these secret places, children develop and control environments of their own and enjoy freedom from the rules of the adult world. Children’s Special Places enters these hidden worlds, reveals their importance to children’s development and emotional health, and shows educators, parents, and other adults how they can foster a bond between young people and nature that is important to maturation.”
Dens, or forts, or tree houses, are a place where children can have unstructured play and let their imagination soar. They learn how to use natural materials to build their own special place, often working as a team with siblings or friends.
It is a safe place where kids can make their own rules and decisions without adult interference. Educators say this helps children become more self confident and gain self esteem.
Dens are childrens’ little havens. They also learn how nature is a wonderful place for natural play.
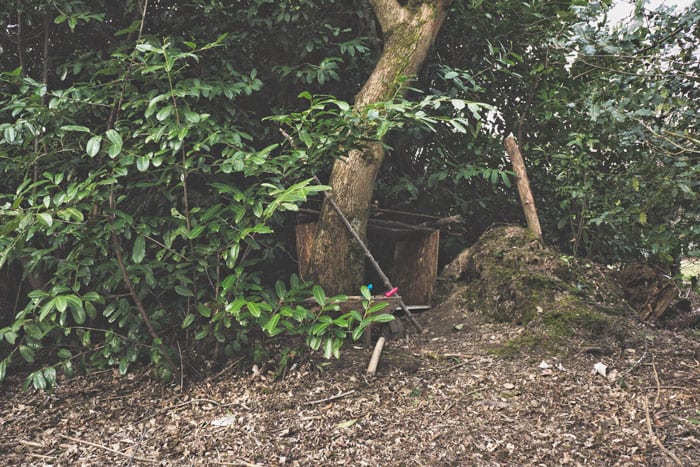
Richard Louv, author of Last Child in the Woods, agrees that children need a place to just play in the woods. “If kids don’t have some kind of connection to nature that is hands-on and independent, then they are probably not going to develop the love of nature and vote for parks and the preservation of endangered species,” he says. “Unless you know something you are unlikely to love it.”
There’s some research to back up this intuition. One 2010 study in the journal Children, Youth and Environments found that among people who ended up dedicated to nature and conservation, most had a childhood filled with unstructured play in nature, some of which “was not environmentally sensitive by adult standards; rather, it included manipulation of the environment through war games, fort building, role playing of stories in popular children’s adventure books and movies, and the like.” It’s imperative to the future of our forests which sustain us.
As for my family:
Since the last days of winter, the kids have been spending hours in their den. Sometimes they call it their little fort. I think they have another name for it but they won’t reveal it to me!
Then this week Theo told me they wanted to go there when it was dark. Perhaps even have dinner there on their own? he asked. Personally feeling that these secret dens or forts are something special to have in one’s childhood, I agreed. I remember as a child wishing that I had a treehouse all to myself.
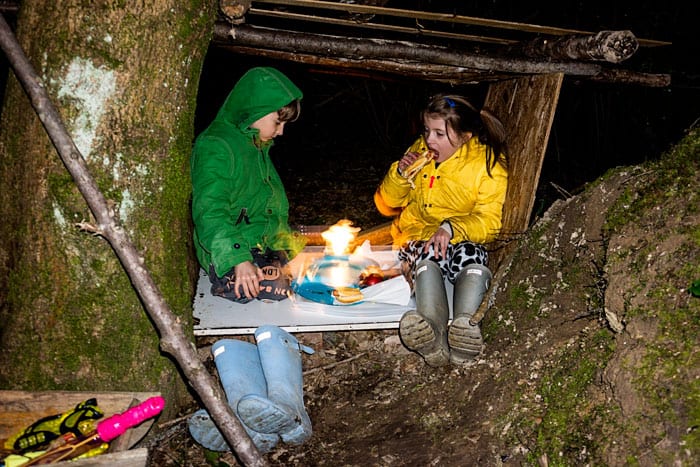
I was only allowed there to bring them their tray of hot dogs and fruit. Soon they were back asking for more. They each ate three hot dogs in their den! I was asked to leave as soon as I brought them their food. I stood nearby and could just see their light behind the trees.
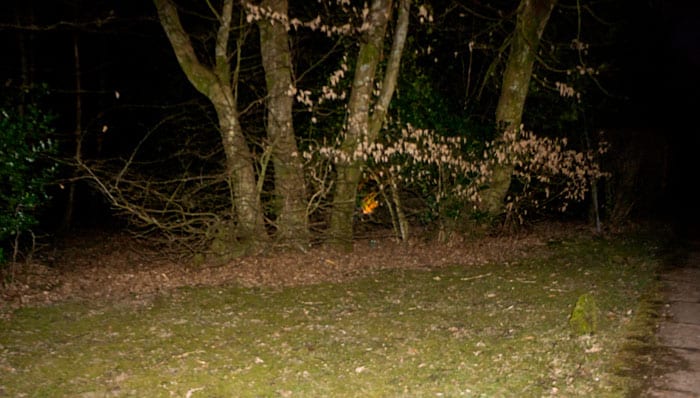
I’m happy that they now have an outdoor special place as often in the past we’ve had to make temporary forts indoors with blankets, cushions and chairs. It’s wonderful for their imagination and desire for nature play.
More Play Spaces
Pallet Playhouse

This pallet playhouse would be a good playhouse if you are looking for something a little more permanent.
Hula Hoop Hideouts
This backyard fort is perfect if you’ve got a few hula hoops and some spare fabric laying around.

Treehouse Fort Ideas
For most of these, you may need to head to Home Depot to pick up supplies. However, it’s important to remember that building tree houses does not have to be difficult!
The creators of these houses have given specific instructions on how to get the job done. Whether you just want an easy-to-build platform or a full tree houses with a climbing wall option, there are plenty to choose from.

Platform Treehouse with Rock Climbing Wall
Looking for a treehouse with a rock wall? This one, shown on Repurpose and Recycle, is a simple platform and you can add on a slide!

Classic Treehouse with Swing Set and Sandbox
If you are looking for some ideas that have wooden swing sets, this one is great! The house is simple and can have a sandbox underneath.

Photo Credit: Ana White
Treehouse Lookout
The perfect place to watch over the backyard.

Photo Credit: StylesDesigns
Backyard Castle
This one is a dream for imaginative play. It may not be a beginner’s project, but with some time and a detailed plan, you can create the backyard fort of your princess’s dreams!

Mid Century Play Fort
Mid-century is very trendy and has been for awhile now! If your home tends to follow that trend, this playhouse would be a cohesive extension of the rest of your home!
Platform Treehouse with Sheet Tent
Installing a low-level platform like this gives you so many different options for add-ons. A slide? Rock climbing wall? Both could easily be added!

Photo Credit: Repurpose and Upcycle
Small Tree Platform
While this may be on the smaller side of play areas, it gives young ones a great vantage point of the yard! Perfect for imagining that they are a super secret spy on lookout.
The older kids may enjoy some cool outside science experiments for their playspace
100 Interesting Natural Science Experiments
To match that I have 100 Nature Crafts
Natural Outdoor Play Space for Kids

DIY Outdoor Play Space for Curious Kids
Ingredients
1 long board that was 8 feet long 10 inches wide, 2 inches thick. It is important to use a thick and very sturdy board for the counter surface so it can easily hold the weight that will go on it without bowing.
2 boards that were about 10 inches long 6 inches wide and 2 inches thick, these boards will help support and hold up the long counter board.
12 screws that are 3.5 to 4 inches long ideally stainless steel or another metal that will not rust. That will allow you to easily adjust the height over time or remove if needed.
Tools
Level
Screw gun with a bit that matches your screws.
We did not need to drill pilot holes but you may need to depending on the strength of your drill, hardness of the wood and trees, ect
Saw to cut the boards to length if needed.
Sand paper
Instructions
To install:
Measure the height you feel is the best height for your child or children, think about finding a middle spot that works for as many as possible. Also take into consideration how quickly children grow and plan for a little wiggle room so you hopefully wont need to change the height next summer.
Sand the boards all down to ensure there are no splinters in the kitchen.
Measure and mark the trees for the two short boards that will hold and support the counter.
Add the boards one at a time and double check to make sure they are level – both on the tree AND with each other.
Rest the long counter board on top of the two mounted boards, again check that the counter is level, adjust one of the boards mounted to the trees if needed.
Screw the long counter board onto the two sort boards and/or into the tree.
Recipe Notes
The steps and supplies for this project are all flexible based on the location you’ll be building the mud kitchen counter, the size you would like yours to be and the materials you have on hand. Below we’ll lay out how we made our exact set up. We used wood we happened to already have in the garage leftover from another project. This wood was not pressure treated, we were alright with that where there was no out of pocket expense for the project.
We started with a blank area in the backyard and quickly realized our children were most interested in using found items that were all around them in nature and mixing up fantastic mud cakes that were decorated with flowers and pinecones.
The DIY Science Table – Mud kitchen was created with two large fir trees that were about 8 feet apart at the height we placed the counter.
We spent way more time talking about the plans and choosing the trees than it took to mount the counter. Our children immediately brought over supplies and started playing and haven’t stopped!
We have also added in logs, rocks, and crystals we’ve found, slices of wood from a few trees that came down in the neighborhood, pinecones, acorns, and a hook with a hose that they can pretend to fill up with water when the rain bucket is empty.
DIY Mud Kitchen
A mud kitchen is an outdoor play area that’s perfect for aspiring chefs! I have fond memories of creating mud pies in the yard as a child! You can relive those messy memories with your kids with a DIY mud kitchen in the backyard.
It can be as simple or fancy as you want it to be. In fact, it’s the perfect time to get the kids involved. You might be surprised by some of their ideas about kitchen essentials! In the end, you’ll have the perfect space for creating dirt based dishes.
For our DIY mud kitchen it’s actually more of an exploration table (in my mind), we used mostly recycled and found materials that kept costs low. As an added bonus, we all had fun rifling through forgotten items for the perfect kitchen utensils! Empty glass jars, my old muffin tin, and leftover boards were given new life in our outdoor play kitchen.
Mud kitchens are perfect for kids of all ages, even children as young as one can have fun creating messy dishes. It’s the perfect way to get creative outside while exploring with imagination and sensory play together.
Outdoor Science Table
Enjoy outdoor STEM and STEAM activities with an easy to create DIY Science Table.
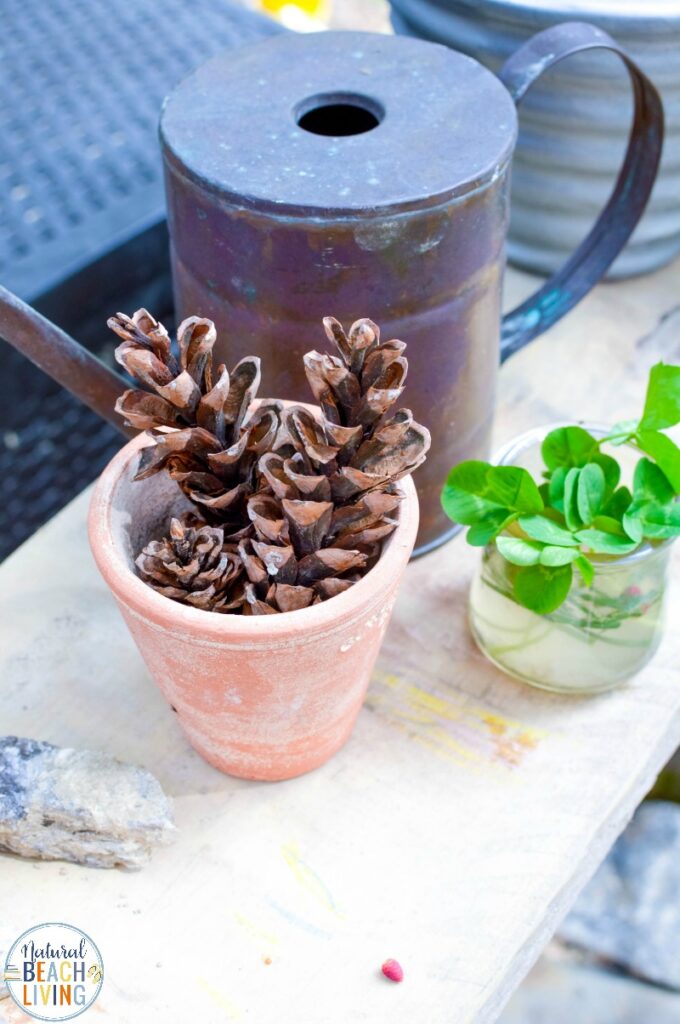
Not sure what to make or add?
Use old kitchen utensils, pots, jars, and pans or dishes combined with magnifying glasses, tools, dirt and water to create your own exploration area.
Then, decorate together with pebbles, grass, flowers, and seeds.
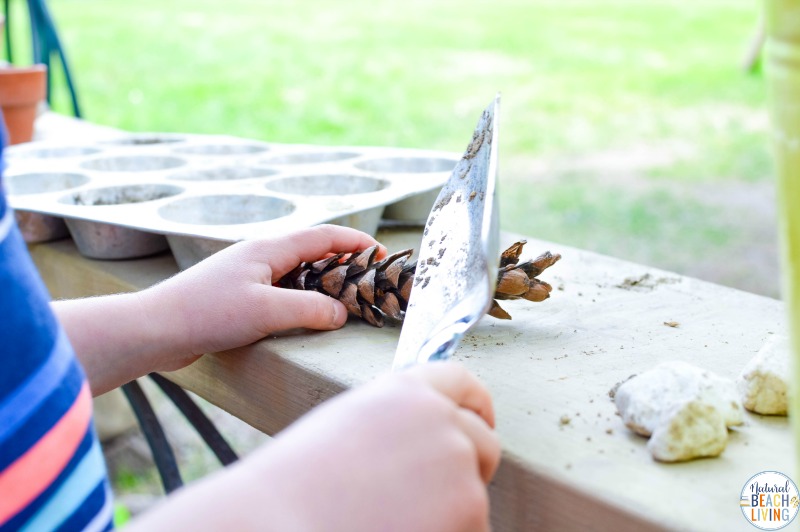
Another fun idea is to create some “mud recipe” cards for your kiddos. We invented a recipe for “mud tea” with water and wildflowers from our yard. Then, we created “mud potatoes” with pebbles coated in mud. Writing down these mud pie recipes for your children will add a fun element to your DIY mud kitchen and create a cherished memory for you later. Just don’t forget to laminate them or your recipe cards might end up as an ingredient in the next mud cake!

Melissa & Doug Sunny Patch Cutie Pie Butterfly Bug-Catching Net
Recycled Obstacle Course
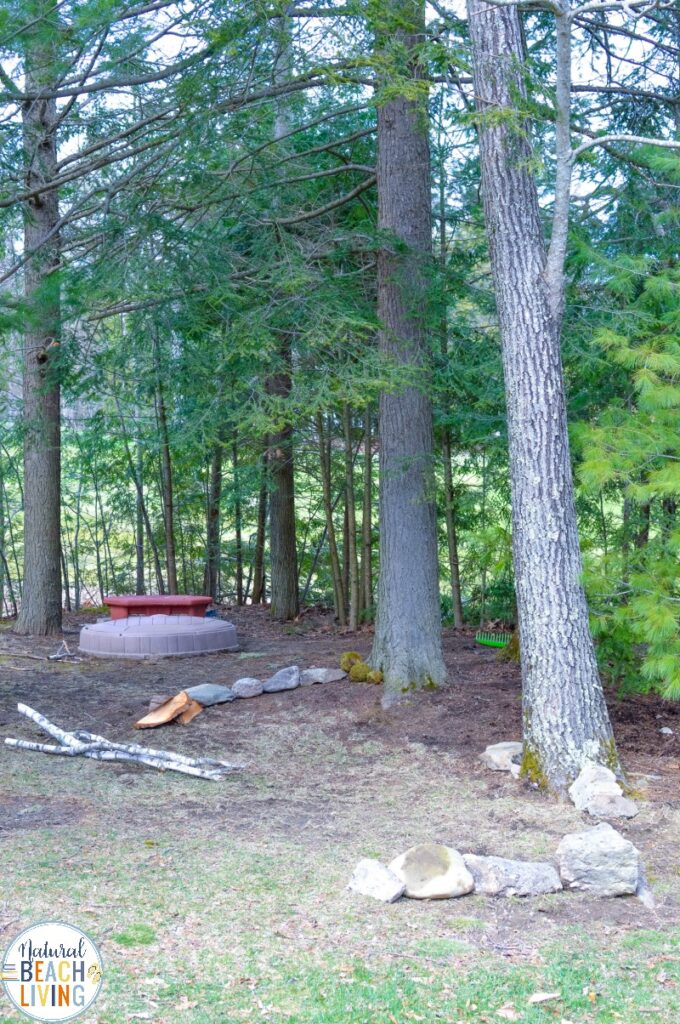
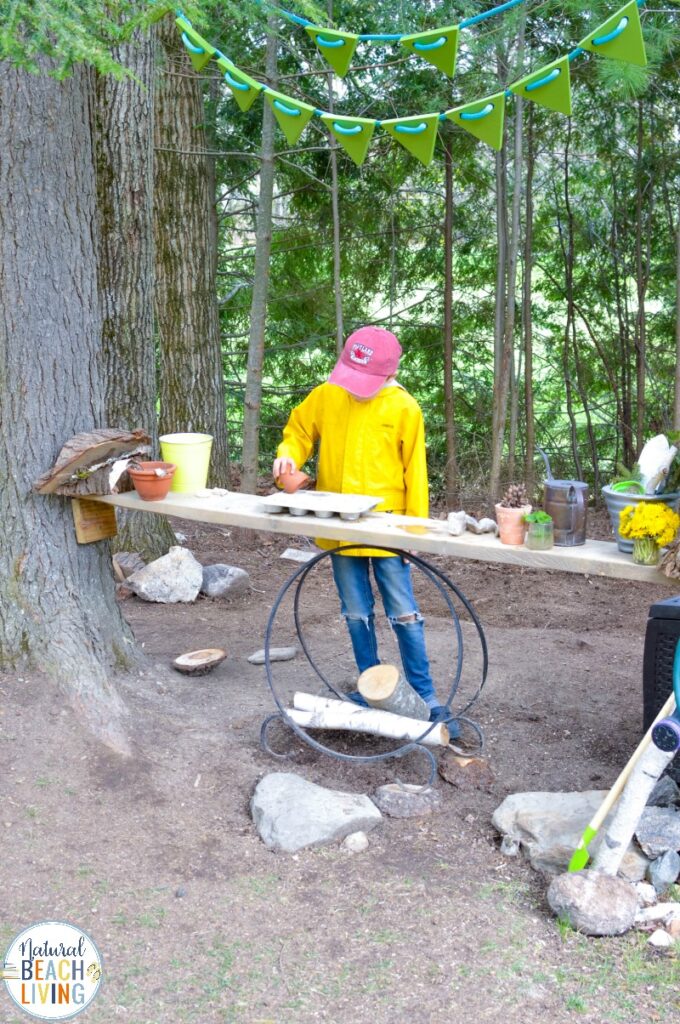
Did you know you can create an obstacle course using only recycled materials? It’s easy and fun! A backyard obstacle course is a great way to encourage kids to be physically active outdoors this Summer.
Experts agree that at least one hour a day of physical activity is important for children’s developing muscles, motor skills, and reducing the risk of related conditions like heart disease, obesity, and diabetes. You can help your kids increase their physical activity by creating a fun obstacle course in the backyard for the family to enjoy.
Creating an obstacle course using recycled materials is budget-friendly and an excellent way to encourage children to recycle. You can use plastic bottles, cans, cardboard, wooden pallets, tape, and paint to create an epic obstacle course!
Easy DIY Outdoor Play Area
Pallets are perfect for creating obstacles for balancing. Recycled cardboard boxes can be used to create epic tunnels for your kids to navigate. Sidewalk chalk is the perfect way to add directional arrows to your course. Old tires are perfect for jumping through or rolling around. Finally, you can create a relay race using plastic bottles.
Another way for your kids to have fun with backyard play areas is to let them design it themselves! Simply provide the materials and see what they come up with.
Nature Exploration Play Space
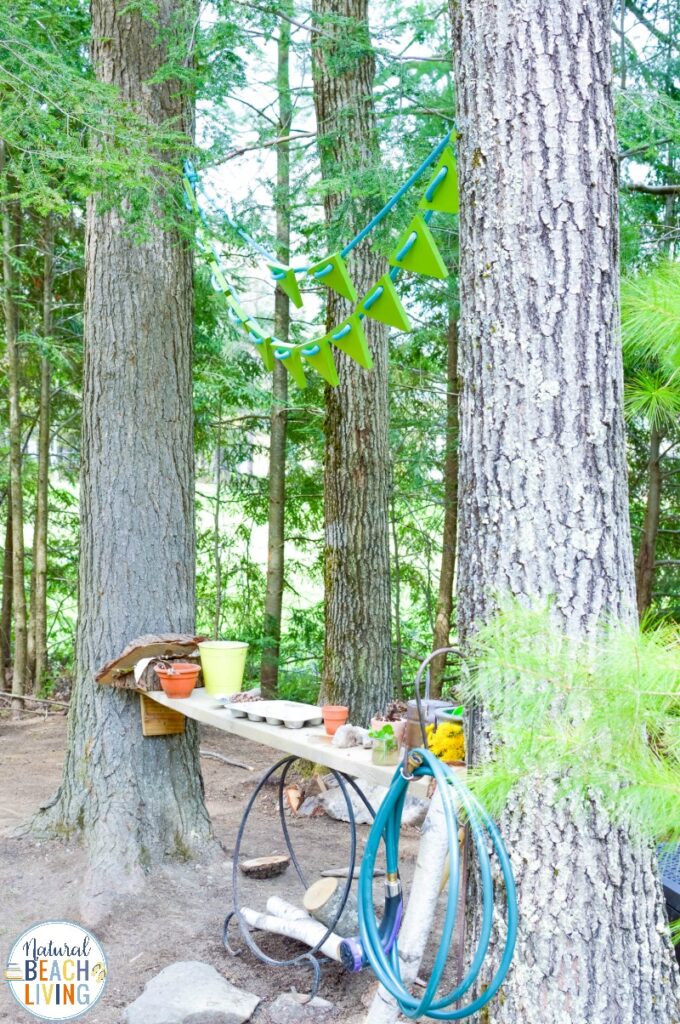
DIY science tables, DIY backyard play areas, and natural outdoor obstacle courses are excellent ways to get outdoors and have fun using recycled or found materials.
However, if you’re interested in creating more natural play spaces for your children, there are lots of ways to do that too!
Spending time outside is the perfect way to encourage your children to explore the great outdoors and develop curiosity and wonder about the natural world. It’s a great opportunity to learn about your surroundings, the weather, and different seasons.
Send your kids outdoors with a copy of Lonely Planet for Kids’ Backyard Explorer, a butterfly net, or magnifying glass and see what they can find! You will be surprised by all the cool things they can find and the wonderful lessons it will lead to.
Here are just a few interesting things we have found:
Mushrooms
Pinecones
Dandelions
Cardinals
Lizard
Praying Mantis
Ants
Turtle
Worms
Creating a natural play space using items you find in your own yard can be a lot of fun! Stumps make excellent seats for little explorers to use while they observe the natural world.
Leaves and twigs make great “boats” for floating in puddles or a small creek.
In fact, for a truly creative natural play space, provide your child with some leaves, rocks, sand, and sticks in your play area. Then, sit back and watch as they create their own little world using what they’ve been given. It’s the perfect way to let your kids explore as their imaginations run wild!
10 Pro Ideas for Creating a Yard That’s Child & Nature -
Friendly Soft surfaces, plenty of shade and butterfly-attracting plants embrace comfort while encouraging outdoor discovery
Your garden may just need a few quick tweaks to make it a welcoming environment for a baby, or it may require some larger adjustments before it’s ready. We spoke with three landscaping professionals — Amanda Shipman of Amanda Shipman Designs, Laara Copely-Smith of Laara Copley-Smith Garden & Landscape Design and Simon Orchard of Simon Orchard Garden Design — on how to create a safe, inviting baby-friendly yard.
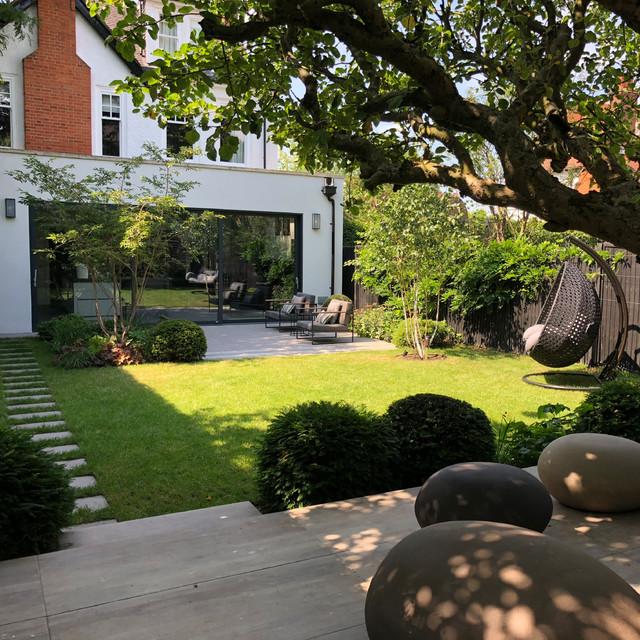
1. Go Big on Shade and Soft Surfaces
Grass — super soft on tiny knees and a good cushion for even thin blankets — and dappled shade come high on garden designer Amanda Shipman’s list of features for babies in gardens.
This garden has plenty of both. The shade hits the back of the house, which can be a desirable spot for someone spending a lot of time at home with a baby.
Keep scrolling for more tips on adding shade and soft surfaces to your garden.
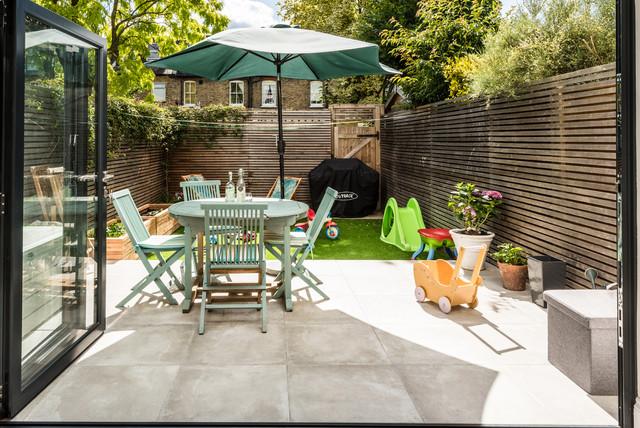
2. Focus on Smooth Flooring
A soft, green lawn isn’t the only flooring option. “Professionally laid, smooth paving with solid joints is also a nice thing for a baby,” Shipman says. It’s perfect for crawling unhindered, and also provides a flat surface for bouncers to sit on.
Area rugs can soften outdoor floors that aren’t as smooth as the pavers in this patio. Layer a few children’s rugs, which often come backed with rubber to make them nonslip. Or look for larger outdoor rugs that can stay put after playtime is over and pretty much live outside until your little one is walking.
Gravel is one flooring material you may want to think twice about. “A baby might eat it and it may hurt knees or the soles of their bare feet when they’re crawling or just starting to walk,” Shipman says.
If you can’t temporarily hide existing gravel under rugs or cover it completely, it might be worth replacing it with another softer material. Alternatively, consider a large, flexible wooden playpen that you can configure to keep your child safely out of the way.
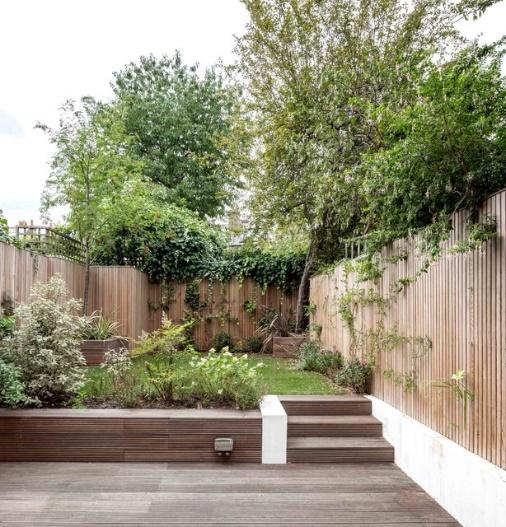
3. Inspect Your Decking
Decking can also be a suitable flooring surface, as it’s softer and warmer than stone. Make sure yours is in good condition. “Check for splinters and wide joints that could trap fingers or toes,” Shipman says, “although, with proper installation by a professional, you shouldn’t get splinters with hardwood.”
Algae can make the surface slippery too, so give it a good power wash when necessary. (Shipman also suggests a sweep of garden furniture — get rid of anything broken that could be dangerous.)
Garden designer Laara Copley-Smith suggests looking beyond soft- and hardwood decking too. “Some of the composite decking is really nice,” she says, adding that composite decks feel nice on your feet, are good surfaces for blankets, don’t have splinters and are long-lasting.
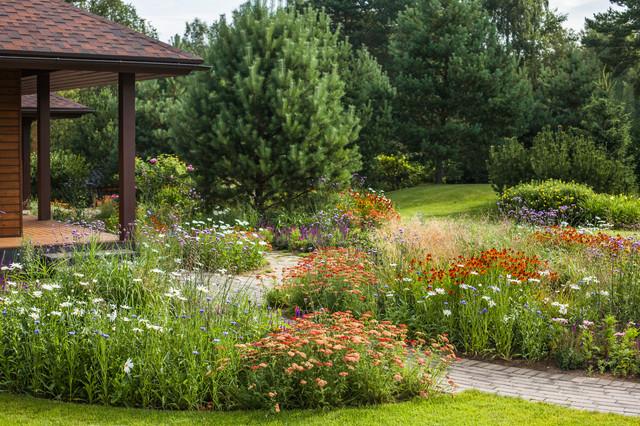
4. Choose Child- and Butterfly-Friendly Plants
Keep in mind child safety when adding or replacing existing plantings. “Choose soft plants over spiky ones (such as yucca or pyracanthus) or those that shed spiky leaves (such as holly),” Shipman says. “Also beware plants that have poisonous leaves or berries (such as laburnum seeds that drop on the ground) or leaves that can cause skin irritation (such as euphorbia).”
Shipman also suggests avoiding passion flower and other plants that typically attract wasps. Fruit trees with fallen rotting fruit, such as plums and apples, can also be a bit of a wasp magnet.
Copley-Smith echoes that sentiment. “In a cottage garden, avoid foxgloves, as certain ones are poisonous. Yew hedging has toxic berries, and the blades of some grasses — such as phormium — can be sharp.”
Rather than ripping out established plants, you might be able to plant barriers to make them hard for little fingers to reach.
“Plants that attract butterflies are perfect for babies, though,” Shipman says. Lying in the shade, looking up at colorful wings flapping about could keep them occupied for ages.
Read more about attracting butterflies to your garden
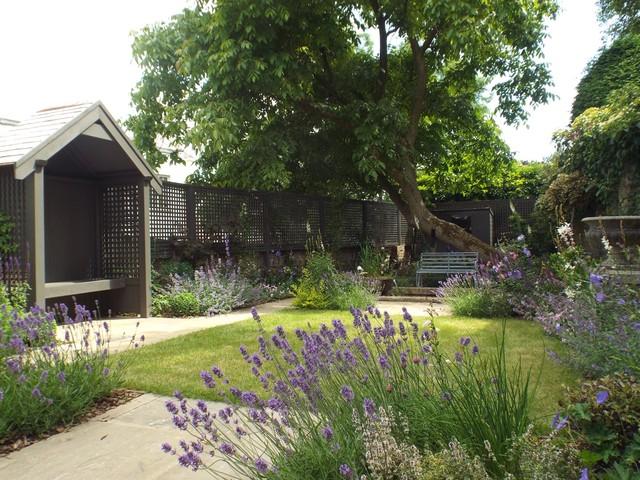
5. Be Mindful of the Bees
While plants that attract bees offer beneficial wildlife value, they could pose problems in a garden with very young children. “I’d perhaps be careful with plants that are very attractive to bees, such as lavender,” Copley-Smith says. “Even if your baby is safely contained, bees fly.”
A compromise, especially if you have lavender and other bee-friendly blooms in pots, is to relocate them farther away from the part of the garden where you’ll be spending the most time together.
As babies grow, garden designer Simon Orchard suggests embracing nature boldly. “Young kids are fascinated by all small creatures — ants, centipedes, woodlice, bees…. We should embrace this early interest in nature and not make them fearful. As parents, we teach toddlers not to touch radiators or stick fingers into sockets,” he says. “Likewise, it’s up to us to teach them not to touch bees and to watch at a safe distance.”
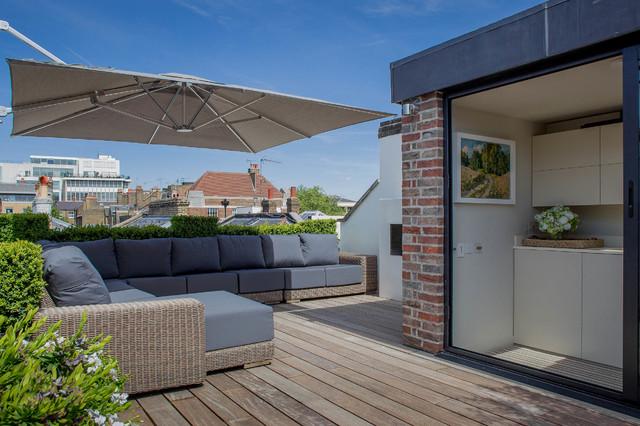
6. Set Up a Shady Lounge Corner
This kind of spot, beneath a good source of shade, is perfect for very small babies, whose carriers can sit on the cushions while you (if you’re lucky) lie down in the same spot and catch a much-needed rest.
As your baby grows, seats like this will be perfect for him or her to cruise along and practice walking. A big table could be a hindrance here. Consider folding tables you can get out in the evenings for visiting friends or meals in the garden.
Shop for outdoor lounge furniture
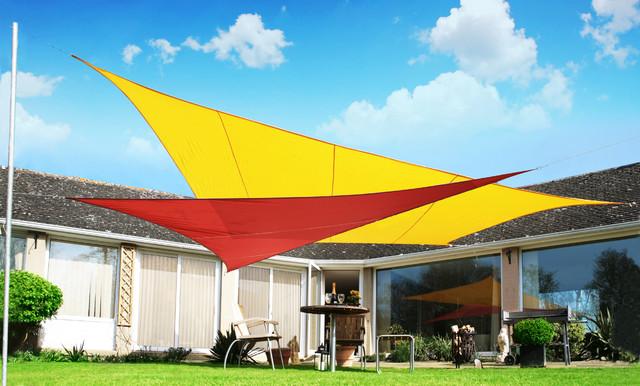
7. Consider Hanging a Shade Sail
Consider adding a shade sail if you’re short on tree shade or a naturally cooler patch in the garden. “Shade sails are very cool and really flexible,” Copley-Smith says. “You can suspend them over a lawn or seating area or attach them to a building. There are different colors, and you could choose a bright one a baby would enjoy. Make sure it’s big enough to provide adequate shade.”
Alternatively, she suggests a pop-up gazebo or a patio umbrella.“There are some very good cantilevered parasols — really big,” Copley-Smith says. “But get the correct base and potentially tie it to something too, to ensure it won’t blow over. You can also get little parasols you just put on the lawn, under which your baby can lie — great if you have a newborn.”
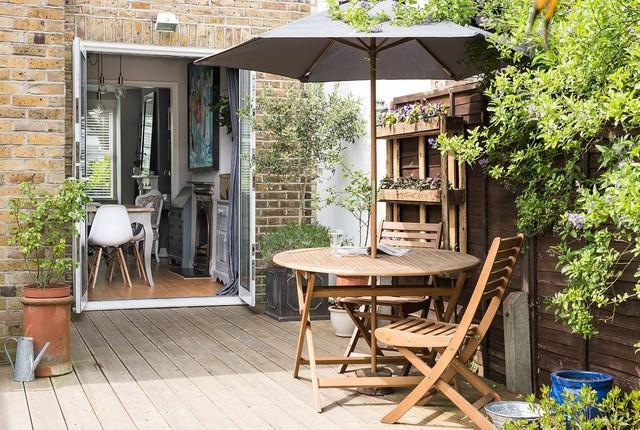
8. Let Them Touch
“Show and talk to them about wildlife and the natural world,” Shipman says. “Let them feel different textures. Show them different leaves and flowers — you could pick examples and arrange them in patterns together.”
The area just outside the back door is a great spot to have some plants with soft leaves and interesting textures to play with.
An herb garden is a nice idea here. Add a planter like the one in this photo, perhaps only filling the highest shelves until your baby is old enough to know not to eat compost. This way, you can carry your little one outside while you’re cooking and let them help pick the herbs for tea. Babies of a suitable age can have a taste too.
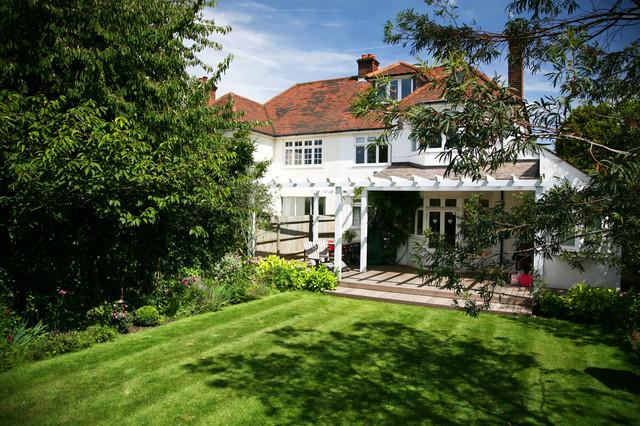
9. Add a Roof or Waterproof Cover
Think about adding a waterproof cover so rain won’t stop outdoor play. Waterproof shade sails are an option, though they are pricier. “You pay more for a waterproof sail shade and need to have the posts at different heights, so the water runs off and doesn’t pool,” Orchard says. “Retractable awnings next to the house are also great for rain and shade and mean the kids are in view. Gazebos are also good and can be moved around the garden easily.”
He adds that maybe a cover isn’t necessary at all. “At the end of the day, though, children and babies don’t want to be confined and they don’t dislike rain either — it’s normally the parents who are averse to it,” Orchard says. “Stick kids in a waterproof suit and wellies and let them roam freely.”
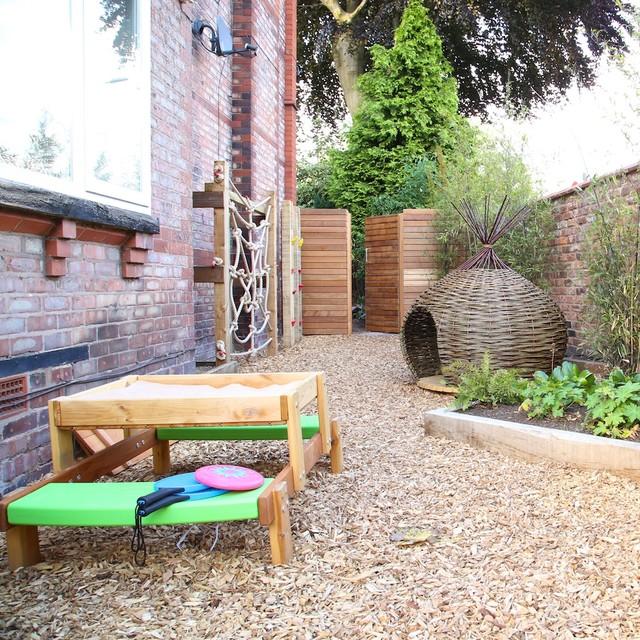
“Outdoor playhouses are also great, or convert an unused shed into a den for them,” Orchard suggests.
Alternatively, seek out a ready-made structure like the woven one in this garden, or put up a teepee you can easily bring indoors. You can fill it with their favorite toys and, as they grow, put tiny furniture and a blackboard inside.
Smaller children and babies will need to be supervised, of course, so a portable den would need to be under a larger waterproof area if you don’t want to get wet — or be big enough that you can all get inside.
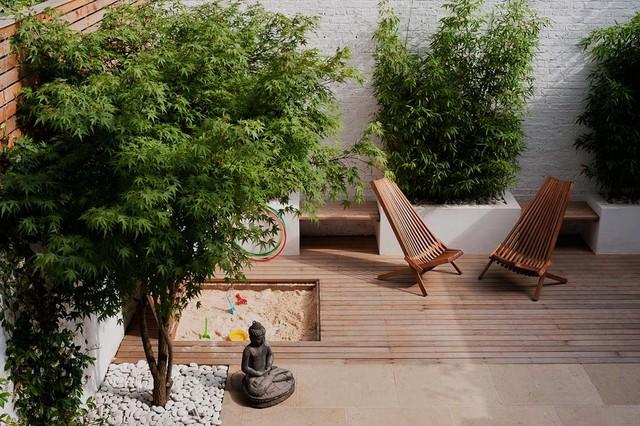
10. Include a Sand Pit
A built-in sand pit, like the one shown here, isn’t a quick fix, but it can contribute to garden enjoyment for years.
“The benefits of this design include a lid that can be put over it to protect the sand from the elements,” Copely-Smith says, preventing soggy play. It’s good to cover your sand pit when not in use, even in fine weather, as it could attract cats, foxes and other unwanted wildlife.
Note the size of the decorative pebbles around the tree in this photo — too large for a baby to put in his or her mouth.
You may also be interested in...
Some easy economical solutions for outside play rooms
-Made with love
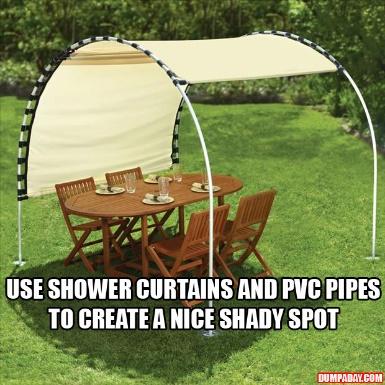
The primary thing you need outside is shelter from the sun.
And I even I could make this one on my own.
Easy outdoor canopy

PALLET TEEPEE from Killer B Designs HERE

Playhouse and Sandbox in one IMAGE SOURCE
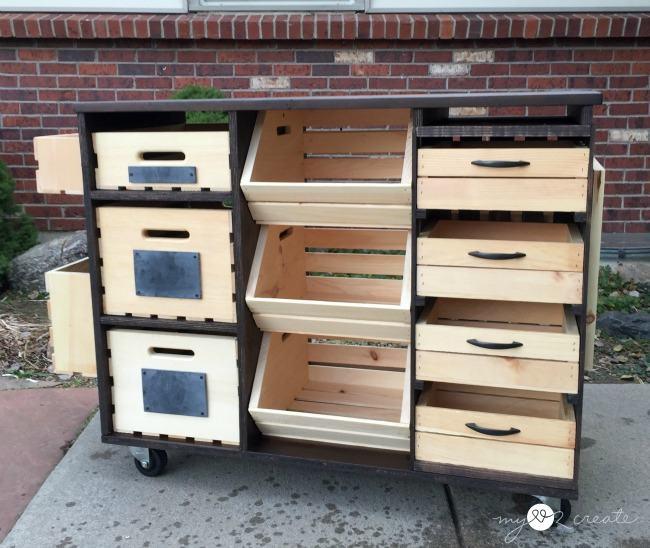
Create Some Outside Storage with Wooden Crates
We rescued our pantry cart from the kitchen but a diaper changing station works too. We love being outside, but it’s a lot harder with babies and toddlers around. I felt like I needed everything in the hose outside. You have to worry about applying enough sunscreen, making sure they don’t run into the street or put bugs in their mouth, and also keep them from getting hurt. You will have no problem filling it with basics for babycare and other essentials for creating fun.
A great outdoor space for a baby or toddler doesn’t have to be huge or cost a fortune. All you need is a safe, obstruction-free patio, porch, or grassy patch with a shady area nearby, where your cutie can test new skills, investigate, play, and experiment.
Depending on the space, you can create up to five fun activity centers by rigging, investing in, or repurposing a few simple, low-cost, or forgotten toys and equipment. If you follow your baby’s skills and interests as a guide, the activity centers here can keep your little one busy for hours.
Use the natural gifts of your backyard
Okay, sometimes when you have a lemon you need to make lemonade. We had just built a new home in the Rocky Mountains…so our yard was a tad bit rocky and about one half of it was sloped. We had already carved out a path to the house and built stairs with wooden fencing posts laying on their sides and pavers when we found out that we were going to get to adopt a baby from my friends’ teenager. I wanted flower paths to run on each side of them to add some color and a touch of playfulness.That seemed like it was going to be easy to do while waiting for our baby. It was really interesting how grow flowers on such an incline. And it was charming in the end. When she was a baby we would sit on the stairs and play by the flower/herbs on both sides of them. Just like I wanted her too!
NOTE: If you just recently planted new seeds and you planted them on a incline or you know that heavy rain storm is coming then the best bet is to provide protection. We can provide protection by doing the following:
Add a piece of cardboard, paper grocery bags, burlap, or a sheet over top of the planting area.
Add a layer (a 1–2-inch layer) of small mulch such as straw or fine wood chips/sawdust to help keep the seeds from floating away. You can just leave it there It because also makes a softer layer for their feet.
Use soaker hoses instead of sprinkler to water them. Also, water in the evening when it can soak in.
Then I planned a wildflower garden.
Our front yard overlooked our neighbors massive breathtaking flower bed. So, I planted a ½ acre of our open space with wildflowers…my way. I mixed a bunch of Rocky Mountain Wildflower seeds with perennial flowers and herbs together that peaked at different times over the spring summer and fall. One thing I loved about growing up in the Finger Lakes was the way the wildflowers on the roadside changed.
I was trying to duplicate that.
OMG I did not even imagine how important this became to our little community’s children.There were lots of outside naps at first. Then came all the teddy bear tea parties, daily wild bug hunts, family blanket picnics, sensory jar making parties, stone collecting and dipping them in glitter glue or paint (DIY glow in the dark paint was popular), wildflower potpourri and bouquet making for drying, winter sledding: and let’s not forget the water play while “giving the flowers something to drink”.
More lemonade strategizing
I couldn’t get the nice soft lawn that you dream of walking across with bare feet. So, we used astro turf under the play gazebo and along the entire length of the house for play structures and movement.
At the end of the lemonade party…our yard was where the whole neighborhood played and added to our ideas. We had families bring in play structures and tables, build a better fence and put in a trampoline for older toddlers, help manicure and care for our wildflowers etc. It was great…I was never bored and Hope always had friends to play with. I loved the outdoor kitchen that we all put together one piece at a time.
We were transferred to Florida when Hope was three and a half. The one thing we missed the most was created on what was once a rocky sloped field that we had made into a baby’s dream play space that Hope enjoyed about 80% of her waking hours.
If you have something like big rocks, a pond or creek, a wooded area, walnut trees, an old barn, a small yard, a well house, sub-pump drainage pond etc., then spend some time with friends and family brainstorming how to make them safe and play-worthy before your bundle of joy arrives. Or click the link below:
The Best Solutions for Hiding Eyesores in your yard

Backyard Biology – How to Design A Garden To Be A Kid’s Fun Science Lab
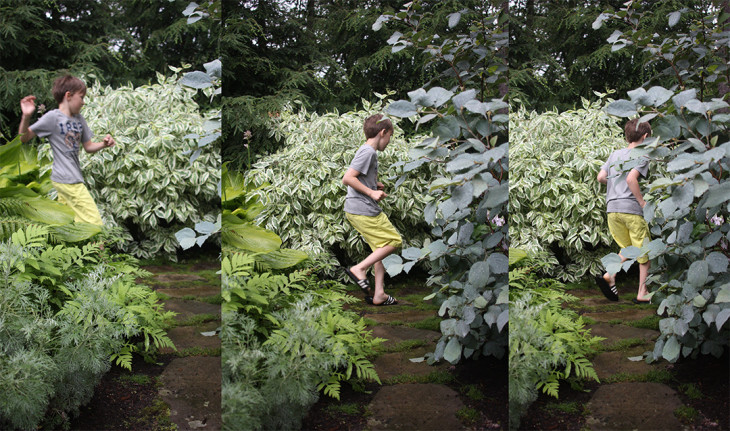
We need kids that can tackle the environmental and health problems of the world around us. There is no better way foster their natural enthusiasm than to create a science filled backyard that draws them outside.
I’m not talking about a patch of grass with some bushes around the edges (boring). Rather, a place that starts to teach and inspire them towards the art and science of caring for our environment. Yes, they need a place to burn energy. But they also need a place to feed their curiousity and minds and with a little thought, the battle over screen time can become easier. An inspiring and enticing backyard garden doesn’t just make you happy and increase your property value. It is place where people (especially the littles) are encouraged to explore and learn about nature, biology and natural wisdom in general.
HOW CAN WE MOTIVATE KIDS TO ENGAGE WITH THEIR ENVIRONMENT?
One answer can be found at the home of two Massachusetts scientists. These parents have been experimenting with a living laboratory in their small, suburban backyard. The couple have a strong background in molecular biology, and have designed a space that functions as a small, relatively self-sustaining ecosystem. They use it as an al fresco classroom – a garden science lab and a place for backyard science- for their three children.
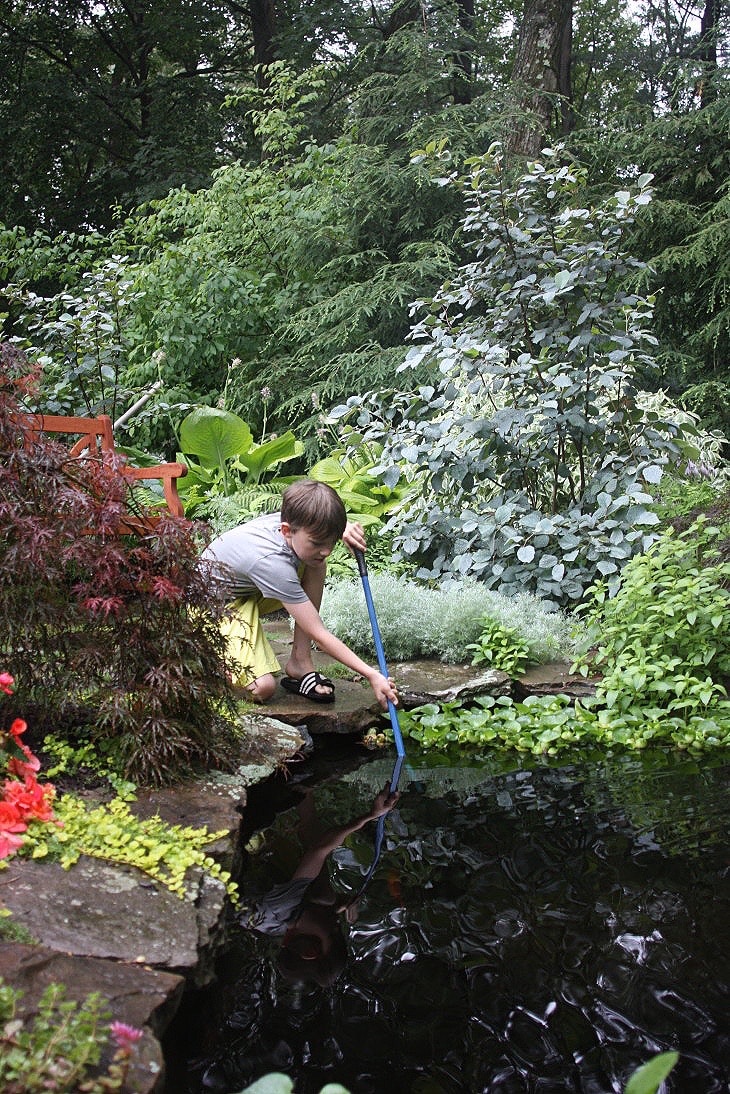
HOW TO DESIGN A BACKYARD SCIENCE LAB
The garden, was designed to invite wildlife and the encroaching woodlands into the backyard, encouraging a seamless flow between nature and the suburban household. Many of the plant species are native to the area, requiring minimal maintenance. The garden revolves around its small pond, complete with koi fish, frogs and a snake, while birds linger and nest in branches overhead. Tall evergreens line the yard, hiding the neighboring properties from sight and drawing the eye outward, over the garden and into the woods.
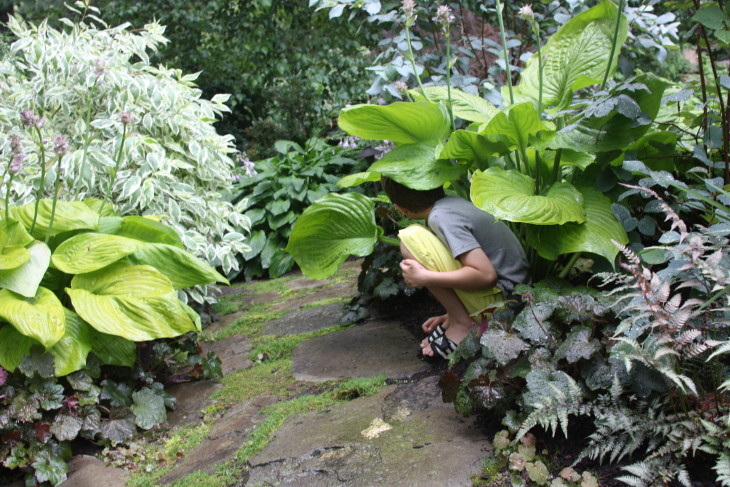
Tom Wilhelm from A Blade of Grass, the designer of the garden, took the traditional elements of a children’s garden, small benches, thick shrubbery, hidden places to explore, and imbued each with unique properties to enhance learning. Wilhelm explains:
“these moments can be as simple as including butterfly bush or fruit-bearing shrubs that attract birds, thereby allowing children to observe the mutualism between flora and fauna. They can also be somewhat more complex, such as encouraging children to collect and study the tadpoles in a pond, or the dragonfly eggs floating near the water’s surface.”TOM WILHELM – A BLADE OF GRASS
PROMOTE AN APPRECIATION FOR NATURE AND EMPATHY FOR THE GARDEN CREATURES THAT IT SHELTERS
An educational garden should promote an appreciation for nature and empathy for the creatures it shelters, as well as an understanding that everything is connected. The backyard biology of the garden, becomes a microcosm for the world’s environment as a whole.
Encourage children to embrace the outdoors and nurture it by making a garden a place not just to run. But also make it a place to hide, a place to climb and a place to learn, even where space is limited. (We can only hope they will carry this perspective with them into adulthood).
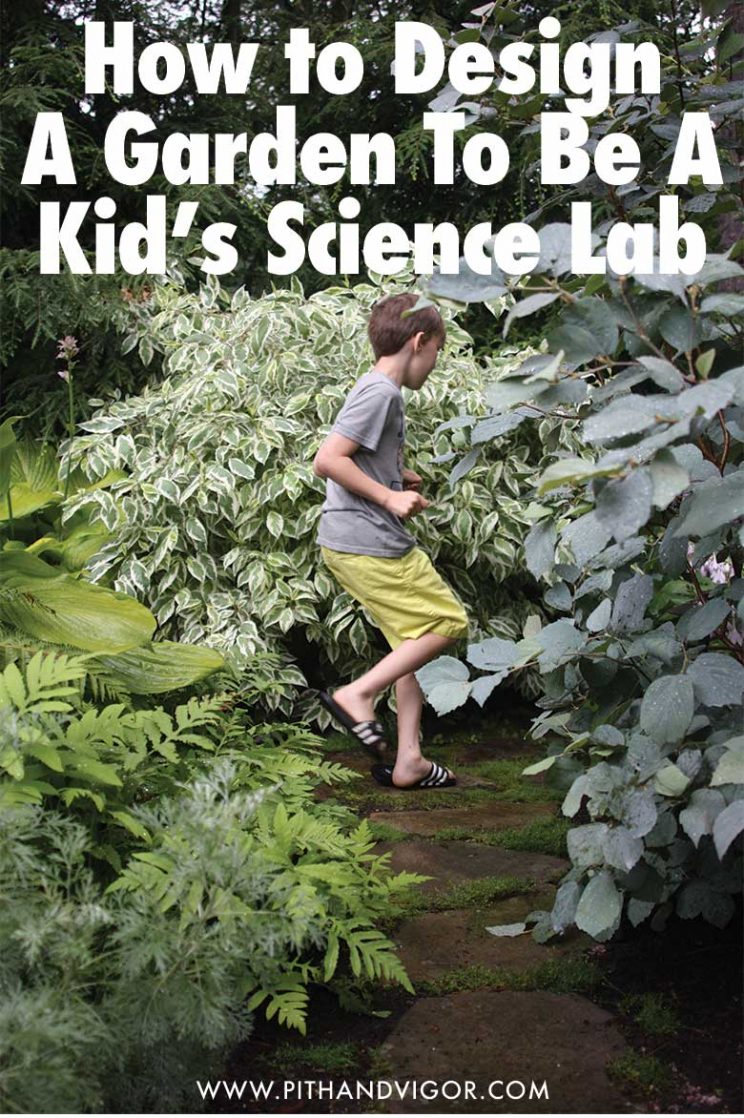
SCIENCE IN THE BACKYARD – LESSON IDEAS
There are so many lessons that can be learned in and through a garden. While most of the learning that takes place in outdoor gardens is experiential, educational gardens can serve as great ways to start conversations on a variety of topics.
Ideas for Garden science lab lessons:
Science: conservation, evolution, seasons, food (buying locally, pesticides, organic), symbiosis.
Horticulture: tending particular plants (shade v. sunlight, varying soil types, water regulation), photosynthesis, plant identification.
Literature: as simple as reading outdoors on a shaded bench, or as creative as designing a Victorian-themed garden and reading classics.
Art: paint or draw the creatures, plants, and structures in the garden, design new paths/flower beds, create topiaries.
Nature & Wildlife: Ecology, habitat maintenance, insects and pollinators.
Business: Many garden products can be sold at local farmers markets. Give kids an opportunity to plan small businesses that go beyond the lemonade stand.
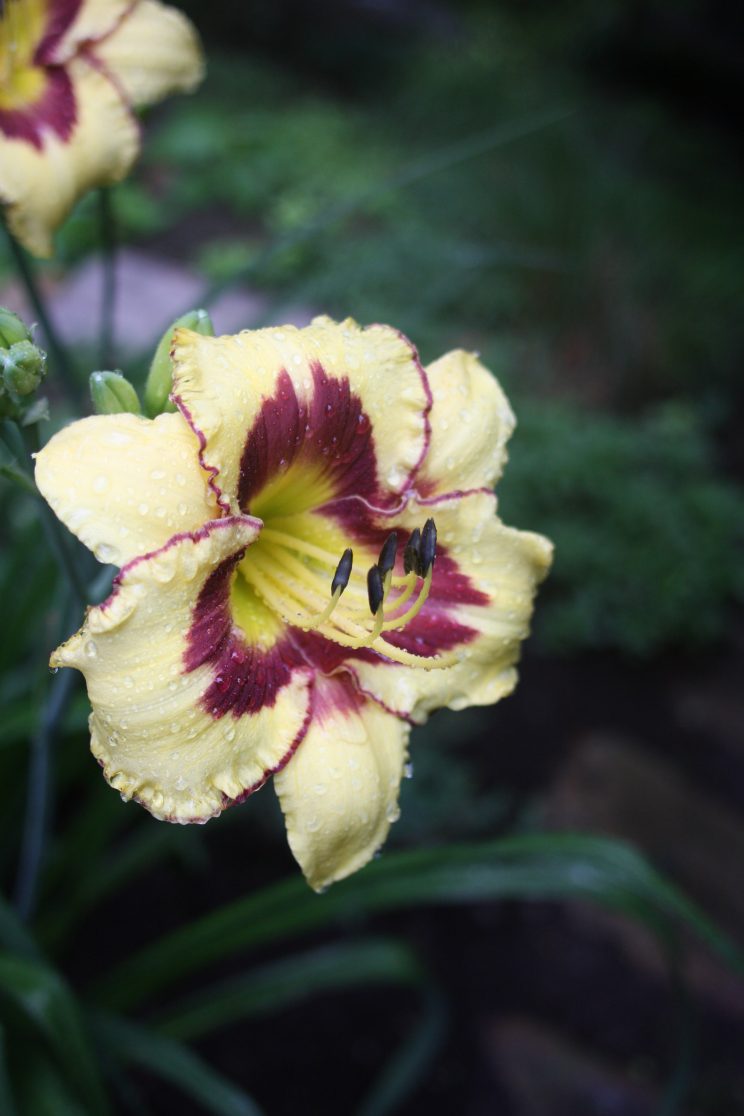
Lilies (along with other common garden plants like tomatoes, morning glories, snapdragons, petunias and irises) are ‘perfect’ flowers – meaning that they have both stamens and pistils (the male and female parts of a flower. Perfect flowers are the most common type of flowers and are easy subjects for a wide variety of experiments in hybridization, pollination and genetics as well as investigations in flower structure and basic biology.
TIPS FOR MAKING YOUR OWN BACKYARD GARDEN SCIENCE LAB:
Sometimes the best learning is experiential. Gardens that include interactive elements (like a koi pond or a vegetable patch) encourage kids to learn through observation and take a personal interest in various plants or animals. Alternatively, taking a child to a nursery and asking them to pick a flower to grow and tend (ideally from a seed) gives them responsibility and fosters attachment. Herbs are good because they encourage touching, smelling, and tasting. If the plant is a vegetable, it can lead to conversations about where food comes from, buying locally, etc.
Choose plants or features that will attract a variety of wildlife. Hang bird feeders with breed-specific feed (or plant a shrub with berries), and see how many varieties you can identify. Plant bright, tubular flowers for hummingbirds and butterflies.
Do prior research. Know what you hope the garden will teach your children, or allow them to discover on their own. Decide whether you want largely native species, so kids can recognize them at home or away. Include features that suit your educational goals.
Don’t assume you need a large space to make a big impact. This suburban garden in Newton, MA, is only several thousand square feet.
Gardens are not static. They change over time in terms of structure and function, so don’t be afraid to tweak either. An educational garden can evolve into a place to read or reflect as children age.
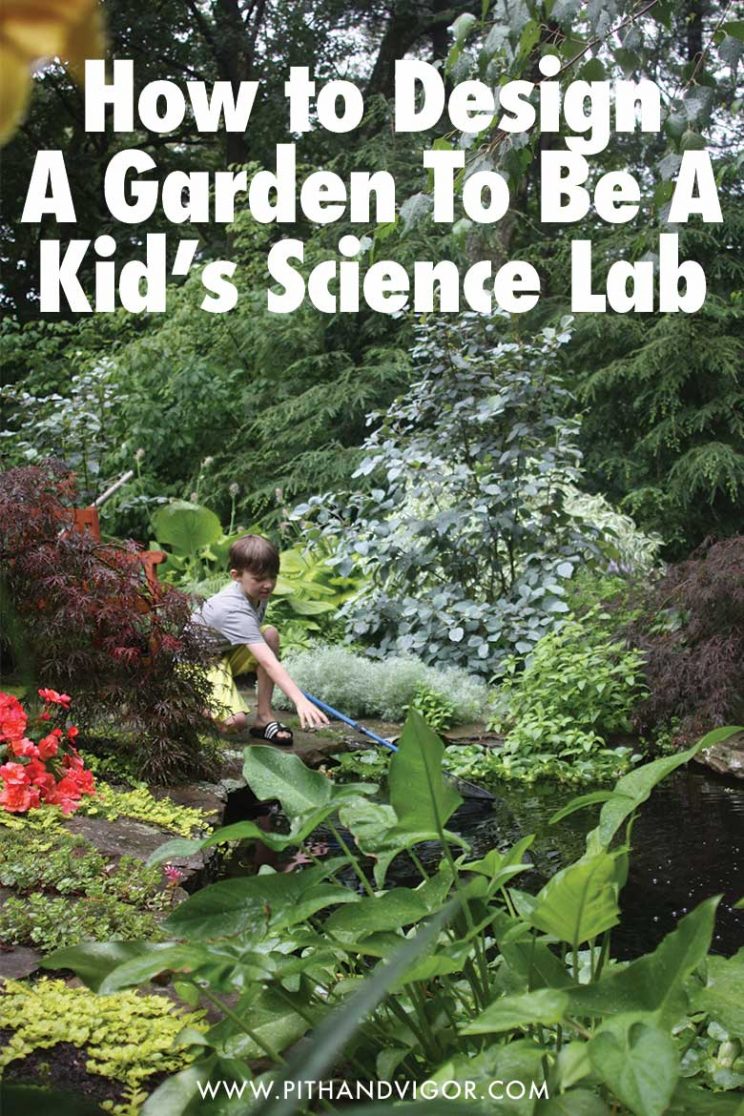
Editor’s Note:
As a testament to the design, these photos were easy. I wanted to photograph the garden with a kid. (and since I had one that lives with me…)
But he wasn’t enthusiastic about an afternoon posing in someone else’s garden. There were bribes involved. But in the end, I didn’t have to pay up.
The koi pond distracted and entertained my son for as long as I needed (and then some). He was having so much fun in this garden science lab he forgot about not wanting to help. We both loved this place. Maybe because there were no distracting and garish plastic toys? Rather, there was mystery and surprise around every corner.
It also felt bigger than it was. The trails that curled around themselves and the obscured views create a greater sense of space. It is not only a small, relatively self-sustaining ecosystem, which the owners use as a beautiful al fresco classroom but a place that he and I both found to be encouraging of play and movement (more than any old patch of grass!) .
Giant Spool UpCycled into an Outdoor Science Lab
This has to be one of my most favorite outdoor projects that I've completed lately. I took a giant old spool and upcycled it to create an outdoor science lab and play kitchen for the kids. To say it's a hit would be the understatement of the year.


I started with the spool and traced my bowls in pencil and then used a jigsaw to cut out circles so I could recess them down into the spool. This was very important because it keeps the bowls from tipping over and makes it easier for the kids to mix stuff up.

Next, I gathered my ingriendents. I must say that I absolutely LOVE the Method brand pump bottles that their dish soap and laundry soap comes in. I've been saving them up for this project for a while now. I love them because they are so easy for little hands to pump. Kiley was only 3 when I set this up in the backyard and she was able to use the pump bottles without any problem. I filled them with colored water, vinegar, oil and soap.

Gather up some equipment. My kids were adamant about needing safety goggles. I found a ton of little buckets, and bowls, and test tube type things in the Dollar Spot at Target.


$10 Science Lab
10 Best Outdoor Science Tools for Kids
By:Jacquie Fisher
We love outdoor science activities & experiments!
Getting to know nature and being a backyard detective are activities my kids have enjoyed for years.
And having great science tools takes outdoor exploration to a whole new level!
It’s amazing to see the wonder and hear the questions when kids can get up close with bugs, plants, trees and even wildlife.
So I love to have kid-sized science tools for them to use — ones that are sturdy and don’t need much supervision so kids can go off and explore on their own.

10 Awesome Outdoor Science Tools & Activities
Enjoy these 10 outstanding science tools that are perfect for the backyard, park or beach – keep them in your backpack for hikes, camping and other adventures!
For each Science Tool, we’ve included links to Related Science Activities & Experiments so your kids will quickly be inspired to get out & explore!

We’ve had the Back Yard Insect Cage Bug House with Catching Tools for Little Critters
And I can’t tell you how many bugs have called it ‘home’ for a few hours.
Caterpillars, potato bugs, jewel beetles, a few worms — I could go on and on. We use the tweezers to let the bugs crawl on when we’re ready to get them out and send them home. And the kids LOVE the magnifying scissors — you can catch the bugs and see their detailed bodies up close!
(Disclaimer: I make sure that no bugs are harmed during the using of these items 🙂
Related Activity: Go on a Bug Hunt with this free printable!

Another well-loved and often used science tool is our Melissa & Doug Sunny Patch Magnifying Glass. It’s nice and big, easy for little hands to hold and has a very large magnifying area.
Get an up-close look at leaves, flowers and other plants in the yard. Bugs can go right on walking as we scope them out and you can see all the details of the veggies we grow in the garden. Kids also get a kick out of looking at each other through the glass.
Related Experiment: Dissect a Flower & Learn about Pollination

My son received a telescope like the Celestron PowerSeeker Telescope as a holiday gift one year and it’s one of those gifts that you don’t take out every day but when you do, it really leaves a BIG impression!
Believe it or not, you can see the stars and constellations even with a kid-sized telescope. Be careful to get one that has a steady tripod stand so your kids won’t knock it over each time they want to look through it. And it’s also great for seeing around the neighborhood at night — we’ve watched owls and fox as they fly and roam.
Related Activity: Look at the Stars & Make Marshmallow Constellations

A much more frequently used item is a good set of binoculars! This is one place where if you spend a little more, you’ll get a LOT more.
First, be sure the have a nice grip and are easy to hold. Look for a pair that adjusts (folds out wider which most do) so they will grow with the kids. And try to get a set with at least 8x power so they can really see up close when they find something they’d like to observe.
The ExploreOne Binoculars are a good choice for younger kids (although the power is only at 6x). Older kids would like the BARSKA Compact Binoculars which are easier to carry and also waterproof!
We take ours EVERYWHERE! When the kids were young, they would even take them in the car and to the grocery store 🙂 Other great places include the park, beach and even the zoo!
Related Activity: Animal Observation Nature Journal {with free printable}

These are really cool! Spy Net Night Vision Infrared Stealth Binoculars truly do let you see at night so the user can make out the animals that are lurking in the backyard.
Or better yet, the owl that’s hooting in the tree. Or use them during a great game of hide and seek at night.
Related Activity: Go on a Nighttime Scavenger Hunt {with free printable}

So we’ve covered scoping out the sky, the backyard and even nighttime adventures — the only thing left is the water!
Spy on the fish, search for tadpoles and see what type of plantlife you can find in underwater. A great science tool for the pond, lake or beach. Try the Educational Insights Science Club Aquascope which also includes a fun marine biologist’s journal too!
Related Activity: 20 Activities for a Day at the Pond
Parents Guide For
Preparing A Play Space For Littles
with Parents Corner
Up to 5 years

BUILDING A DIY FOREST PLAY SPACE THAT YOUR LITTLE ONES WILL LOVE.
Playfulness is central to how we all grow and learn. It’s what allows us to connect with others and let our imaginations flourish. But as we get older, play becomes more and more a luxury rather than an integral part of daily life – taking a backseat to professional and financial obligations and other dull but necessary evils.
Like the name would suggest, playspaces are for all things clever, silly, quirky, and fun for all ages.
From the whimsical ideas of Hope Marie to the creatively deceptive simple activities of fitness, recreation, and discovery that endlessly run through my brain: we want to inspire great playspaces that "toy" with the mind and unlock mental and physical muscles many of us have not stretched since childhood. Exhibiting nature this way will: artists also show us the power of play in revealing systemic injustices, subverting gender expectations, and confronting the absurdity of our political and ecological realities.
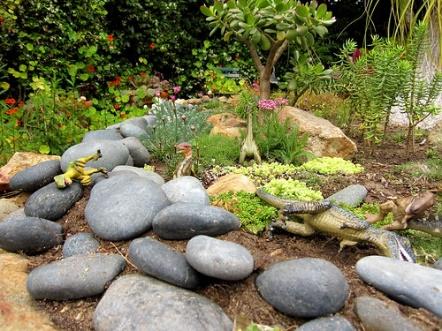

1. Pick a spot that looks inviting and versatile
for play options.
Something that shouts, ‘explore me’! Think of your child’s interests, heroes, influences, things they love, etc. They should influence your vision and choices along the way. But you also want it to remain safe to the wildlife as well. Watch them use and play in the space the way it is naturally, so you don’t alter or move something that they enjoy.
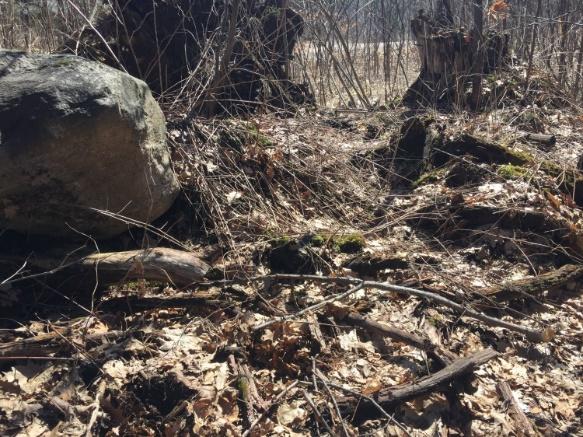
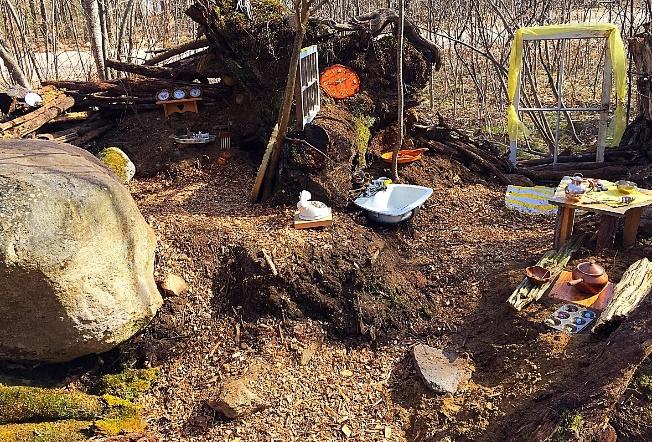
2. Clear the space as needed.
Removing tripping hazards, prickly thorn bushes and sharp rocks will help to encourage play and keep everyone safe. Be aware of who may already live in that space. For example, If there was an active birds nest, I wouldn’t touch this space.
3. Invite your expert explorers to check out the area.
Watch them investigate the area. What are they drawn to? How do they use the space?
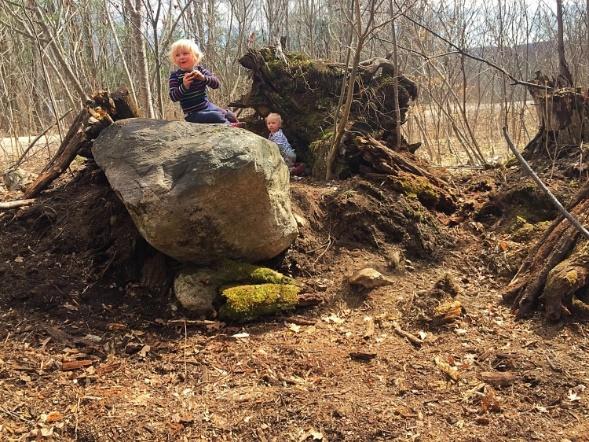
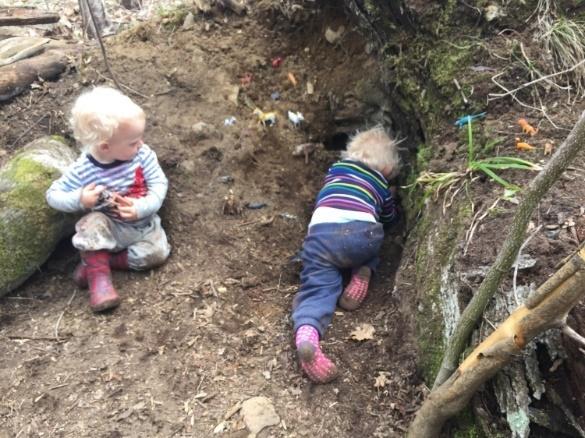
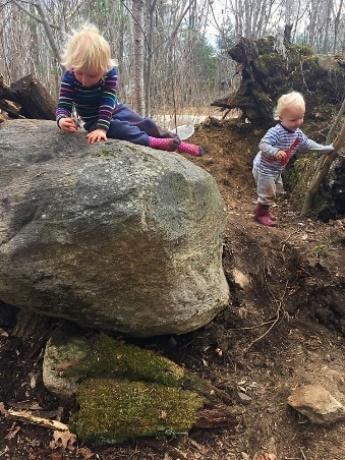
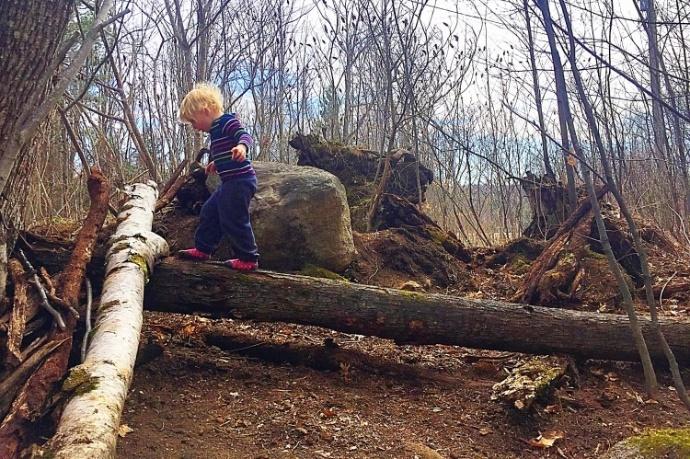
4. (After watching your little experts in the area) fix, change or add, where needed.
You don’t want to eliminate all challenges, but there’s nothing wrong with adding a few things here and there to help the kids to enjoy the space. For example, I added a step stone when I noticed my littlest explorer struggling to climb up in to the ‘entrance’.
5. Define the space.
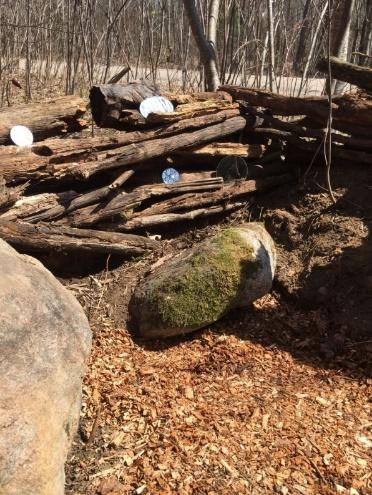
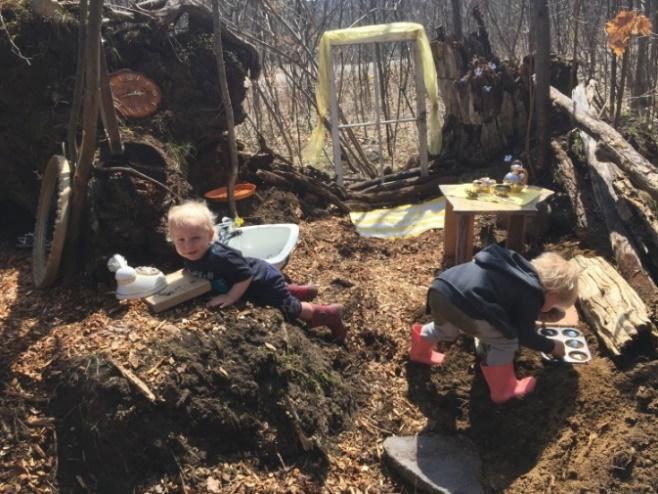
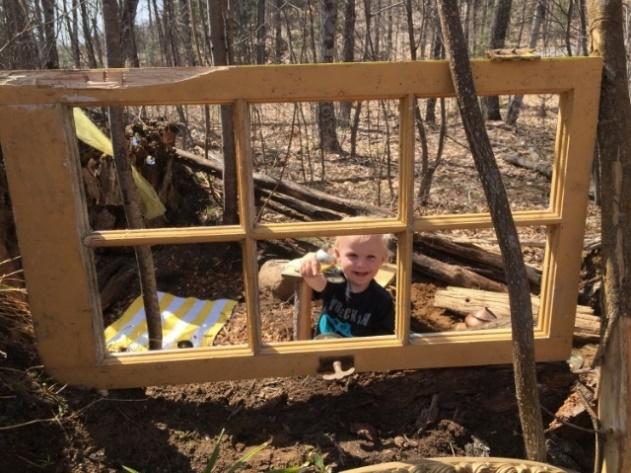
Logs, branches and rocks work well as ‘walls’ and wood chips are excellent for ‘floors’. Old windows and mirrors are fun too once the glass is removed.
6. Add multi purpose open-ended materials.
Pots, pans and kitchen utensils are great. Bowls, cups, rocks, natural wood blocks, scoops etc.


7. Make it creative and adventurous.
You are setting up an ‘invitation to play’ (as you would in the classroom if you’re an educator, Just on a larger scale and likely a little messier) A telephone, a clock, a small table and even a sink -makes the area feel like ‘home’. I also love to add items that sparkle and shine. Items that look like they aren’t typically meant for play. Special, interesting and unique – just like the little people who will be enjoying them.
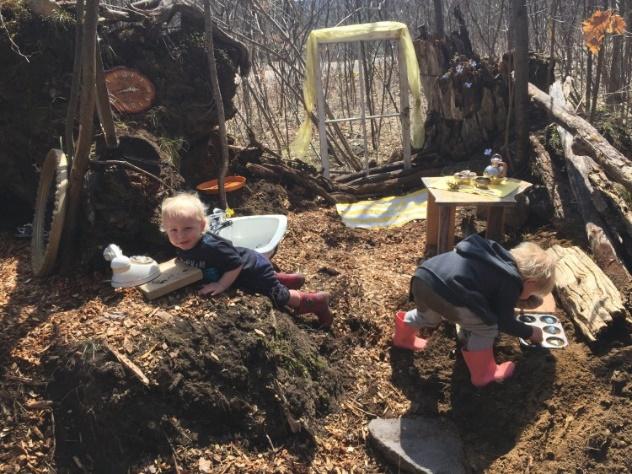
8. Keep the area safe for wildlife and your kids.
Watch for new hazards as the area changes through the seasons. Wasp nests, thorn bushes, broken branches etc.
9. Follow your child’s lead -discover their Interest.
If you created a space to be a ‘house’ and they have decided that it’s a ‘diner’ – go with it! Add a cash register, menus and a take-out window. Kids have the greatest ideas, and it will be fun to watch the area grow and evolve. It can be a nature science lab, wildlife hospital, home or cabin, school, gym, animal food factory, fire or ranger station, train, or automotive repair business, ecology/save the planet bureau and more.
Get your hands dirty. Eat the mud cakes! As a mother of 5 (ages 13-1) one thing that I know for sure is that time flies and there will be a point (*sniff sniff*) where they won’t ask you to sit and play anymore! Enjoy these moments!
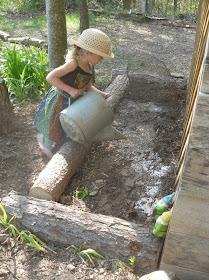
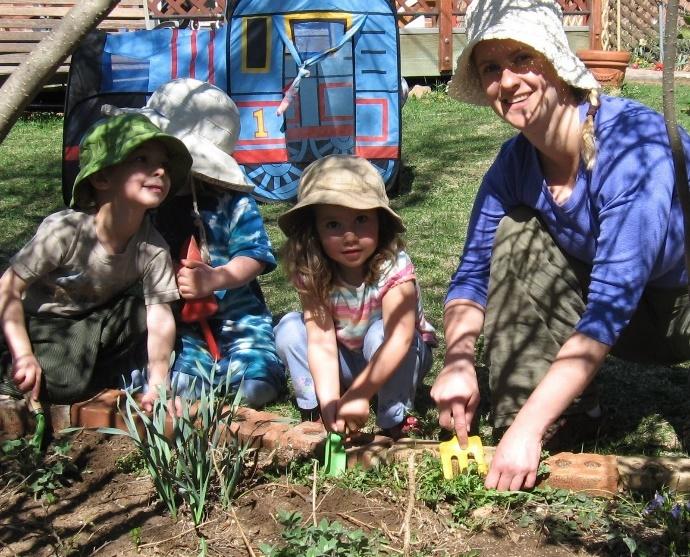
Planning your Outdoor or forest play area
Designing a children's outdoor play space doesn't have to be complicated. In fact, I'm trying to make a real effort on the blog to include easier, natural activities.
Also, if you live in an urban environment with no backyard, a lot of these can be found/done at your local park or community garden! Here are ten things that can make a child's outdoor play space all that more special:
1. A SECRET PLACE
Kids need somewhere they can breathe, be alone and feel free. What makes a place secret? Make it their size, construct "walls" and have it in a slightly obscured location. Whether it's a clubhouse or just a sheet draped over some tree limbs, the main idea is to prompt them to create a world of their own. Boys like calling it a club or hide out.
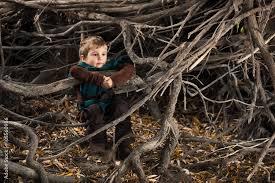
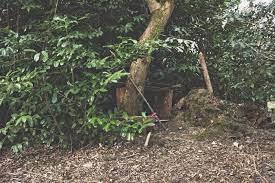
This is one of my favorite things ever. I would even wear olive and brown colors as camouflage. Our family’s rule was if it isn’t nailed down then we could use it. I liked cheese cloth dyed in mud. My mom kept my secret she would leave it under my pillow.
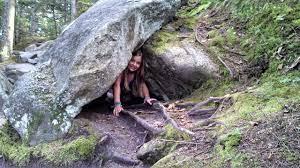
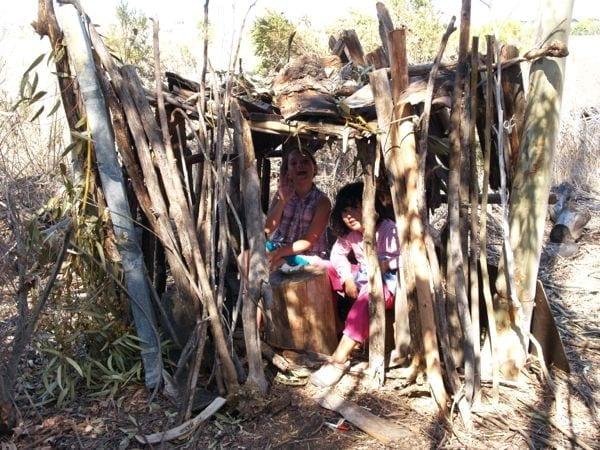
More Great Ideas:
The Five Minute Fort via My Crafty Spot
Make a Live Willow Den | We are buying our willow whips here
Giant Nest (ambitious, but had to include because it is amazing!)
2. A WATER FEATURE
Where there is water, there is fun. Enough said.
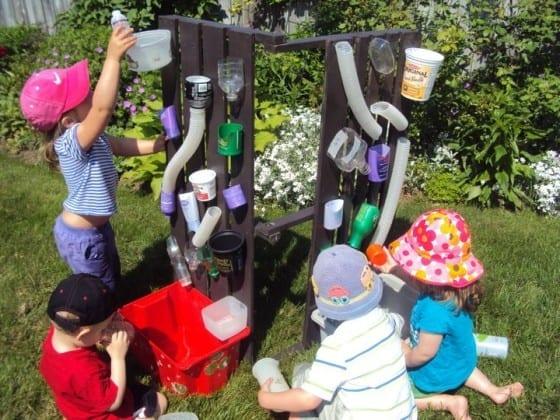
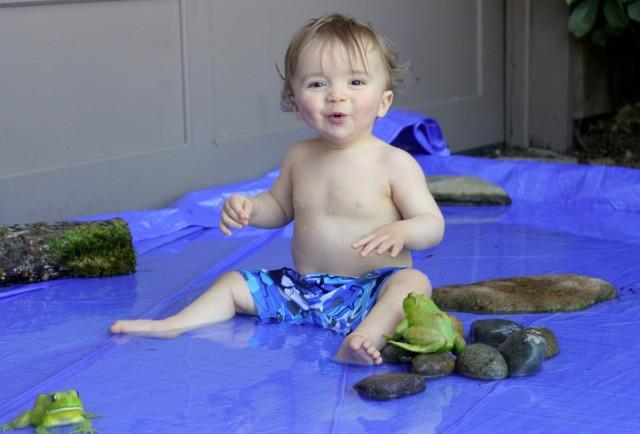
Homemade Water Wall via Happy Hooligans
More Great Ideas:
Nature Soup via Meri Cherry
10 DIY Sprinklers (I couldn't pick just one) via Fantastic Fun and Learning
How to Make a Giant Outdoor Water Bed via My Frugal Adventures
Easy Waterplayby the Picklebums
3. MUD GLORIOUS MUD
Whether it's mud pies or just digging for rocks, kids need to get dirty! I know that our mud kitchen was my daughter's favorite part of our outdoor play area this past summer. And if you really want to pair this activity down just give the kids some dirt and a bowl - trust me they will find their own wild materials.
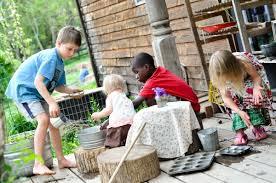
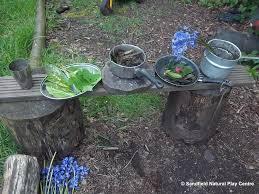
Designing an Outdoor Mud Pie Kitchen
More Muddy Ideas:
Make Mud Paint! via Learn Play Imagine
The Great Dinosaur Stomp via My Small Potatoes
30+ Ideas for Kids to Play in the Dirt via Hands On As We Grow
Mud Kitchen Essentials (this is a wonderful, comprehensive post) via abc does
4. SOMETHING TO CLIMB ON
As parents of all young children know, climbing is a natural instinct. Trees, stumps, rocks - they all present an opportunity for our kids to test their limits and go higher!
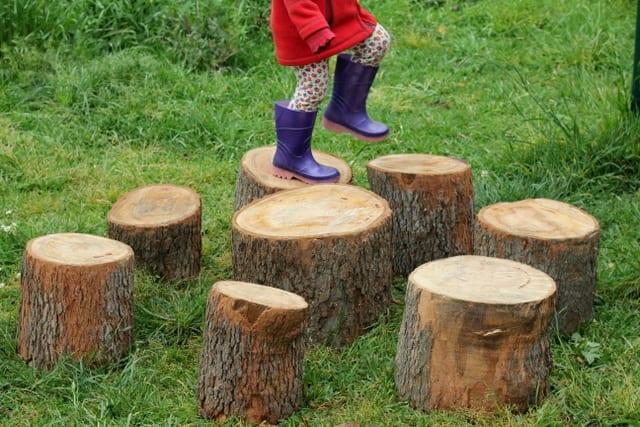
More Great Ideas:
Don't feel like installing, cutting or building anything? Have them go climb a tree!
Tire Climbing Tower via Blessings Overflowing
DIY Slackline via Pail and Pipe
Triple Wide Climbing Ladder (Buy it here)
5. SOMETHING TO GROW
For us, gardening is one of the fundamentals, and plays a unique role in our daughter's outdoor space! It may seem daunting, but there are some really easy ways to set up a growing area.
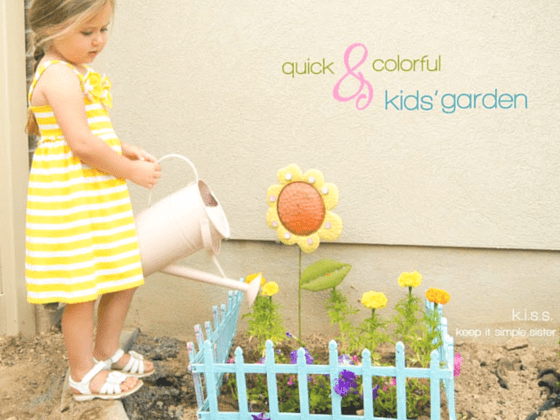
More Great Ideas:
Create a Sensory Garden via DIY gardening
You Grow Girl (My favorite resource for container gardening!)
Make a Fairy With Your Kids via See Jamie Blog
Designing a Sensory Garden via Gardening Know How
Make a Raised Bed in a Kiddie Pool via Southern Plate (with this one, I would put down a liner between the pool and the garden so the plastic chemicals don't leach into the food.
6. A PLACE TO CREATE
I always feel so much more creative when I'm outside. It is such a bonus to have an area where the kids can write, make art, music and even put on plays for each other. It doesn't matter if it is as simple as making mandalas on the ground with natural items, art and nature just go together!

More Great Ideas:
20 Amazing Outdoor Music Stations via My Nearest and Dearest
Make an Outdoor Puppet Theater via Koko Designs
Giant Outdoor Weaving Station via Seasonal Gnome
Paint Filled Eggs on Canvas via Growing a Jeweled Rose
7. SOMETHING TO SWING ON
I'll never forgot the rope swing in my grandparents' yard. It was such a simple design, but whenever any of my siblings or cousins mention those years, that swing is always in the picture. Swinging is blissful and every child deserve a chance to feel the wind against their face as they propel themselves towards the sky.
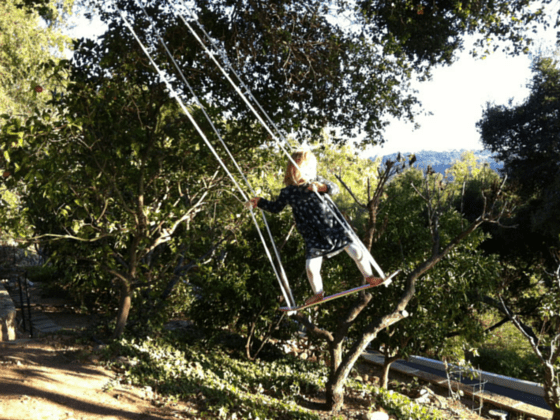
More Great Ideas:
7 Dollar DIY Rope Swing via Budget Blonde
Skateboard Swing via Little Bit Funky
Kid's Backyard Tire Swing via Popular Mechanics
Airplane Swing Tutorial via Whitney's Workshop
8. OPEN-ENDED MATERIALS
Spontaneous, unorganized play is the foundation of a child's time spent outside. In the spirit of the adventure playground movement, I like to have loose items and material available for my daughter to create with. They have no set "purpose" except for her to imagine, build and create with.
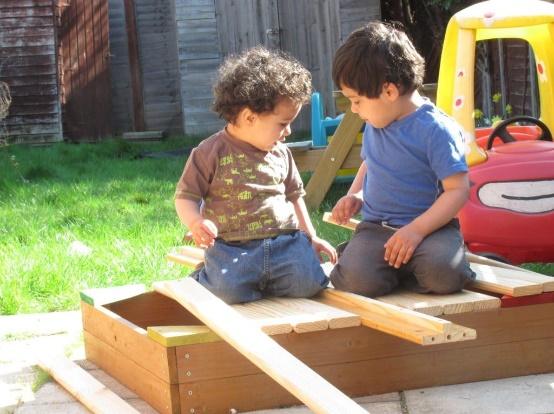
Loose Parts Play via In The Playroom
More Great Ideas:
Loose Parts Play via Inside Outside Indiana
Theory of Loose Parts via Let the Children Play
Handy Idea for Storing Loose Parts for Play via Let the Children Play
Homemade Tree Blocks via An Everyday Story
9. SOMETHING THEY CHOOSE
I've definitely been guilty of getting caught up in my own ideas and forgetting to ask my daughter what she really wants. Making sure our kids have a stake in the project can connect them to their space.
Some things I'm trying to ask her are:
What's your favorite thing to do outside?
Do you like this here?
What color should we paint this?
Do you want to name your clubhouse?
Is there anything special you want to bring outside from your room?
Are we missing anything?
Does your family want to go collecting materials with you?
Make An Outdoor Pretend Play Area
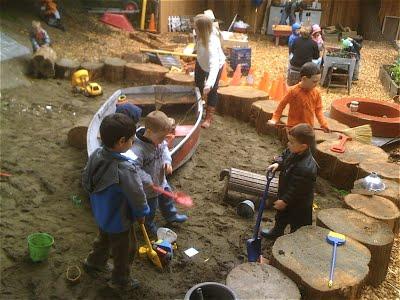
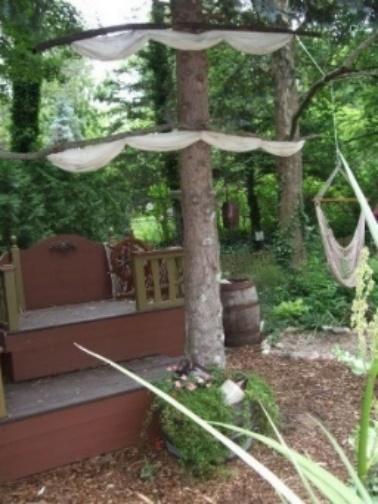
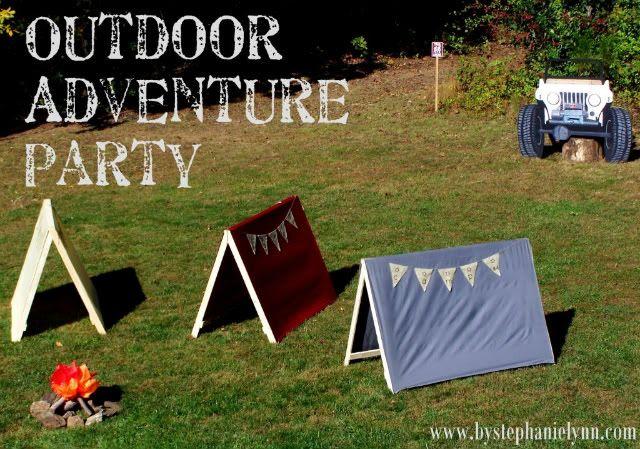
Kids love to pretend to cook and serve food, so why not take that idea to the next level with an outdoor eating area, complete with a table, stools and everything you need to have the perfect pretend (or real!) meal outside. Use the same space as a makerspace if you can.
PREPARE A BABY-SAFE BACKYARD FOR FAMILY FUN
HOW TO BABY PROOF YOUR YARD
You’ll want to begin, of course, by making your backyard space as safe as possible. Remove obstructions and lock up or fence off swimming pools, lawn equipment, poisonous plants, and other hazards. Make sure railings and gates on balconies, porches, and decks are both sturdy and up to date—slats should be less than 3.5 inches apart or covered with a strong mesh or another safety device. Then add a few low-cost, high-engagement items, inspired by the ideas here, to create a kid-friendly zone for your outdoor explorer. Try one or two suggestions to start, and then switch it up occasionally, depending on your child’s mood, the weather, your time, and budget.
Stimulate your babies and toddlers with these outdoor ideas from Learning through Landscapes…
Young children have an innate urge to learn about the world around them, and the outdoors offers a never-ending range of exciting opportunities. They can satisfy their love of movement when outside, improving muscle strength, lung capacity and bone density along the way, as well as developing important physical skills such as coordination. A rich outdoor environment offers the chance to explore and investigate, as well as encourages language and communication skills.
From the minute you open the doors or start the ritual of finding the correct clothing and footwear, babies, and toddlers’ sense that change – and the potential for adventure – is in the air, so make the most of their enthusiasm by developing your outside space…
Stimulating senses
Babies are highly responsive to outdoor stimuli. Sound moves in a different way outside – changing naturally with the wind or variations in air pressure. Until they’re about six months old, babies can differentiate sounds much more effectively than adults; they’re much more receptive to bird sounds, for instance, and as a result they’ll love being outdoors. Light also behaves differently. It’s changed by the weather, filtered by trees and alters throughout the day. Visit spaces near trees or create a place where voile or chiffon can hang – this will filter the sun and move with touch or the wind.
Smell and taste can also be stimulated outdoors. Babies on the move make the most of any opportunity to pull themselves up to standing. An effective way to encourage this behavior while offering exciting sensory experiences is to install sturdy low-level planters filled with strongly scented herbs such as lavender or rosemary, colorful summer plants or edibles like strawberries or redcurrants.
And don’t forget touch – another key sense for helping babies to learn about the world. Outdoors, they can lie on the grass and feel it tickling their skin or experience the textural differences between hard and soft surfaces.
Tailored for toddlers
Once babies are toddling, they’ll benefit from varied landscapes. Small hills, tunnels and trails encourage activities such as crawling, rolling, stretching, and running. Tires, ladders, stumps, and planks provide opportunities for climbing, and low walls and rails at various heights allow babies to pull themselves up to standing. Textured pathways (bark, wood chip, gravel, pebbles) not only add visual interest but also sharpen the mobility skills required for managing uneven ground.
Natural materials such as sand and soil provide fantastic opportunities for exploration, investigation, and manipulation. Smaller sandpits offer great opportunities for digging, while larger areas of sand allow toddlers to use their entire bodies to feel the texture. Children can extend their play to a digging area filled with soil. Here they can pretend to plant and dig up vegetables (try providing onions or potatoes for this activity).
Water is fascinating for young children due to sounds that can be created with it and because it causes reflection. It also presents an opportunity for them to explore the qualities of the above materials, by mixing – and getting grubby! Also think about resources that support exploration of the weather, such as streamers, windsocks, umbrellas, and wind chimes.
Tip: Nooks and crannies will entice crawling and toddling youngsters, so try creating natural dens under low-hanging branches. Alternatively, supply large cardboard boxes or lengths of fabric attached to fences. Cushions and blankets help create cozy nooks for snuggling into with adults and other children for stories, songs and games. Adding interesting items such as mirrors, fir cones, sponges, large buttons, toy animals, etc. will stimulate exploration and conversation.
Learning through Landscapes offers a range of services to support outdoor learning and play in the early years. Its membership resources and publications provide a regular supply of fresh activity ideas, and it offers on-site support through advisory visits and half-day, full-day or twilight training sessions for nurseries.
Maker zone” in the natural playground
(Loose Parts Area)
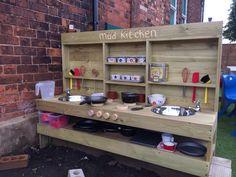
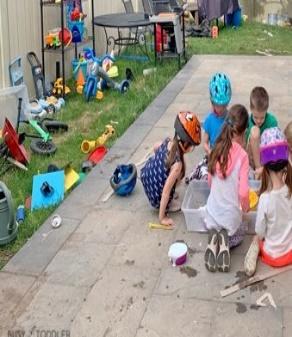
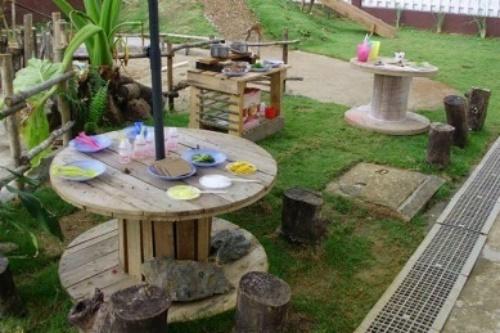
To help spur on your little builder, offer baskets, bins, crates or piles of twigs, pinecones, vines, bark, leaves, acorns- whatever you have on hand in your ecosystem. I’d suggest also placing a flat work surface nearby, either on the ground or elevated slightly to function as a table. Be prepared for lots of creations given as “gifts” throughout the day!
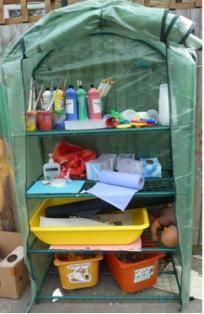
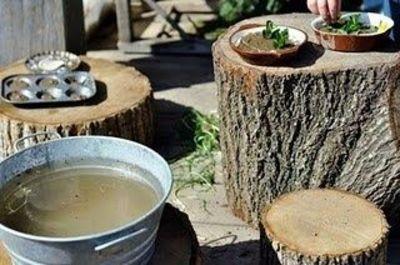
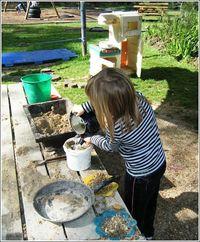
Mud & creative kitchens
A mud kitchen is another great addition to your natural backyard playground. Outfit a child-sized work space with bamboo cutting boards, ladles, little wooden bowls and utensils, etc. If the weather turns cold, your mud kitchen can easily be converted into a snow kitchen. (And if you want other ideas for winter activities, I’ve got you covered!)
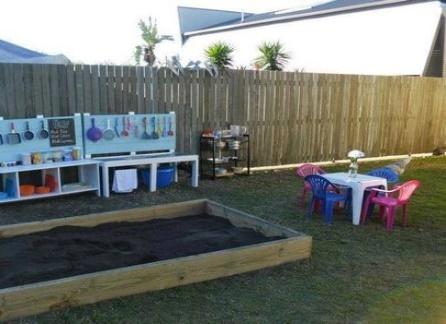
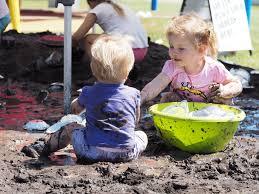
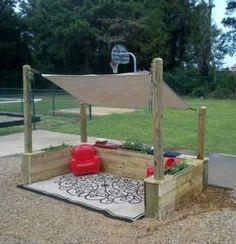
SANDY PIT
Just like Roo from the Hundred Acre Wood, little children need access to a sandy (or just plain dirt-y) pit for digging. I’m not just talking about your typical sand box. While those are great for small projects, I’m talking “rip up the sod and dig to China” levels of digging. Give your kid a variety of tools so they can switch up their digging with raking, hoeing, or weeding, too. My favorite sandboxes are created a theme and have a play tent or sun shelter.

SOMETHING FOR THE BIG KIDS
Trust me, you don't want to leave this one out! It's wonderful to interact with our children, but the truth is sometimes they just need to get lost in the moment without us. This past summer we installed two hammocks and it instantly transformed the children's play area into a mixed-use space that we all love to be in. Remember it’s cooler in the wooded area because its shaded. The more comfortable you are, the longer they can play in that oxygen rich environment that is so good for their health.
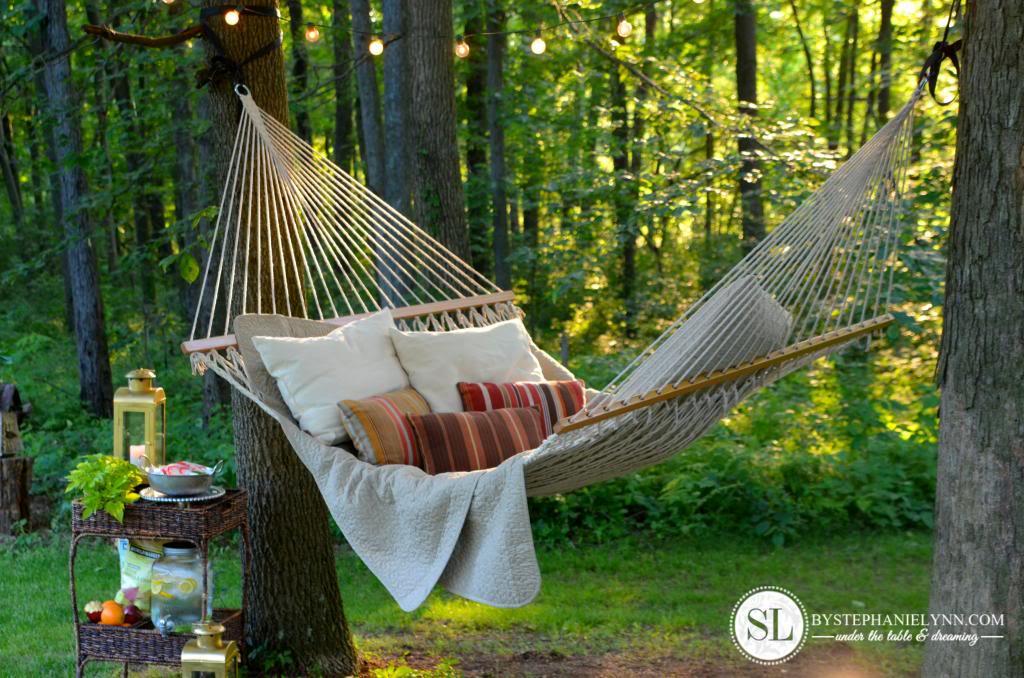
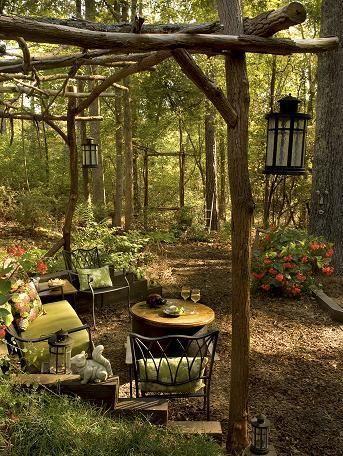
So, these are on my list, I challenge you to make your own lists based on your child's interests.
I hope you excited over this challenge. Lets do this Happy Hooligan’s style!
Cool Features to Add to Your Play Garden or Lawn
Creating a fun and exciting outdoor playspace for your child for free or just a few dollars! You don’t need expensive toys and fancy equipment to have an outdoor play area that will thrill your kids.
These inexpensive ideas for a backyard play space will make your yard the funnest place in the neighborhood. the corner of the backyard draws the children in like a magnet. It’s the play area in our backyard that’s entirely dedicated to the daycare kids, and it’s where the most care-free and magical moments of our day take place.
The old-fashioned simplicity of our outdoor play area makes it an enchanting place for kids to play, explore and learn. There’s our repainted play-house, and sandbox tips, which are popular for sure, and there is a myriad of other inexpensive play features that entertain, challenge and engage the hooligans for hours every day, all year long. It’s these play features I’m going to tell you about today.
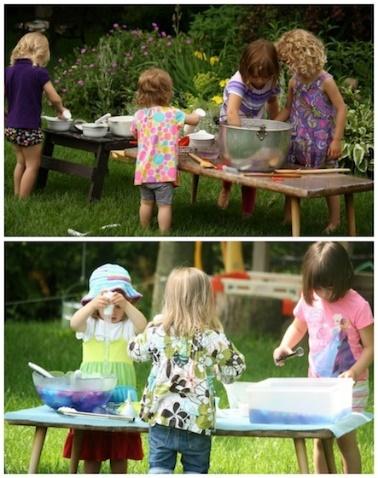
A THRIFT SHOP COFFEE TABLE
One of the best but least expensive investments I ever made for my daycare was this thrift shop coffee table. I got it for 6 dollars at a second-hand shop a couple of years ago, and we use it every day. In summer, it’s our backyard activity table, in winter it’s our art table in the craft room. Big enough for a crowd to gather around and water and paint spills don’t matter at all. See it in action here.
DIY WATER SLIDE
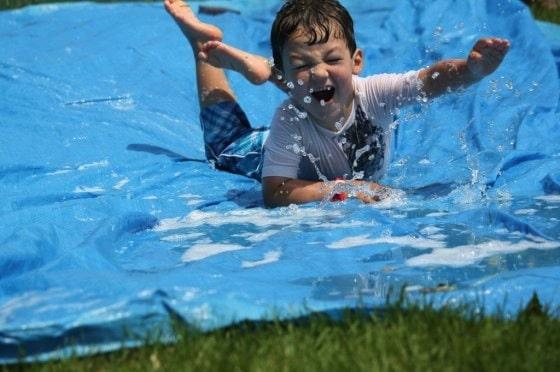
For the price of an inexpensive camping tarp, you can give your kids a whole day of wet, water, slippy-slidey fun! ! We’ve been doing this for years here in my daycare, and the kids never tire of it. See how to make your own waterside here.
HOW TO MAKE A MOBILE MUD PATCH FOR PLAY IN YOUR BACKYARD
Use a wheelbarrow to create a mobile mud patch for mud play in your backyard play space! It’s like a portable mud kitchen, and it will provide your kids with hours of good, old-fashioned muddy play! It’s a wonderful way to provide a temporary mud patch or mud kitchen in your backyard at home or preschool without having to dig up a patch of your lawn.
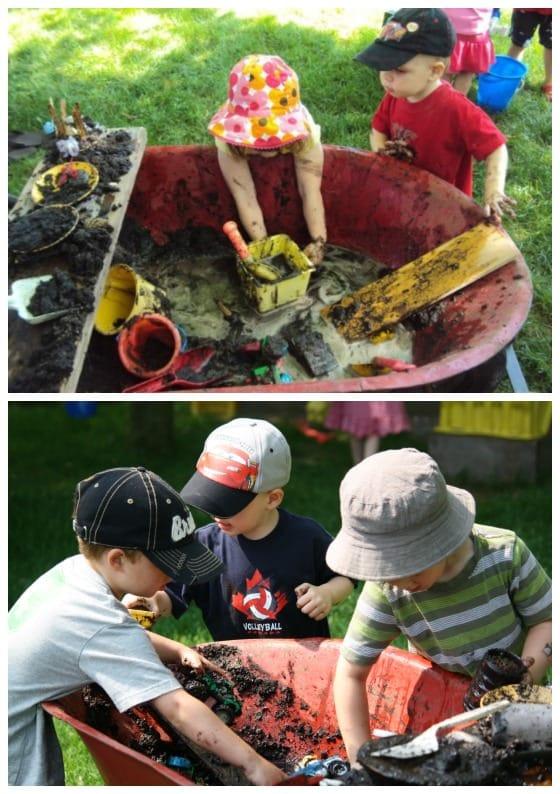
My daycare kids love to play in the mud, so we’ve come up with tons of creative mud play activities over the years. Many, we’ve done for International Mud Day which is June 29th every year.
HOW TO MAKE PLAY LOGS FOR A BACKYARD PLAY SPACE
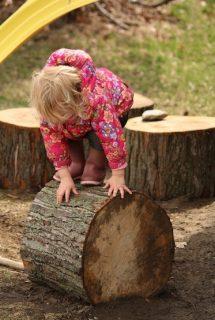
They provide children with a natural place to climb and jump, and they help to develop gross motor functions. Balance, coordination and decision-making skills all come into play when a child decides to take a step from one log to the next, and without knowing it, they take depth, distance, risk and their own abilities into consideration every time they climb up or jump down from one of the logs.
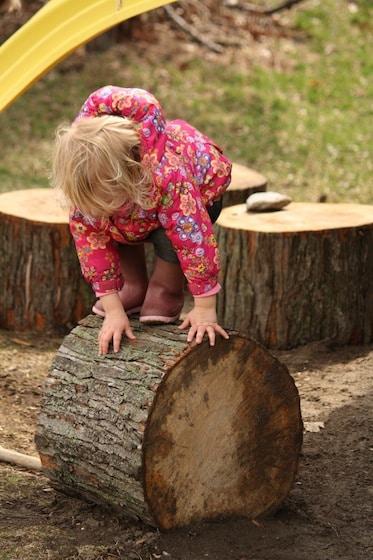
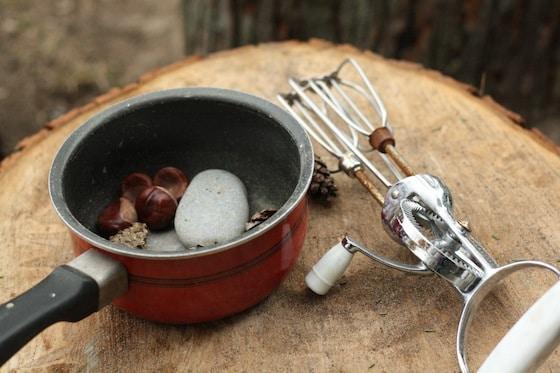
A log can also provide a place for a child to exercise his or her imagination and creativity: One moment it’s a stage on which to perform, and the next, it’s an instrument for making music. Ours are most often used as an extension to our play kitchen, and as tabletops for sorting “tools” and treasures on.
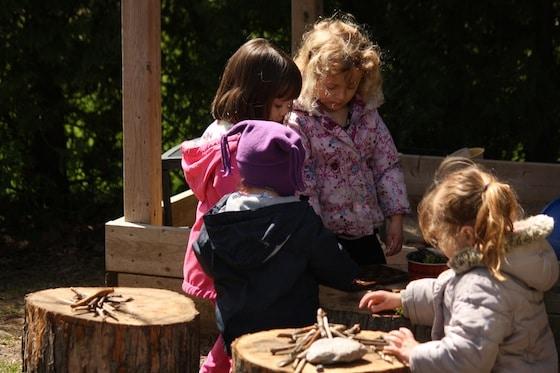
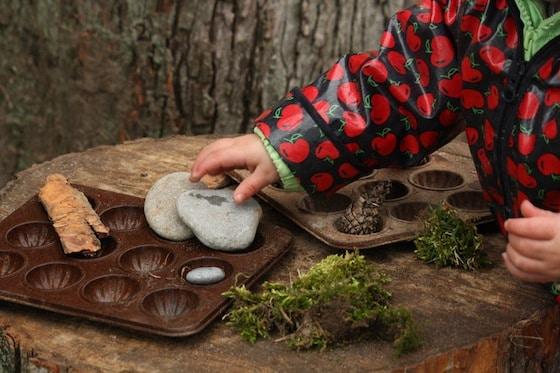
I can say without a doubt that our play logs have been one of the best backyard additions yet.
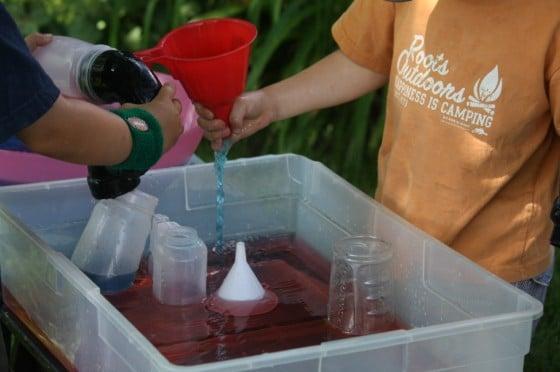
MAKE WATER WALLS WITH TUBES AND FUNNELS
MAKE MAGIC WITH YOUR VERY OWN FAIRY GARDEN
THINGS TO DO
11 Pretend Potions Your Kids Can Create Today
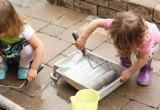
ADVENTURES AT HOME
10 Outdoor Art Projects That Are Easy to Clean Up
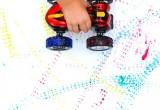
14 Creative Ways to Paint without Brushes
12 Incredibly Easy Tie-Dye Crafts for Kids

50 Fall Activities to Jump Start Your Favorite Season

12 Easy Ways to Set Up a Backyard Water Park
Creating The Ultimate Sandbox
Using a location in your backyard that’s near a sidewalk or concrete, adding sand can turn an area of your yard into the ultimate sandbox. Add boards, sand tools and toy construction equipment and keep your little ones entertained for hours.
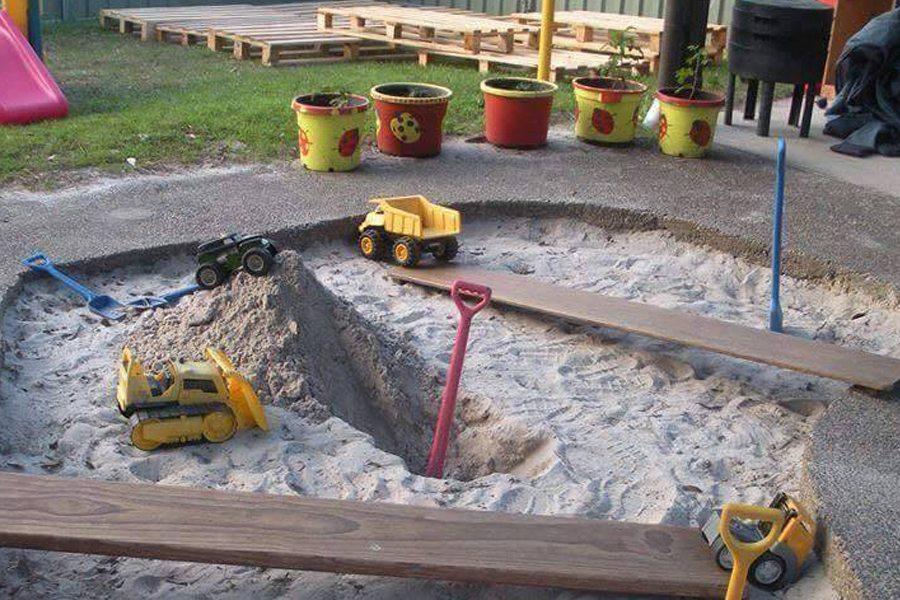
Sandbox Ideas – Toy Suggestions, Play Ideas and Storage Solutions
Assemble A Racetrack
This little racetrack costs almost nothing and is sure to pay off within hours of being set up. Using inexpensive square and rectangular pavers, some sidewalk chalk and those matchbox cars you’re always stepping on inside, you can create the perfect little outdoor track.

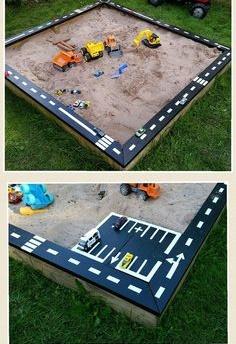
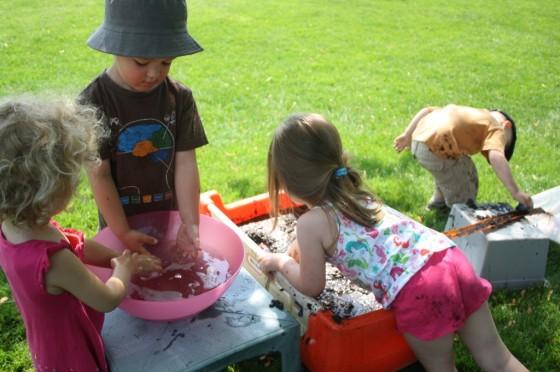
Muddy Car Wash Activity for Kids
The whole neighborhood is going to want to hang out at your house when you do this!
Build A Small Town
Using inexpensive materials such as scrap lumber, wood and rocks, there are endless possibilities when it comes to creating a quaint little town within your backyard garden.
These activities are full of fun and adventure! A they can easily be added to your outdoor space to freshen or spice things up. However, they make excellent activities on their own
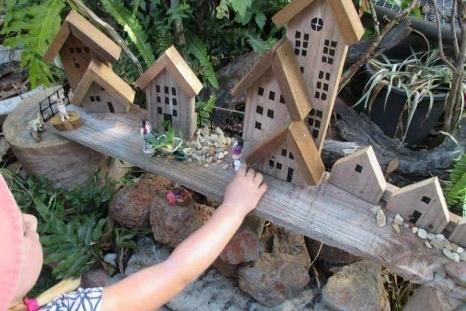
Having an extraordinary outdoor play space
doesn’t have to cost a fortune.
You can find several tire play structures in the "Design Library" on the Playground Ideas Website
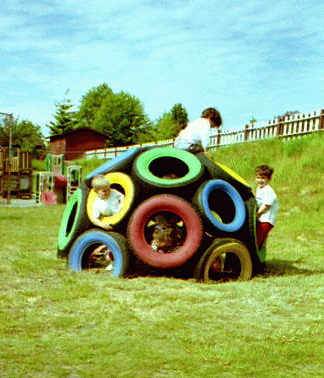
The PlayDome Page
I love this colorful tire Play Structure from The PlayDome Page
Swinging
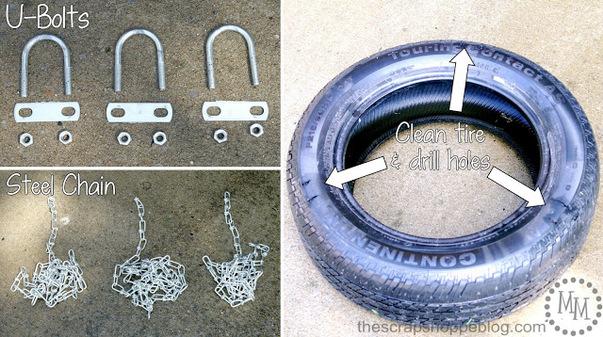
Today's Creative Life
Make a tire swing with this tutorial from Today's Creative life.
Ladder
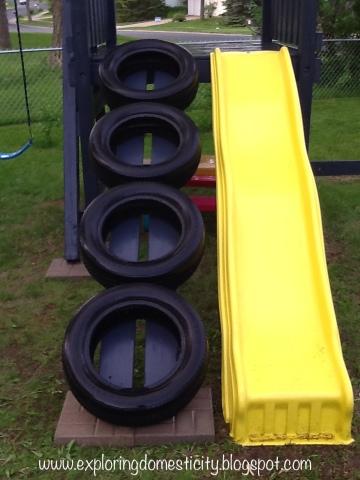
Exploring Domesticity
Use Tires as a Ladder. Check out this Tutorial by Exploring Domesticity
Sandbox
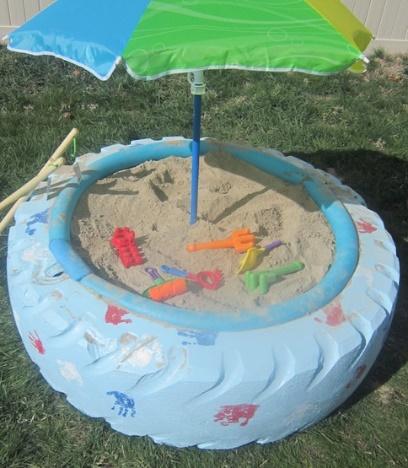
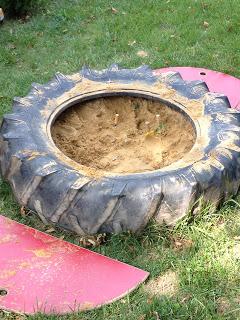
Make your own Tire Sandbox with this tutorial from I Heart Naptime
Some tips from recreational experts
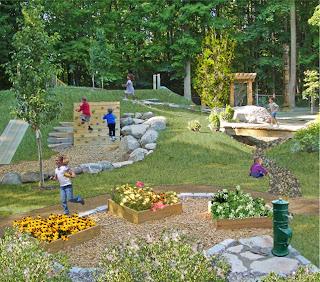
Natural playgrounds use natural elements to create safe, accessible, age-appropriate play, social, and learning opportunities. Cozy family play spaces in their own woodlands can be set up according to their personal interests and challenging their physical strength and agility as well as their imagination and creativity in new ways as they grow. Examples of elements for a community park might include
hills which integrate climbing aspects and slides,
shrubs for play forts or labyrinths,
sand areas,
open space for group or athletic play,
picnic shelters that double as art and science space
butterfly or rain gardens, and
fairy villages made from willow branches.
Natural playgrounds provide unique advantages. They appeal to the adventurous and the curious child.
Educational: Research shows that the natural environment fosters more creative play.

A widened age of interest in play: More of the park is considered play space, but it appeals to all ages. (Many of the standard pieces of equipment are skill based and therefore limited to narrow age groups.)
Environmental: The materials are natural, often from local sources or native plants, while plastic play structures are environmentally costly to manufacture, ship, and dispose of.
Jobs: Construction of natural playgrounds utilizes primarily local landscapers rather than remote manufactures.
Budget: More unique play elements can be constructed per dollar
and so forth
Common concerns voiced are accessibility, safety, and maintenance. However,
They can be built to ADA standards and using the natural landscaped appeal in some elements may exceed standards. For example, a slide embedded in a hill would be easier for kids to access than one that was reached by a ladder.
Most of the safety problems with natural playgrounds are from the high elements. Kids may scrape their knees while climbing boulders, but they could do the same on a sidewalk.
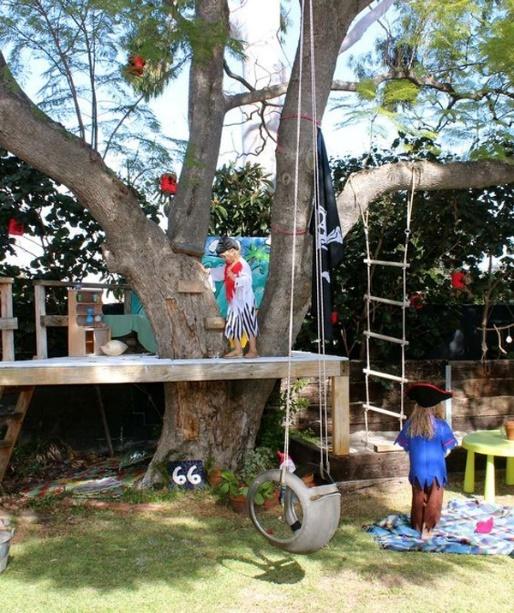
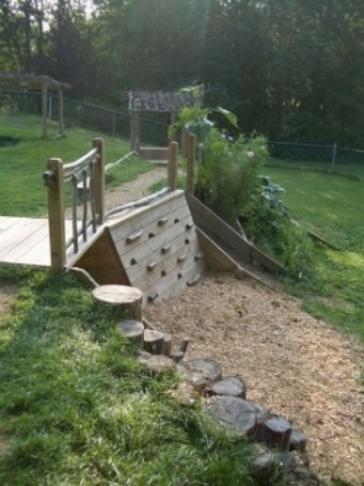
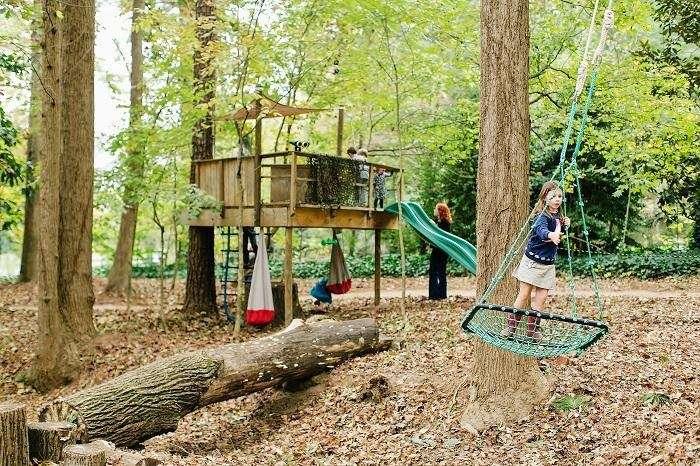
Information that I have found has indicated that they are less costly to maintain, but comparisons are hard, since they include general park maintenance rather than just checking bolts.
They are different from what we are used to. In this high-tech era, we expect “clean” playgrounds. Nature is unknown and sometimes scary. Kids would get dirty. But I think that is a good thing. But they can
I believe that making their natural space unique capitalizes on current research in playspaces that provide exceptional opportunities to challenge their kids love for testing out their ability to conquer their fears, and climbing structures are the perfect place to challenge themselves to reach new heights. Being able to climb higher than they did the last time they visited the park gives kids a sense of accomplishment.
There is an over-used cliche about thinking outside the box. Here, let's not think inside the box or outside; let's think about kids and creative play and rather than a new plastic toy, let's give the kids what they really want, what will stimulate their creativity: the cardboard box.
Construction Area
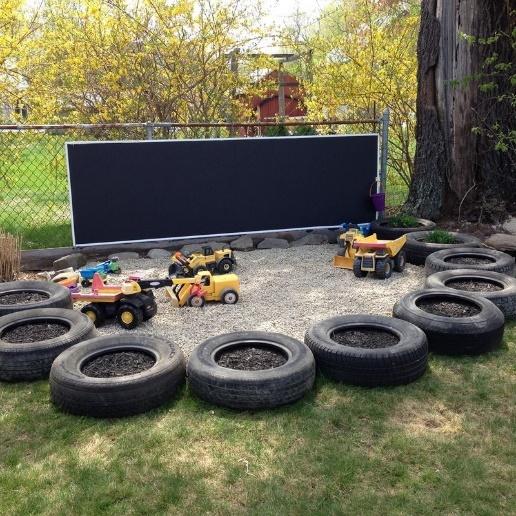
Fill the tires with dirt or sand for added construction fun.
This fabulous sandbox from Smiling Mama's Blog has a great DIY cover.
Outdoor Seating
A Life We Built
Aren't these tire seats from A life we built just so adorable?
If you are going to hang out with the little ones, then you need a comfy place to call your own.
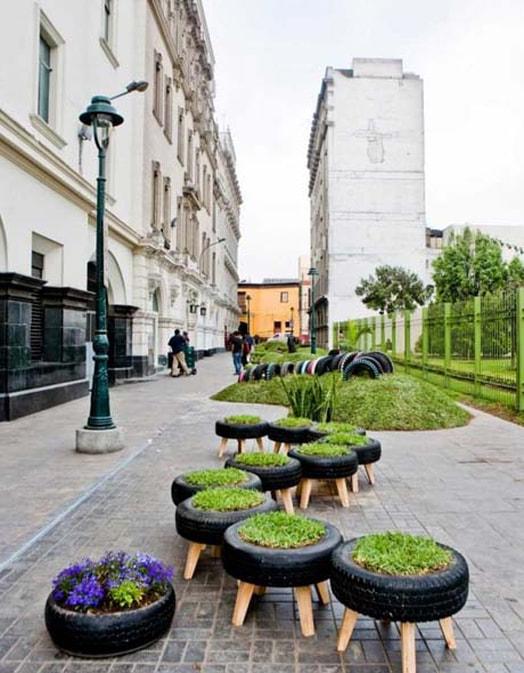
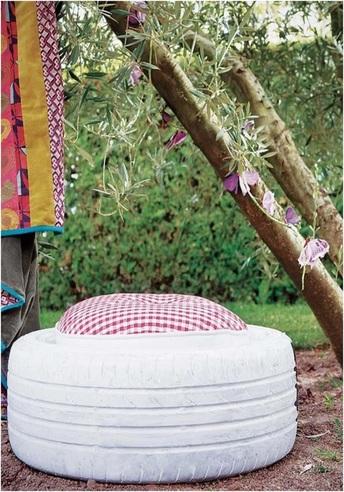
Flaming Petal DIY Enthusiasts
These lawn seats from flaming petal are so fun!
Storage
A easy Tire seat tutorial from DIY Enthusiasts
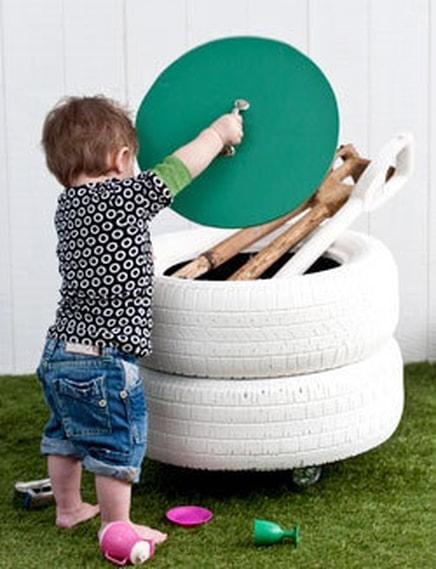
Babble
This idea from Curbly would be a great option for outdoor storage
Flower Garden
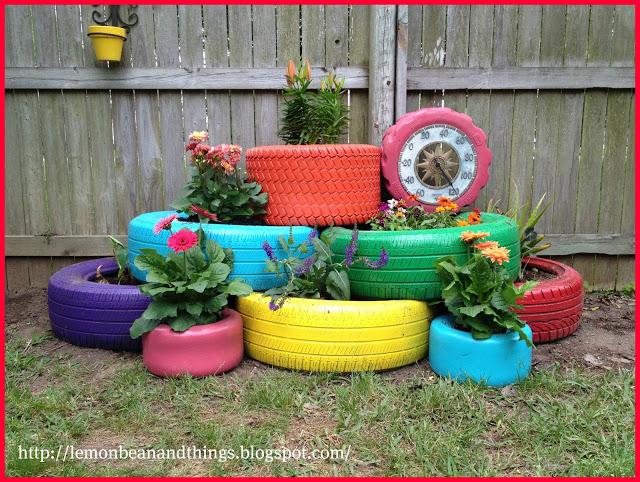
Lemon, Bean and Things
I love this colorful tire garden from Lemon, Bean and Things
Creating Fairy Gardens and Small Worlds
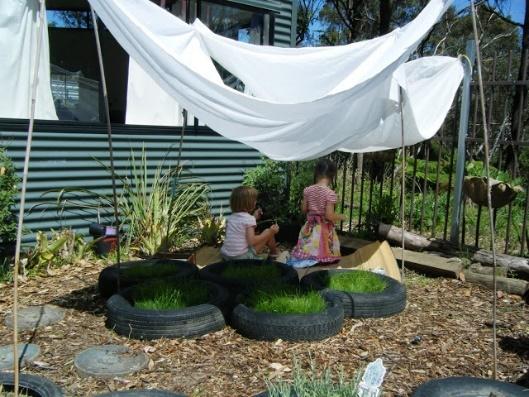
Let the Children Play
What a fun space from Let the Children Play.
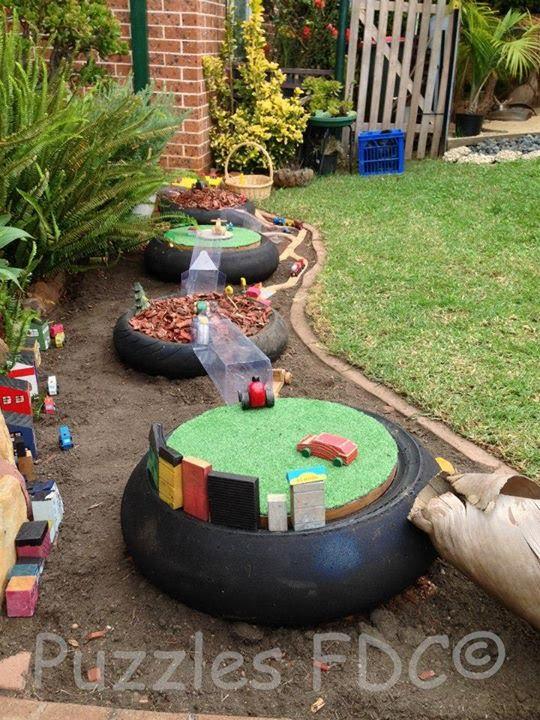
You can transform tires into an outdoor space for small world play with
this idea from Puzzles Family Daycare
Play Based Learning
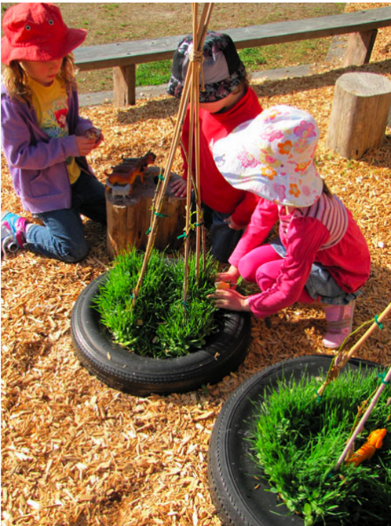
Here is another fun space for small world play from Play Based Learning
Playground Border
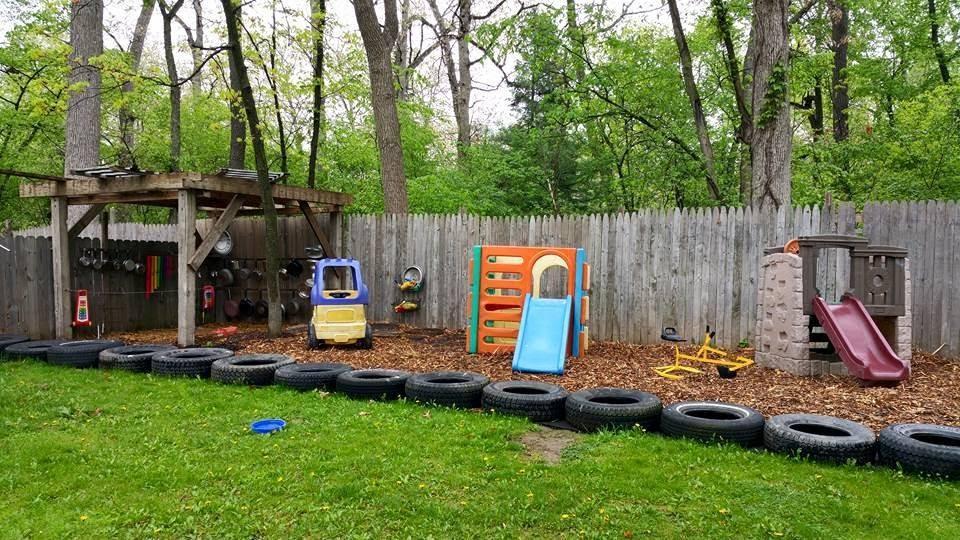
Use tires to border your play area.
Mud Kitchen
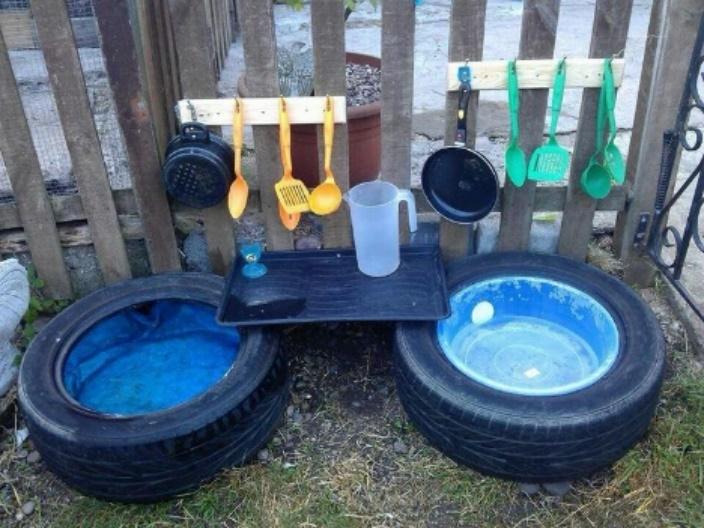
This fabulous tire Mud Kitchen can be found on 1001 Gardens
PAINTING OUTDOORS
Quite frankly, being an outside artist is a challenge. So much of it depends on the weather and the location of the outside water spigot. There were windy spots in the yard and if it was in the morning sun it wasnt in the sun for the after noon.
My solution when she wanted to paint way before other children was to use what ideas I had in my head. And see if it developed into a interest for her. We used any liquid in the kitchen for paint. Tang and pudding was her favorite for painting. It stained her shirt. So I learned to just let her paint in her diaper.
An easy starter project was to paint with water which darkens the construction paper or cardstock.
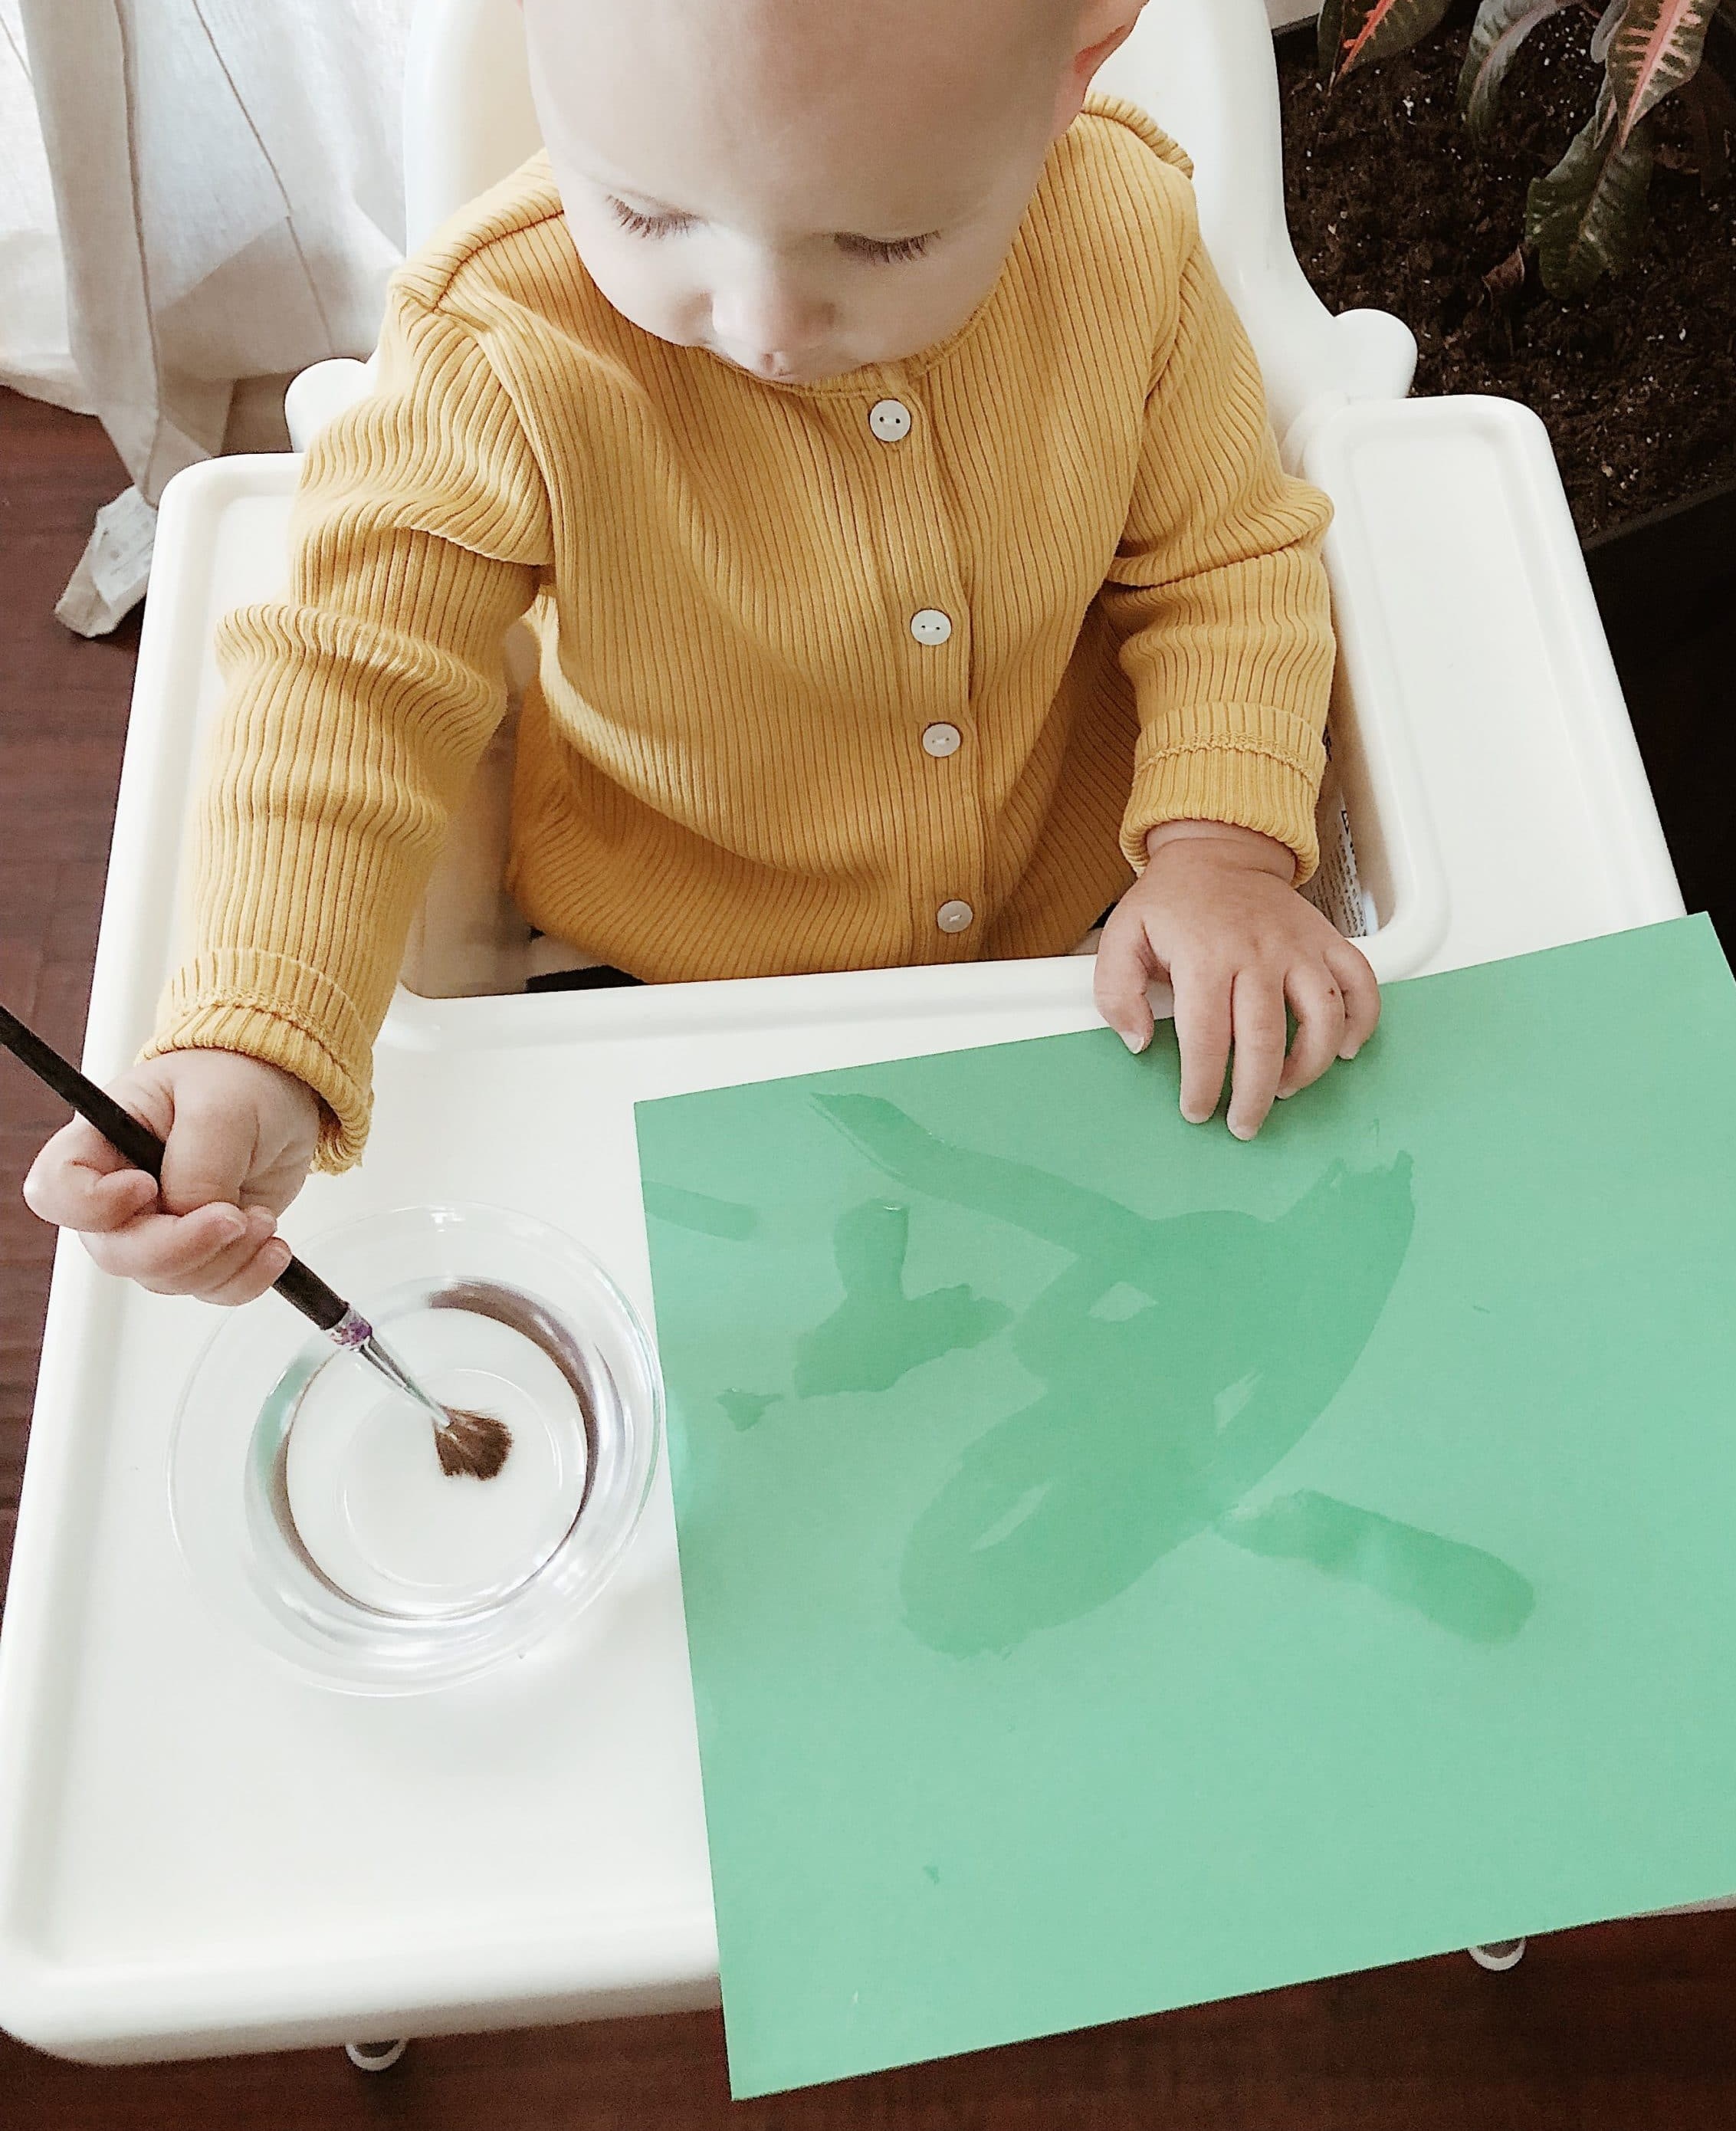
The floor or patio door-We started by putting paint on cardstock inside a ziplock bag- then taping it on the window of the glass door...
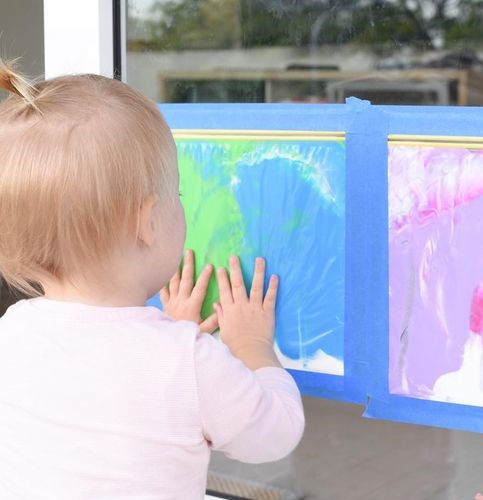
On the floor with a splat mat...

on cardboard or butcher/craft paper
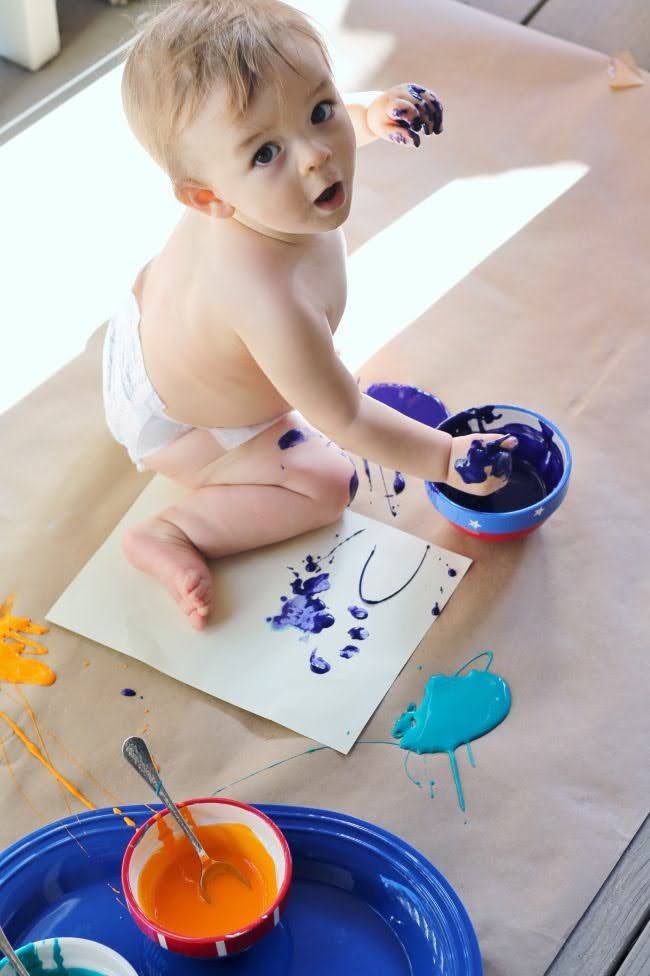
On her high chair tray
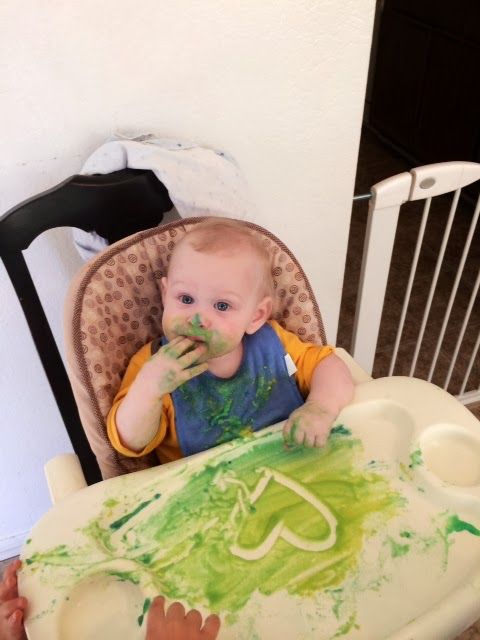
outside at a friends house
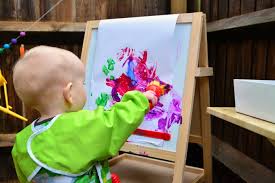
I thought maybe Hope liked art because I would often work on her scrapbook. So one day I taped all her watercolor recipe cards together to make a book for her. She loved it.
Painting in the tub was really easy clean up.
Painting on plates to use as picture frames
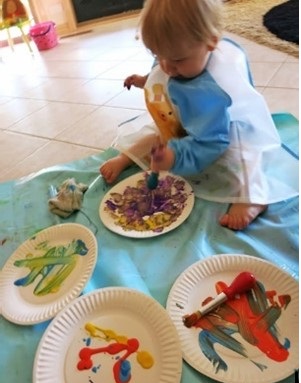
Hope got her first easel from my brother. He knew it was just right for her and mailed it to her before her second birthday. Russ was building her a gazebo just outside the sliding glass door. It was portable, sturdy, easy to move and easy to clean. It went with us everywhere.
If your crafting skills aren’t quite up to par, you may need to learn about Process Art.
Summer Camp at Home
250+ Summer Activities for Kids


Leaf rubbingExplore leaf shapes and sizes with a leaf rubbing picture.
Leaf faces and muddy smilesUse fallen leaves and seeds to make funny faces.

Leaf masksMake a mask out of colourful leaves.

Leaf crownsMake a golden crown and become King or Queen of the trees!


Autumn spotter sheetExplore autumn and keep your eyes peeled for animal activity, plants and fungi.

Autumn leaf huntCan you find these leaves on an autumn adventure?

Autumn fungi spotter sheetKeep your eyes peeled for fungi growing in autumn.

Autumn leaf spotter sheetLearn how to identify colourful autumn leaves with this spotter sheet.

Autumn scavenger huntGo exploring and see how many of these autumnal items you can tick off.

Autumn tree treasure huntCan you find one fallen twig, two sweet chestnuts, three hazelnuts…?


Minibeast huntExplore your school grounds and see how many minibeasts you can find.

Creepy crawly spotter sheetUse this spotter sheet to identify minibeasts you find on the ground.


Fungi spotter sheetGo on a class trip to the woods and see which fungi you can identify.


Minibeast iDialCan you find all of the creepy crawlies on this iDial?

Fruits and seeds iDialPrint and make this spinning ID wheel to identify fruits and seeds in autumn.

Ladybird houseBuild homes to keep hibernating ladybirds cosy.

Hedgehog houseHelp hedgehogs by building a cosy home where they can hibernate in winter.

Giant nature lettersMake your initials on the ground using natural bits and pieces.

Leaf boatsBuild a boat using leaves and twigs, then test it on water to see if it floats!

Butterfly feederHelp butterflies by making a simple sugary feeder.

Minibeast palaceBuild a home fit for minibeast royalty using sticks, leaves and other natural items.

Leaf bagMake your own bag to carry and identify leaves.

Leaf sorting challengeCollect autumn leaves and sort them by colour, shape and size.

Leaf fireworksUse the brightest leaves you can find to make dazzling leaf fireworks.

Sound safariListen up! How many different sounds can you hear outdoors?

Leaf mobileCreate a natural mobile with colourful leaves and twigs.

Conker mathsCollect conkers to practise counting, sorting and weighing!

Forest floor puzzleInvestigate this forest floor, colour it in and answer the questions.

Match the seeds puzzleCan you match the seeds to the trees that produce them?

Why do leaves change colour?Learn why the leaves from deciduous trees change colour in the autumn.

Sounds of springHead outside and listen for busy birds and buzzing bees.

Spring scavenger huntSet out to see what you can find on a super spring scavenger hunt.

Summer scavenger huntGo exploring and see how many summer items you can find on a scavenger hunt.

Summer scentsHow many different smells can you sniff out on an adventure?

Autumn scavenger huntGo exploring and see how many of these autumnal items you can tick off.

Autumn tree treasure huntCan you find one fallen twig, two sweet chestnuts, three hazelnuts…?


Colour bingoHow many colours can you spot in nature?


Tiny treasure huntHow many tiny natural items can you fit inside a matchbox?

Christmas scavenger huntCan you find signs of Santa and Rudolph on a festive hunt outdoors?

Sound safariListen up! How many different sounds can you hear outdoors?

Texture huntGo exploring and see how many natural textures you can discover with your fingertips.These are our activities for this section.
Studies have shown that if you like this, you will also love the following articles. I have pulled them together for you right here!
Summer Camp at Home
250+ Summer Activities for Kids
19 Backyard Ideas for Older Kids (#OutdoorSummer)
Tired of hearing your older kids are bored? Check out backyard ideas for older kids to get outside and off their screens.
Older kids might no longer be mesmerized by bubbles at the park, or spend hours pushing water through a water table.
But don’t worry – that doesn’t mean they can’t have an outdoor summer.
Here are backyard ideas for tweens and older kids sure to entertain and keep them (gladly) outdoors for hours.
Backyard Ideas for Older Kids
Ever looked out your back door window and thought, “How can I make my backyard fun for older kids”?
You know – a place that’ll keep them merrily occupied (and off their screens)?
Well, these backyard ideas for older kids will help.
Psst: have younger kids, too? Here's backyard summer activities for kids.
1. Cook Something in a Solar Oven
Help your older kids build a solar oven with an old pizza box, then let them choose one of these solar oven recipes to make (PDF).
2. Take their Hermit Crabs Outside for Free Play
Was it just me who loved letting her summer hermit crab-free (in my bedroom, no less)…and then lost him/her every so often?
Every summer we used to go to Ocean City, Maryland, and I would use part of the vacation money I had saved to buy a hermit crab – it was so much fun for me from the age of 8-12.
You could surprise your older kids by a) getting a hermit crab (if they’ve never been allowed to in the past), and/or b) letting them take it out back to free-play in the backyard.
Psst: even cooler, they could set up a whole hermit-crab-outdoor-play area and return there again and again with their little clawed friend throughout the summer (my inner child is squealing in delight at this)!
3. Create an Obstacle Course for Younger Kids
Task your older kids to come up with an obstacle course for younger kids – either younger siblings or younger kids in the neighborhood who might like it.
Give them some supplies that they can use, sort of like on Apollo 13 where they’re given a mission and a certain set of supplies, and that’s it.
Supplies can include:
Pool noodles
Balls
Hula hoops
Large boxes
Bean bags
Water guns
Etc.
4. Create a DIY Nerf Gun Target Practice Area
Maybe your older kids have outgrown their Nerf gun (maybe not)…but this outdoor DIY target practice area could get them interested again.
5. Create an Outdoor Hangout Space
You could install a hammock, or bring blankets/bean bag chairs/other comfy things from inside and create a lounging area just for the day (you wouldn’t want these things to get rained on!).
6. Make a Pizza Garden
Kids love pizza – get them involved in the process by allowing them to do a pizza garden as a summer project.
Hint: they can even grow it in the shape of a pizza.
When plants (hopefully) start popping up, have a family pizza-making party!
7. Install a Skateboard Ramp
You don’t have to have a half-pipe or even a quarter-pipe ramp to give your skateboard and roller-blading kids something to do in the backyard.
There are smaller ramps you can put out there, too.
8. Let them Use a Metal Detector
My step-mother found a metal detector for cheap at someone’s yard sale, and I can’t begin to describe how fun this was for a group of kids (my little brother, included) who go to take it out in our woods and use it.
Bonus if you let your kids dig up a few areas!
9. Hold a Camp-Out
When I was around 11, my sister, brother and I used to love setting up a tent in our front yard and camping out for the night.
We tried to hold these around some sort of sky event…but we usually failed to wake up in the middle of the night (or stay up) to watch it.
#memories
Psst: check out these 100 things to do at a sleepover, and 17 easy sleepover snacks to make.
10. Make a Bottle Rocket
Let the kids make a bottle rocket and see how far they can make it soar.
Hint: you may need adult supervision for this one.
11. Play After-Dark Lawn Darts
Perhaps you can let your older kids stay up late one summer night, and play a few rounds with these glow-in-the-dark lawn darts.
I really love this idea, so I also found this DIY glow-in-the-dark lawn bowling game you can create for them!
12. Play Bubble Wrap Twister
How cool – you can save up a bunch of bubble wrap, then paint a Twister game on it and let your older kids play outdoors.
Psst: also great for if you don’t have a big outdoor space, but you’ve got a patio to work with.
13. Make Toy Parachutes and Throw Toys Off Things
I actually got this idea from my sister, who used it to keep our much younger brother occupied one summer day.
You can let them create mini-parachutes, and attach them to things (like toys, army men, or anything else that won’t get broken – or no one will care if it breaks – on impact).
Then, let older kids go on a 2nd-floor patio (with guardrails) or other high places to launch their parachuted items! Racing these can be fun, too.
14. Host a Table-Top Fire Pot Luncheon
Create a few terra cotta fire pots, and put them on the table outside. Assemble some sticks and some lunch supplies (like pre-cooked hot dogs, sausage, or anything else you can think of to cook over a fire), and let your kids cook their own lunch outside.
15. Give them a Backyard Scientist Mission
Find a backyard citizen scientist project looking for people to identify/count things in nature, and task your older kids with completing the mission.
A few to look into:
16. Create a Self-Watering Terrarium Ecosystem
The older kids get, the more power and control they want. Why not let them create their own terrarium that waters itself (thanks to the sun)?
17. Design and Build a Structure Using Mud Bricks
I love this idea because it’s a multi-day project that’ll keep your older kids entertained outside.
They’re tasked with first creating mini-mud bricks, then curing them in the sun for 48 hours. Then, they need to plan and build a structure using the mud bricks they’ve created.
18. Play Giant Racket Ball
Get out whatever rackets you’ve got – badminton rackets, tennis rackets, etc. – and get a giant, inflatable ball (a blown-up balloon will work in a pinch).
Let the kids whack the ball around to one another. No net needed!
19. Throw Colored Powder at Each Other
My husband and I went to a Holi festival in Houston just a few years ago – and it was so fun. We wore white shirts and came out with colors all over the place.
Let your kids help you make homemade colored powder (heads up – this takes overnight to accomplish). Then let them wear an old tee-shirt, and have fun throwing powder all over each other in the backyard.
Writing this article on backyard ideas for older kids really took me back to my own childhood summers. I hope this helps you to recreate some of that magic for your own kids.
Painting with Kids outdoors

If you have a kid that loves to create art, the perfect gift this holiday season may be just as easy as building your artist an easel. Easels are undoubetly expensive, and most parents aren’t willing to spend that kind of moola. So what is one to do? DIY the project, of course! Here are a few of my favorite DIY options.
Quite frankly, being an outside artist is a challenge. So much of it depends on the weather and the location of the outside water spigot. My solution when she wanted to paint way before other children was to use what I had.
An easy starter project was to paint with water which darkens the construction paper or cardstock.

A highchair is a great place to start off too.

outside at a friends house

I thought maybe Hope liked art because I would often work on her scrapbook. So one day I taped all her watercolor recipe cards together to make a book for her. She loved it.

Painting in the tub was really easy clean up.

Painting on plates to use as picture frames

Hope got her first easel from my brother. He knew it was just right for her and mailed it to her before her second birthday. Russ was building her a gazebo just outside the sliding glass door. It was portable, sturdy, easy to move and easy to clean. It went with us everywhere.

If your crafting skills aren’t quite up to par, you may need to consult your local hardware specialist for the necessary materials! With just a few scraps of wood, and a coat of paint, you can give your kiddos the ultimate place to draw when the winter gets boring. Perfect, right? See how they did it via YouTube.

Nothing says “draw here” like a gigantic clipboard…am I right? DIYers across the country should rest easy when they find out just how easy this handmade project is. Wouldn’t your child be so excited to stumble upon this on Christmas morning? Tutorial from Jaime Costiligo.

Dying for an easy art easel? Look no more! Lowes has this amazing tutorial available for any mothers trying to give their children a place to grow and create art. If interested, click this link to Lowes to figure out how they did this!

Do you have kids that are desperate for a few minutes of outdoor time, but they love to draw whenever possible? If so, you may consider making them this DIY protect from Ana White! It’s quick, easy, and sure to look amazing in any backyard environment.

As a kid, I absolutely loved to write on a whiteboard whenever the opportunity arose. There’s something unbeatable about how smoothly a whiteboard marker glides across these surfaces! If you are determined to “wow” your kiddos this holiday season, this DIY easel isn’t a project to be missed.

Around the holidays doesn’t everyone have WAY too many cardboard boxes, and nothing to do with them? Instead of recycling them after the big day, cut them up and make your own cardboard easels. This project will definitely please artists of all ages!

I love when things are magnetic! It’s so easy to purchase magnets and use your magnetic surface to house extra paper or art projects. Why not give your kiddos the same luxury of the magnet? Outfit this DIY stencil with a magnetic backboard where they can show off their favorite art projects.

Recommended
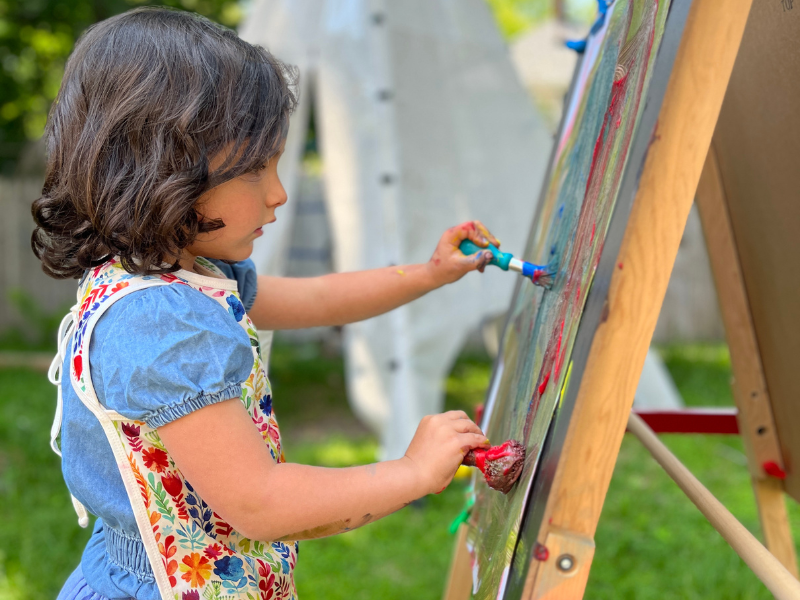
Painting and fresh air were made to go together. Take the art easel outside and see how the sunshine inspires your kids!
Some days are meant for painting outdoors. Especially in the summer.
When the weather is perfect, we like to carry the art easelout to the backyard, add a new roll of paper, and set out some tempera paint.
There’s something about the sunshine and fresh air that breathes new life into regular old art supplies!
If the sun is shining where you are today, we recommend you bring the art outside and see what happens.
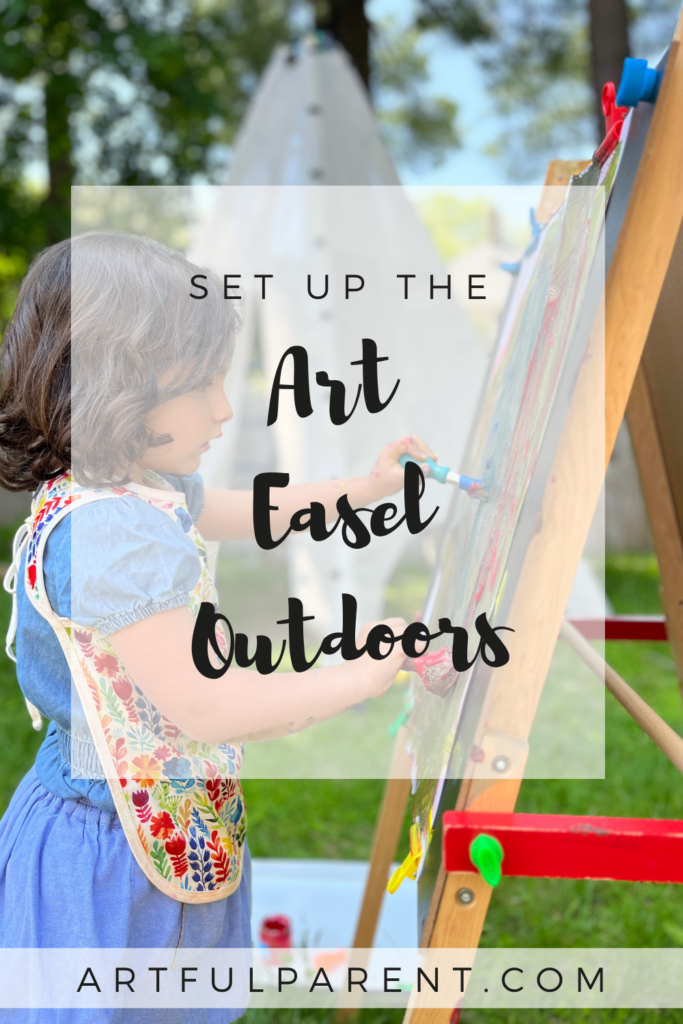
Setting Up the Art Easel
MATERIALS
Easel (we have this easel and love it; it comes with paint cups and a roll of paper)
No-spill paint cups or divided paint cups that hold 2 colors at once
Once you bring the easel outside, we think you’ll want to keep it out there! We like to leave ours on our covered porch, where it’s protected from the elements, but ready whenever we want to use it.
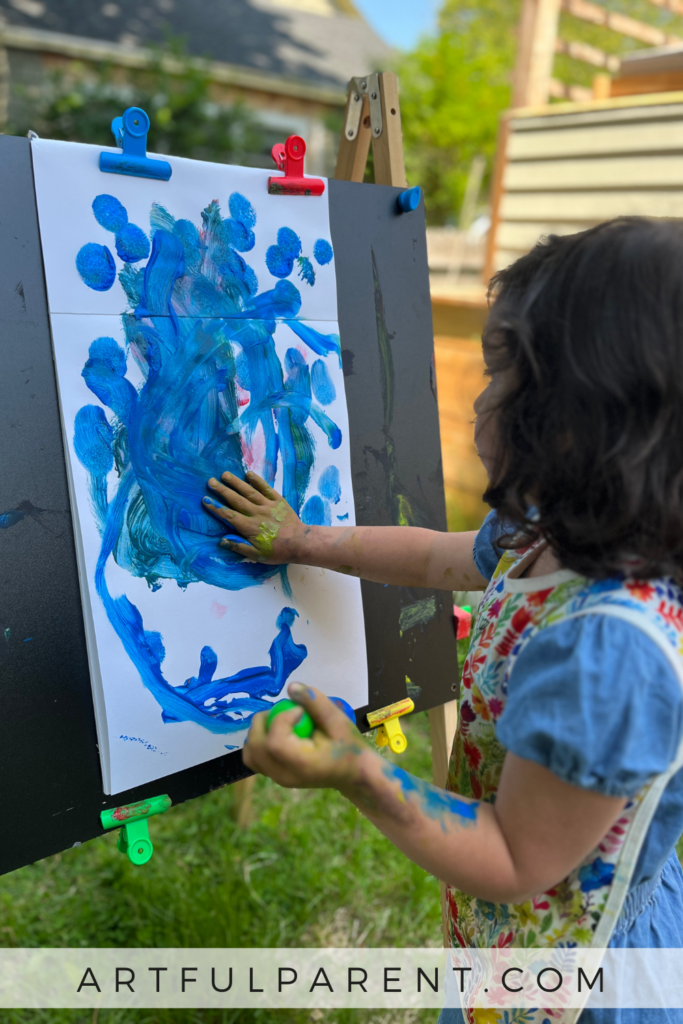
Photo by Rachel Withers
The best thing about an art easel is that you can use it so many ways. Not only is it great for extra messy painting, but also for large-scale drawing.
Set it up with some markers or oil pastels and let kids draw BIG. They might be inspired by the landscape around them, or they might come up with something totally imaginary.
If you’re looking for more ways to use your art easel, be sure to check out our ideas to encourage interest in your child’s easel.
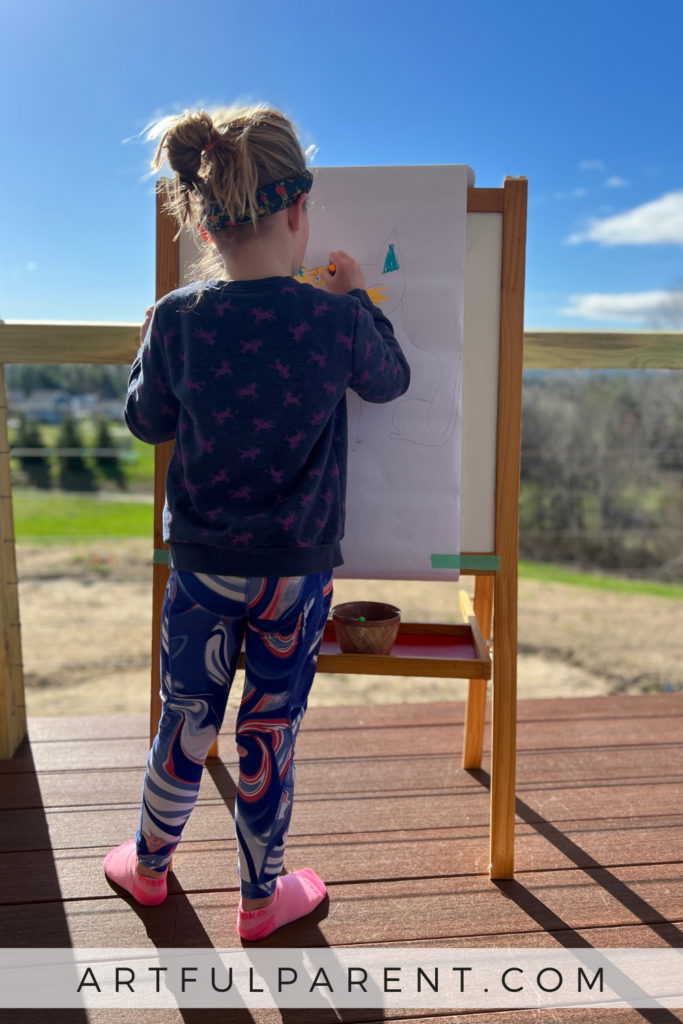
Photo by Andrea Martelle
What do you think? Will you bring your easel and art supplies outside today?
More Outdoor Art Ideas
Pin It for Later
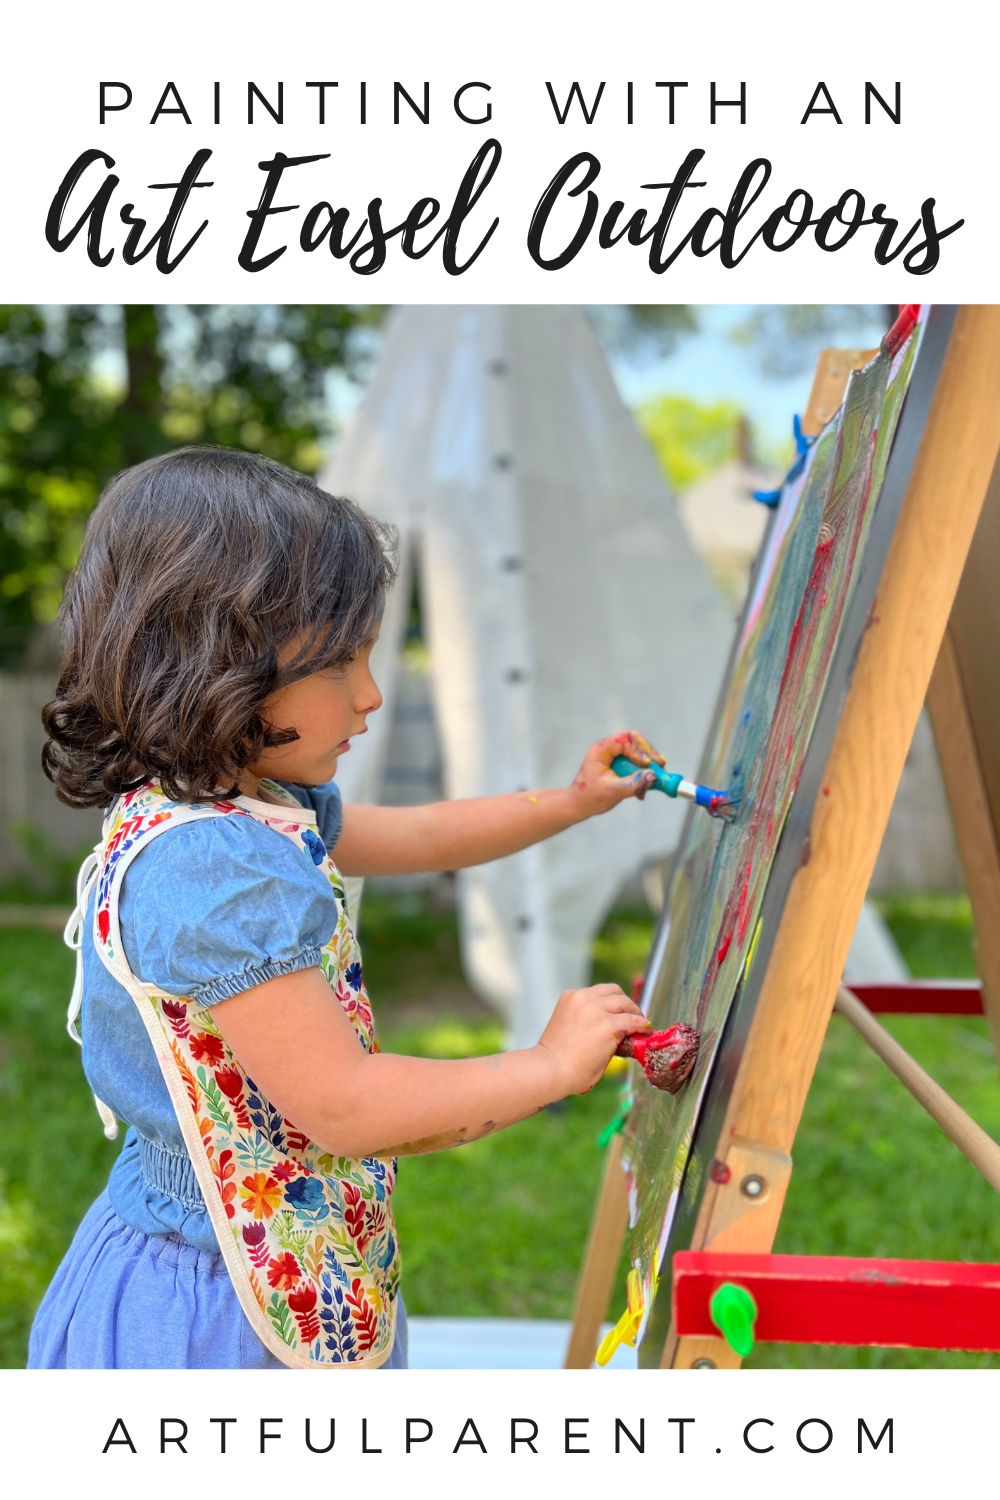
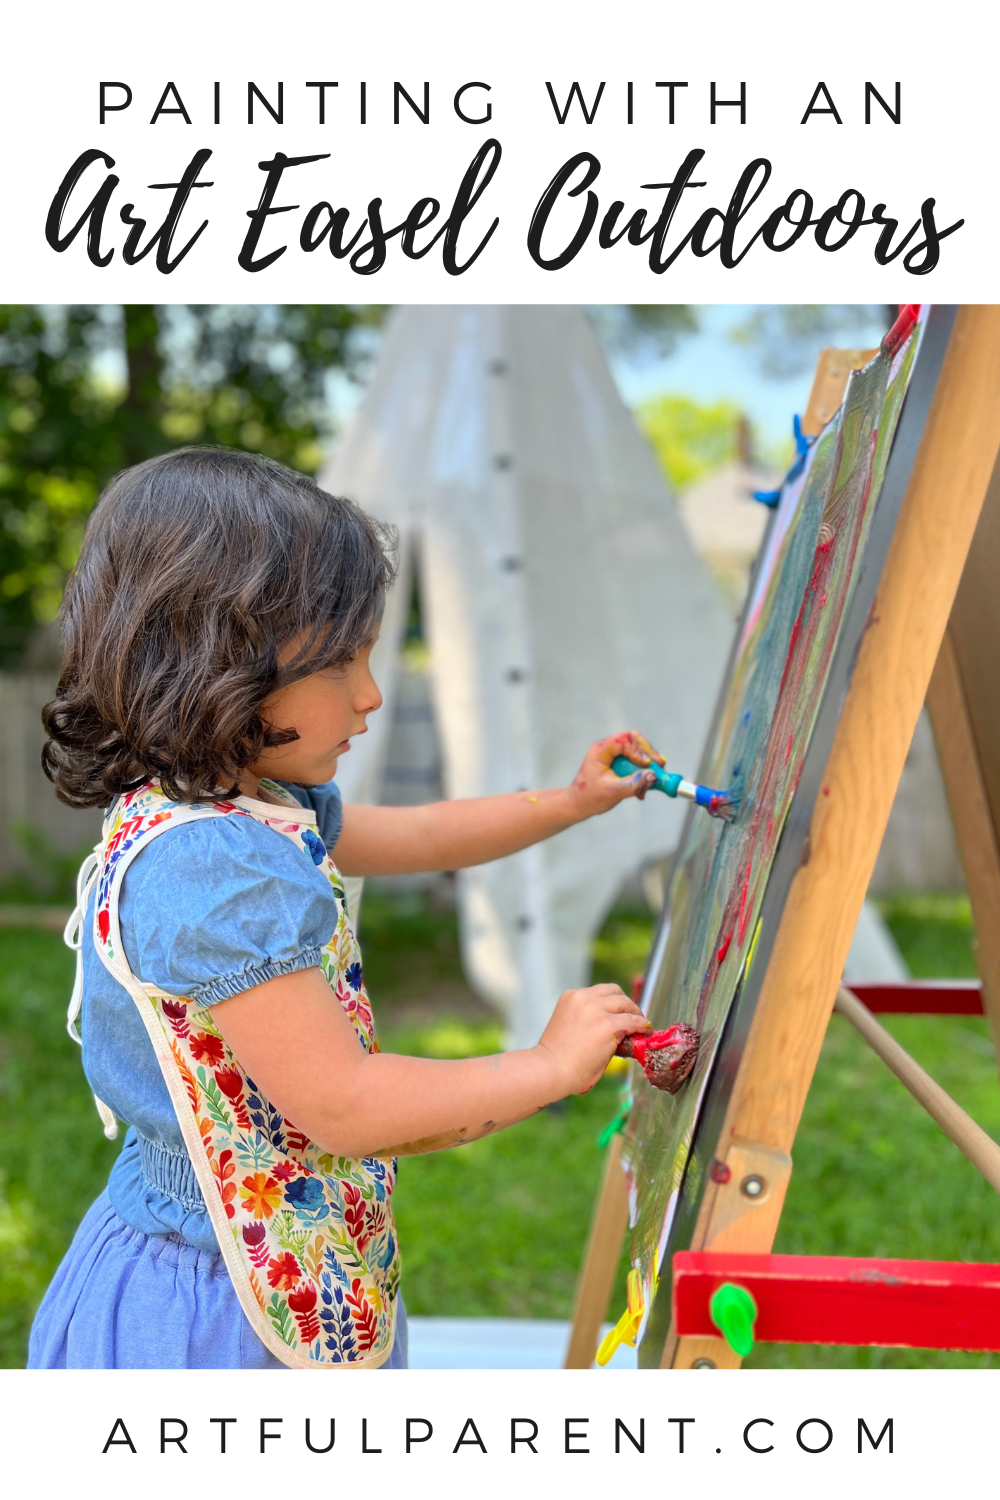
Related Posts
18 Free {or almost free} Cool Features to Add to Your Backyard Playground
Create a fun and exciting backyard playground for your child or your daycare for free or for few dollars! You don’t need expensive toys and fancy equipment to have an outdoor play area that will thrill your kids. These inexpensive ideas for a backyard play space will make your yard the funnest place in the neighbourhood.
The far corner of the backyard draws the children in like a magnet. It’s the play area in our backyard that’s entirely dedicated to the daycare kids, and it’s where the most care-free and magical moments of our day take place.
The old-fashioned simplicity of our outdoor play area makes it an enchanting place for kids to play, explore and learn.
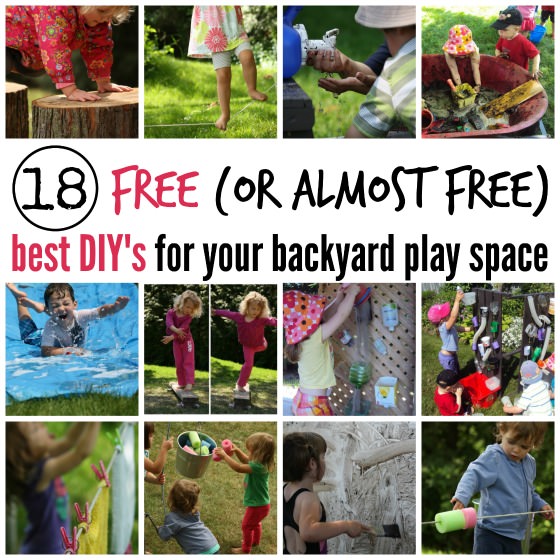
There’s our play-house, and sandbox, which are popular for sure, and there is a myriad of other inexpensive play features that entertain, challenge and engage the hooligans for hours every day, all year long. It’s these play features I’m going to tell you about today.
Having an extraordinary outdoor play space doesn’t have to cost a fortune.
You may be thinking “But, how much does it cost to create a backyard playground like this?”
Well, that’s the beautiful part!
Aside from the playhouse and sandbox, which my husband built, most of the play features in our backyard cost next-to-nothing. In most cases, I’ve used items from around the house, thrift-shop finds, and various bits and pieces from nature to create this outdoor play area for the hooligans.
Tight-ropes, pulleys, water walls, balance beams… all just pennies to make, provide countless hours of fun and learning.
They spark the imagination, challenge gross motor skills and co-ordination, and encourage critical thinking and creativity.
Be sure to grab our printable list of 100 Fun Things To Do At Home This Summer too! Your kids will never be bored again!
Ready to have the funnest backyard on the block?
For your convenience, this post contains affiliate links.
18 GENIUS, FREE THINGS TO ADD TO YOUR BACKYARD PLAYGROUND
Click the links or photos below for the full instructions for each play yard feature.
MOBILE MUD PIT
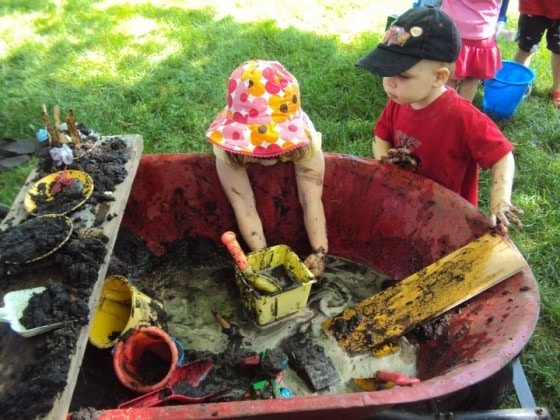
Want a mud-pit without sacrificing your lawn? Click here to check out our mobile mud-pit! Easy set up, easy clean up, and you can tuck it away at the end of the day.
Alternatively, you can buy this mud pie kitchen on Amazon.
PLAY LOGS
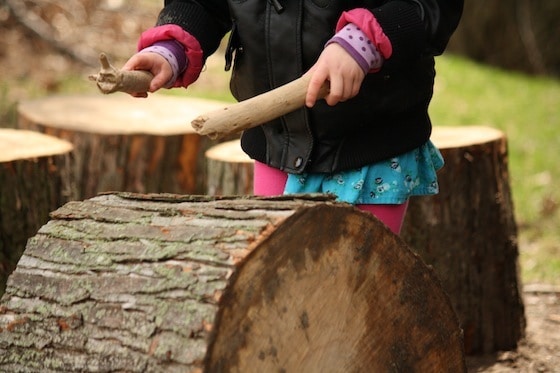
If you know anyone who’s having a tree cut down, see if you can score some play logs! They’re one of the most versatile and popular features in our backyard. Click here to see ours in action, and to find out more about them.
No space for logs? Check out these balancing buckets for indoor and outdoor use.
POOL NOODLE ABACUS
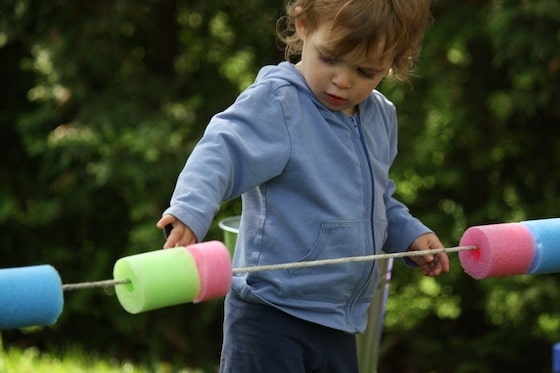
A backyard “abacus” is simple to make and provides lots of fun and learning. The toddlers love this one. Click here to learn more about our pool noodle abacus.
RE-PURPOSE AN OLD WHITE BOARD
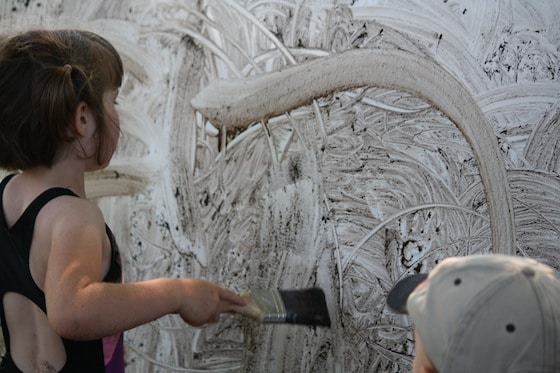
Got a white board that’s too marked up to use anymore? Move it outdoors! The hooligans got a couple of seasons of outdoor art out of this white board that was headed for the trash. Here, we’re painting with mud on International Mud Day.
BACKYARD BALANCE BEAM
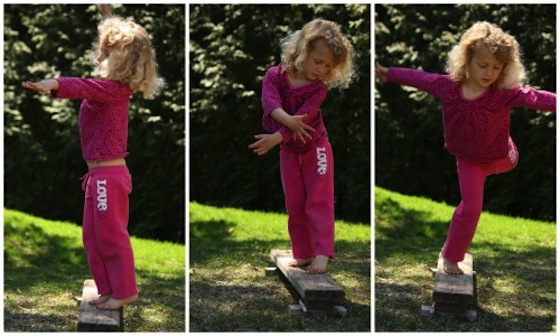
A few scrap pieces of wood make a toddler balance beam for a budding, young gymnast. It provides hours of pretend play and exercise and I can tuck it out of the way at the end of the day. Click here to see more of our outdoor balancing activities for toddlers and preschoolers.
A ROPE AND A BUCKET
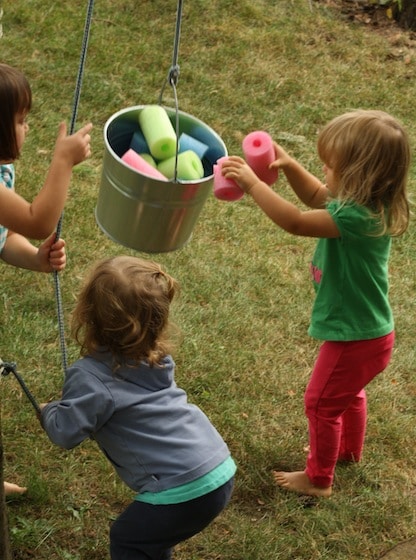
Without question, this simple contracion is one of the best things I’ve ever added to our backyard play area. The hooligans play with it all year round. Not only is it great for strengthening muscles and co-ordination, it also fosters team work, critical thinking and co-operation. See how I rigged up our Bucket & Rope Contraption here.
HOMEMADE WATER WALL
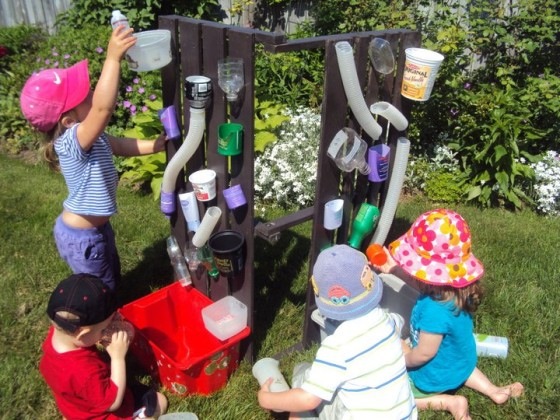
I made this water wall out of recyclables 4 years ago, and the hooligans are still playing with it. It’s provided them with hours and hours of fun and learning over the years. See how I made our water wall here.
TIRE SWING
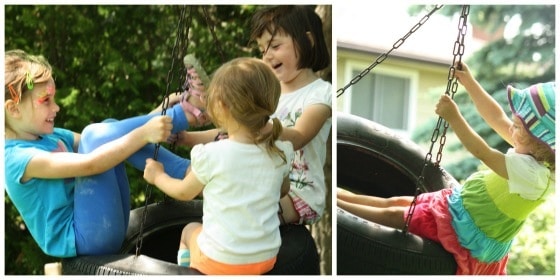
Our tire swing is another one of the most loved features in our back yard. An old tire, hung horizontally is perfect for one or for a bunch of kids to gather on. If your vehicle is due for new tires – perfect! If not, check with a local garage or service station. They may happily donate one to your backyard project. (photo only/no link)
KID’S CLOTHESLINE
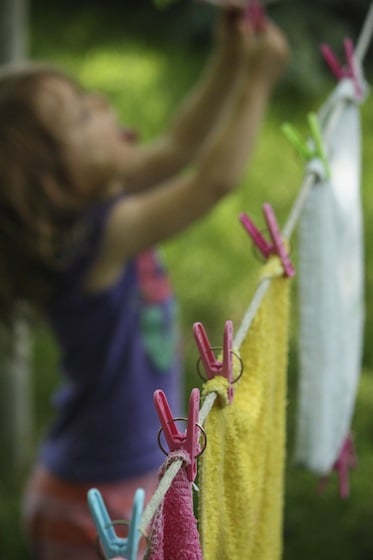
I rigged up this simple toddler clothesline years ago. Secured tightly so it’s not a safety concern, it’s just at the right height for the hooligans to use.
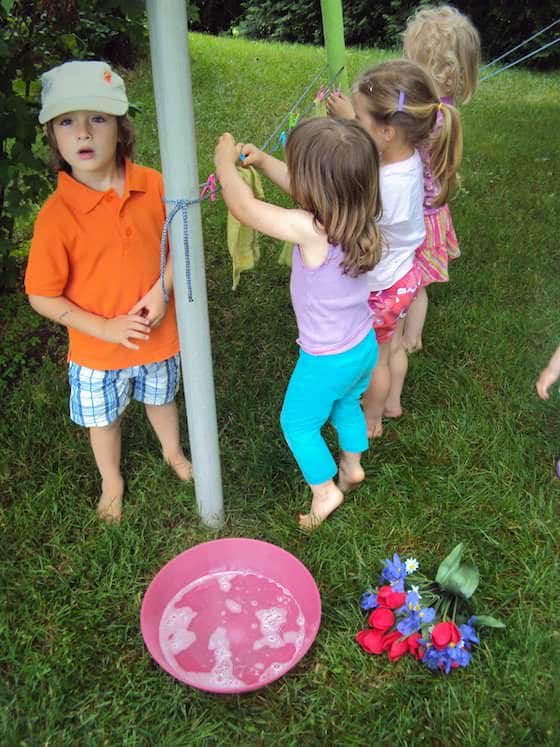
Our clothesline provides lots of opportunity for pretend play, and it’s great for teaching life skills, and developing co-ordination and fine-motor skills. Read more about our clothesline activities here.
ROCKS AND STONES
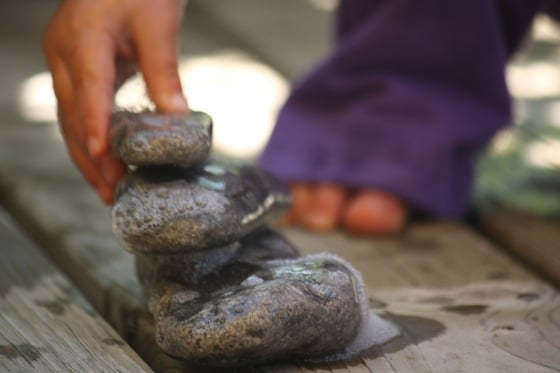
We’ve picked up loads of rocks and stones and even pebbles at the beach over the years. The children always have access to the rocks and stones in the yard, and they play with them daily. They’re kind of our backyard version of the building block – completely open-ended, they can be whatever the hooligans want them to be. See 10 ways that we use our stones and rocks here.
SAND WALL
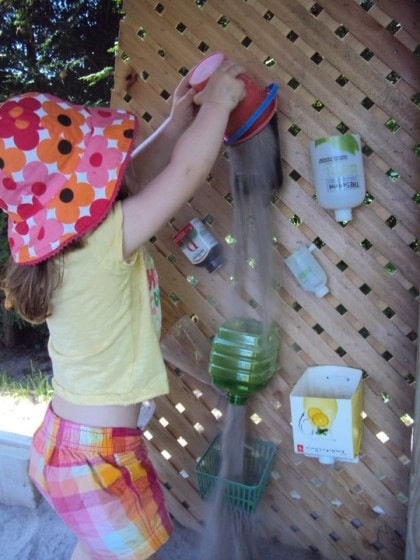
Much like the water wall, our sand wall is also made entirely out of scraps and recyclables. It’s positioned in our sandbox, and it’s provided loads of entertainment over the years. Read about our sandbox and sand wall here.
ARTIFICIAL FLOWERS
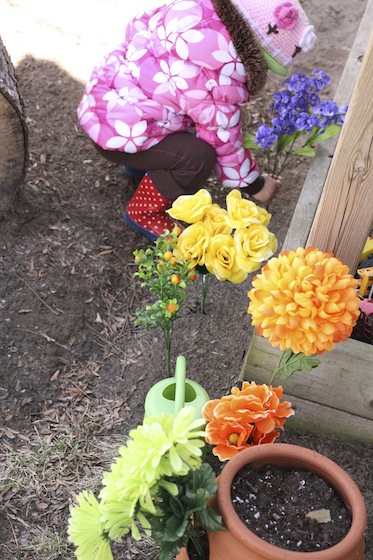
Pick up a bunch of artificial flowers at the dollar store or at a thrift shop. Ours played with every single day. The kids hold “weddings”, they decorate the playhouse with them, they “plant” them in the sandbox. Not a day passes that these don’t get used in some creative manner. Check out one of my favourite artificial flower activities here.
DIY WATER TABLE/SENSORY TABLES
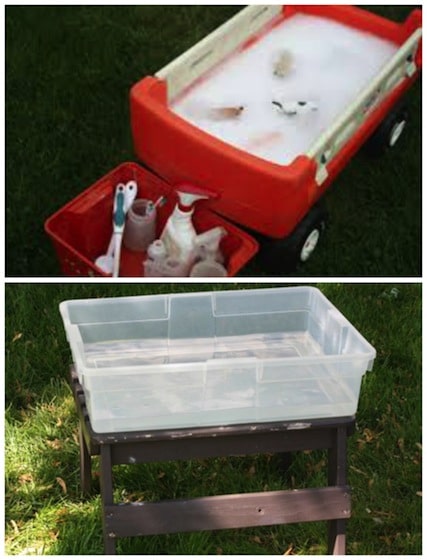
Water tables are awesome, but there was no way I was going to spend big money to get one when you can make your own so easily. I pull one of these together almost every day when the weather is nice. A storage bin set a top a bench or patio table or even an overturned (larger) storage container are all you need for all your water and sensory activities. If you don’t have storage containers, no worries – a child’s wagon also doubles as a water table for a group of kids to gather around. You can check out the way we use it for our water activities here.
BACKYARD TIGHT ROPE
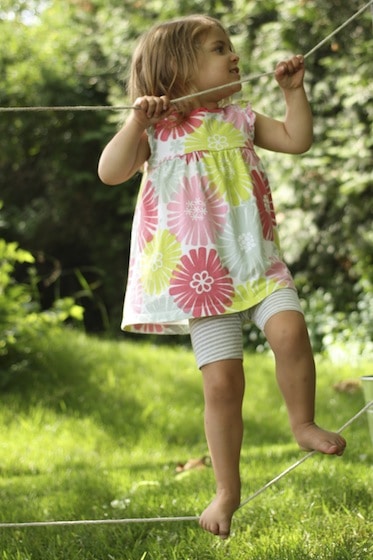
Best thing ever! This is right up there with the tire swing and the rope and bucket contraption. We’ve had our toddler tightrope set up in the yard for years. The hooligans use it every day, all year long even when the snow practically buries the bottom rope. It’s the best for co-ordination and gross-motor development. I’m not kidding when I say our tightrope has provided hundreds of hours of fun for kids from ages 1-7 over the years. Read all about it, and see how to make your own here.
HOSES AND FUNNELS
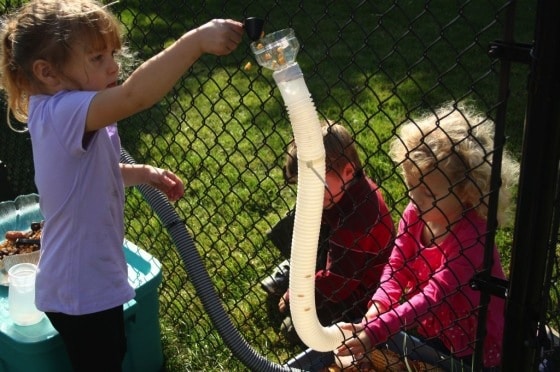
A couple of old pool hoses (or vacuum hoses) pushed through a chain link fence provide hours of fun and learning. Pop a funnel (or the top section of a water bottle) into the top each hose, and little ones will be kept occupied and entertained for ages. Read all about our hose and funnel runs here.
THRIFT SHOP COFFEE TABLE
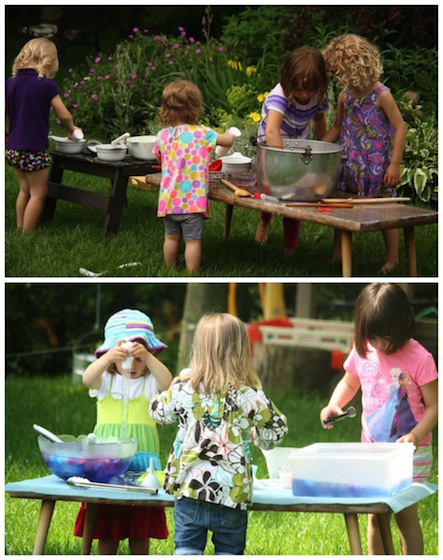
One of the best but least expensive investments I ever made for my daycare was this thrift shop coffee table. I got it for 6 dollars at a second-hand shop a couple of years ago, and we use it every day. In summer, it’s our backyard activity table, in winter it’s our art table in the craft room. Big enough for a crowd to gather around and water and paint spills don’t matter at all. See it in action here.
DIY WATER SLIDE
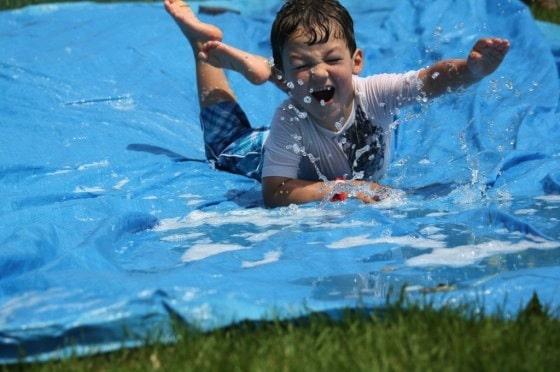
For the price of an inexpensive camping tarp, you can give your kids a whole day of wet, water, slippy-slidey fun! ! We’ve been doing this for years here in my daycare, and the kids never tire of it. See how to make your own waterside here.
ADD “RUNNING WATER” TO YOUR OUTDOOR PLAY SPACE
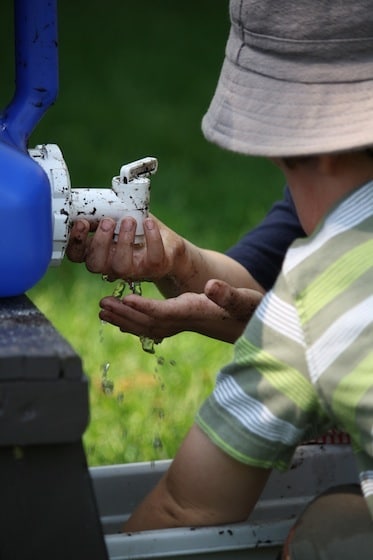
Lastly, my inexpensive trick for adding a source of running water to your child’s backyard play area. A camping jug! Theyr’e in abundance at the second hand-stores around here, so if you don’t have one of your own, you can probably scoop up a used one for a couple of bucks! See some of the ways we use ours here.
And there you have it!
18 inexpensive, super-fun, super-cool things you can add to your outdoor play space this summer! Your kids (and your neighbours’ kids) will love you for it!
LOOSE PARTS: INSPIRING PLAY WITH INFANTS AND TODDLERS
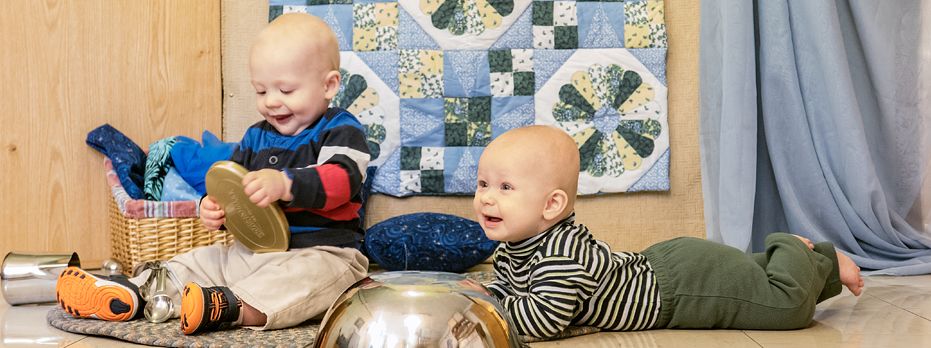
When loose parts are introduced to infants and toddlers, rich, magnificent explorations transpire. Astonishing learning and unexpected capabilities are revealed as the youngest of children make sense of their world. Accidental occurrences become significant and visible as caregivers thoughtfully observe children’s engagement with materials, reflect on the importance of the interactions, and respectfully respond to children’s intentions.
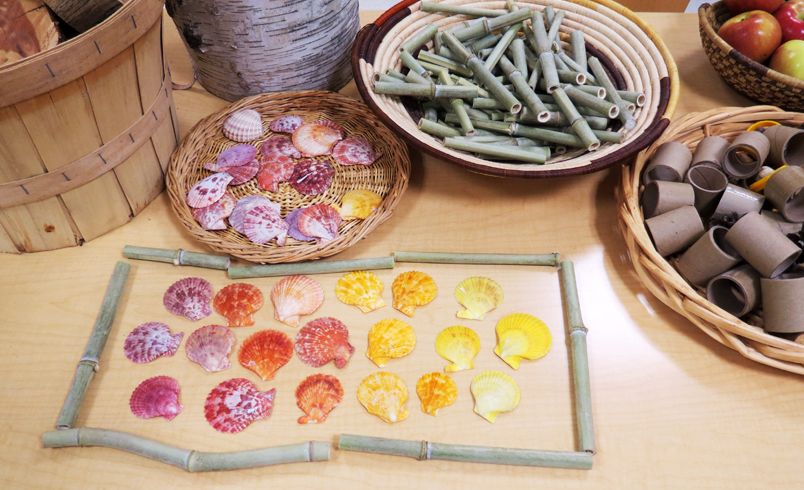
Infants and toddlers are researchers who are fascinated by the properties of objects and how things work. They explore materials with all their senses and delight in cause-and-effect relationships. Loose parts are captivating objects for infants and toddlers to investigate because of their open-ended nature. Loose parts allow young children to be in control of their inquiries as they gather and learn information about physical objects.
WHAT ARE LOOSE PARTS?
The term loose parts was originally coined by British architect Simon Nicholson to describe open-ended materials that can be used and manipulated in different ways (Nicholson 1971). They have unlimited play possibilities rather than single outcomes, which means that there is not a specific way to use items. A plastic musical toy is a closed object that has one intent: sound is made as an infant pushes a button. Toy manufacturers claim that infants will be delighted by its vivid colors, fascinating texture, and engaging sounds. The reality is that the novelty of such a toy wears off very quickly. Once a young child has mastered the single task of making a sound, he is ready to move on to another challenge. Loose parts, however, are adaptable and provide young children with infinite play possibilities.
WHY LOOSE PARTS FOR INFANTS AND TODDLERS ARE IMPORTANT
When incorporating loose parts for infants into your environment consider appropriate items that invite action and opportunity for babies to touch, mouth, explore, move, bang, and rearrange. Examples include balls, knotted cloth napkins, hair rollers, and bracelets. For toddlers, select items that they may transform, transport, and construct. When a toddler plays with a plastic apple it is always an apple, but when she plays with a pinecone she may choose for it to represent an apple, a tree, or a ball for rolling—anything that she imagines.
Toddlers love to fill, dump, and carry things, so provide materials to support these interests, such as coasters, large glass stones, rocks, postcards, and scarves. Also add materials with interesting properties that can be used for design or construction, or made into props. Natural, found, and upcycled objects such as seashells, stones, tiles, ribbon, and fabric are some examples.
Infants and toddlers learn heuristically, that is through investigating, discovering, or problem solving by experimental and trial-and-error methods. Therefore, it is important for teachers and caregivers to provide open-ended materials (loose parts) that allow infants and toddlers opportunity to explore their properties and functions.
Loose parts support the dynamic and multidimensional nature of young children’s learning. Children of all ages, abilities, skill levels, and genders can use loose parts successfully. Because there’s no right or wrong way to work with these items, infants and toddlers may use them according to their ability and interest. For example, a young infant may look at, feel, grasp, and mouth a large, polished tile sample; a mobile infant may stack the tiles; and an older toddler may fill a bucket with them and then dump them out.

LOOSE PARTS SUPPORT LEARNING AND DEVELOPMENT ACROSS THE DOMAINS
Social-Emotional Learning and Development
Play with loose parts promotes social-emotional development, including self-knowledge, self-regulation, self-esteem, and social skills as infants and toddlers get to know themselves and others.
Self-knowledge includes a child’s understanding of his own body, abilities, and feelings. An infant first begins to make sense of his world through his sense of touch, sight, taste, hearing, smell, and through movement. As young children explore intriguing loose parts that are made available to them, they use their senses and movement in new ways, developing an awareness of their own capabilities.
Self-regulation involves infants and toddlers ability to gain control of bodily functions, manage powerful emotions, and maintain focus and attention (Shonkoff and Phillips 2000). The development of self-regulation is seen in all developmental areas as young children gain control emotionally, socially, physically, and cognitively. Children become deeply involved and interested, even in the presence of distractions, when they have interesting loose parts to examine and manipulate. Having sufficient time to investigate play objects allows infants and toddlers the ability to fully experience and dictate how to play. The open-ended nature of loose parts allows for multiple play possibilities, such as carrying, stacking, banging, or collecting, thus offering a child the opportunity to regulate her play as she desires, which is not the case with a single-purpose manufactured toy. Self-chosen play with loose parts fosters children’s capacity to control their environment.
Self-esteem is an individual’s perception of their own worth. It develops as children master new abilities, experience success, and realize their effectiveness. Self-esteem and feelings of efficacy develop as young children take initiative and conquer challenges. Pride in their accomplishments and development of independence may be seen in exploratory play with loose parts when infants and toddlers engage with objects and interesting things happen as a result of their actions.
Social development is a young child’s ability to form and maintain healthy and rewarding relationships with adults and other children. An environment organized with appealing loose parts plays a major role in supporting social play in young children. Toddlers can be intent on having the same play object that someone else has, especially popular items. Loose parts are duplicates of the same items so conflict and waiting among children is automatically minimized. For example, a wide variety of metal spoons could be set up as a provocation (intentionally placing intriguing, challenging, or surprising materials in the environment as a way to provoke children’s thinking). Because there are multiple spoons, each child can take several at a time for their investigations of dropping, banging, lining up, batting, transporting, pushing, and stirring.
Perceptual-Motor Learning and Development
As infants and toddlers engage with loose parts they are continuously investigating and experimenting to make sense of how their world works. They learn about texture as they touch scratchy loofas, soft blankets, and smooth plastic bowls. They investigate gravity by rolling a ball down an incline or dropping it from up high. Play with loose parts promotes gross-motor skills, fine-motor skills, and hand-eye coordination.
Gross-motor skills are evident when children climb on pillows or up ramps, pick up heavy tree cookies with both arms, and chase balls. Balance develops as young children walk across logs, stepping stones, tree trunk borders, or a wood plank bridged between tires. Transporting items and filling/dumping are large-motor skills repeated frequently by toddlers. It’s important to have containers in the environment such as bags, buckets, and crates along with smaller loose parts that children can fill, transport, dump, and refill. Tree blocks, pinecones, small floor samples (tile, carpet, wood), coasters, and napkin rings make good small loose parts, and sand, water, and clay are natural loose parts.
Fine-motor skills include control and accuracy of actions made with the small muscles of the hands. Small-motor skills increase when infants and toddlers grasp a knotted rope, carefully use their index finger and thumb in a pincer grasp to pick up a cedar ring, or clip round peg wood clothespins onto a metal bucket. Pouring is supported when young children use cups and containers for pouring water or birdseed. Play with loose parts supports the development of other fine-motor skills such as moving a small cup from hand to hand, making mud pies and cakes, dropping and picking up bracelets, and banging a spoon on a metal pot.
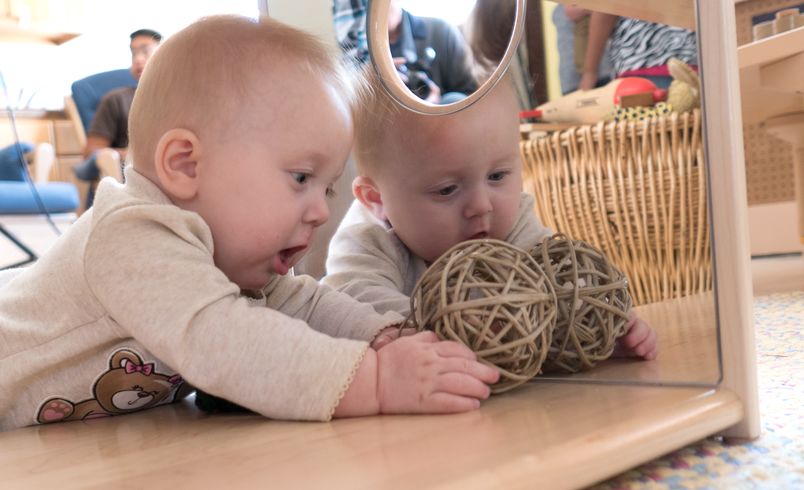
Cognitive Learning and Development
Intellectual, or cognitive, learning includes the abilities of predicting, reasoning, questioning, and analyzing. The process of intellectual learning takes place through natural interaction with real things in the child’s environment (Katz 2015). Infants and toddlers have a natural desire to explore the properties of objects, so exposing them to open-ended play with loose parts allows for experimentation and fosters higher-level thinking. Loose parts are the tools of scientists, engineers, artists, and architects. An early childhood environment filled with loose parts is a laboratory that supports a young child’s drive to invent and discover, a catalyst for rich problem solving.
Language and Communication Learning and Development
Language has many uses as young children engage with loose parts. Sound effects may be used to describe actions as evidenced by Samuel, who makes a “vrooming” sound while pretending that a piece of bark is a car and later makes a “whistling” sound as he pretends that the bark is a train. The value of a loose part is that Samuel is able to change sound effects to match what his imagination has decided the bark to be. During play with loose parts, a child may use language to provide verbal instructions: “Stay there. Don’t fall.” Children may sing as they mix a concoction. A toddler often offers a running commentary when she explores loose parts in her hands.
Play spaces thoughtfully filled with intriguing loose parts offer opportunities for infants and toddlers to actively practice new words. Vocabulary increases as young children learn words to describe play objects and their characteristics, such as color, shape, size, texture, and weight. Teachers can support vocabulary development by using assorted adjectives to describe the rich variations of loose parts such as rough bark or smooth, hard tiles.
Representation of experiences and ideas involves the capacity to use one thing to symbolize and represent another. Nineteen-month-old Arianna takes jar lids off the shelf, places them in a bowl, and stirs the pieces with a spoon. She pretends to take a bite of the mixture. She is using the lids to symbolize and represent food. Ian, thirty-three months old, uses wooden squares to represent a train track. Because most loose parts are nondescript, such as a piece of wood, a child can have the object take on the form of whatever is imagined.
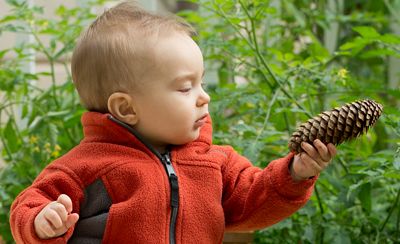
Natural loose parts are generally nondescript, so the object can symbolize whatever is imagined.
Loose parts are fundamental materials in learning environments. When they are intentionally placed in early childhood classrooms, the result is intriguing, challenging, and imaginative play possibilities for young children.
This article is excerpted from Chapter 1: Daly, Lisa, and Miriam Beloglovsky. 2016. Loose Parts 2: Inspiring Play with Infants and Toddlers.Minnesota: Redleaf Press.
TODDLERS AS INVESTIGATORS
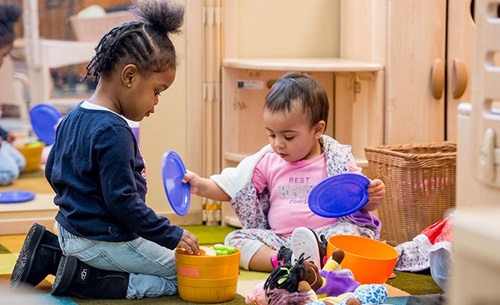
ARTICLE-Toddlers as InvestigatorsTune in to children’s interests and extend the play opportunities they love. Responsive teaching inspires lifelong learners.
SCIENCE ACTIVITIES FOR TODDLERS TO TRY
ScienceToddlersExperiment
Nature Resources
These are some awesome science activities for toddlers for a fun science theme, learning all about science.
When I think of science activities, I often just think of science experiments for the kids to do.
But science is so much more than that.
It’s weather, nature, biology, and so much more.
I actually had a hard time when I jotted down areas of science.
Science can also be classifying and sorting and physics, which all to me, tends to blend in with mathematics.
So I left certain areas of those out of this selection of science activities for toddlers.
WHAT ARE SCIENCE ACTIVITIES?
Science activities can be exploring, observing and taking notes.
It is all about experimenting, trial and error.
Science activities are learning about nature, weather and the world around us.
Science is learning about the human body, animals, and how they all interact.
That’s just science in my own words.
Toddlers obviously can’t understand everything there is to know about science.
Or even really grasp the basics.
But they can be introduced to the concepts and this is often an area that is so magical for kids.
These science activities are fascinating for toddlers!
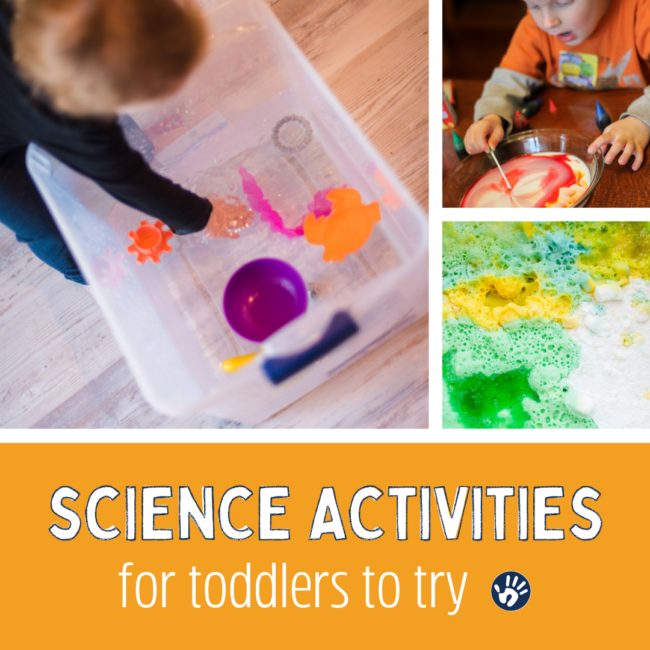
HERE’S LOTS OF SCIENCE ACTIVITIES FOR TODDLERS!
Activities for toddlers to experiment, observe, learn and just have fun with!
Get the FREE Science Experiments Download
Nature Activities for Toddlers:
Make a nature collage. Easy peasy.
Toddlers can paint with nature. From No Time for Flash Cards.
Go on a nature scavenger hunt.
Or toddler will love exploring textures they find in their backyard.
Toddler love to dig in the dirt and will love to build a nest for the birds!
NATURE SCIENCE ACTIVITIES FOR TODDLER
Nature Collage SuncatcherHANDS ON AS WE GROW

Painting with NatureNO TIME FOR FLASH CARDS

Outdoor Scavenger HuntHANDS ON AS WE GROW

Exploring Textures OutdoorsHANDS ON AS WE GROW

Build a NestHANDS ON AS WE GROW
Explore Physics with Toddlers:
Explore gravity! This is a simple activity for toddlers to explore the science concept of gravity with cars and a big tube!
G is for Gravity. An experiment from Inspiration Laboratories.
Try a classic balloon rocket race to watch newton’s 3rd law of motion in action!
Paint using gravity in slide painting. From Mess for Less.
Make and play with a balancing sidekick to explore center of gravity.
EXPLORE PHYSICS WITH TODDLERS

Tube Gravity ExperimentHANDS ON AS WE GROW

G is for GravityINSPIRATION LABORATORIES

Balloon Rocket RaceHANDS ON AS WE GROW


Balancing Sidekick Gravity ExperimentHANDS ON AS WE GROW
Download FREE Week of Toddler Activities to do this week here!
Weather Activities for Toddlers:
Make outdoor wind chimes.
Have a windy race inside! It’s super silly.
Paint puffy clouds. From No Time for Flash Cards.
Go on a hunt to see if you can make real rainbows.
Make a set of these weather sensory bottles! From Pocket of Preschool.
Explore with a raining rainbow cloud experiment.
WEATHER ACTIVITIES FOR TODDLERS

Outdoor Wind ChimesHANDS ON AS WE GROW
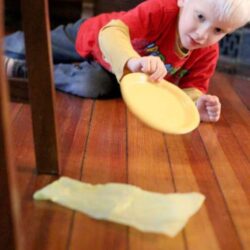

Paint Puffy CloudsNO TIME FOR FLASH CARDS

Make Real Rainbows HuntHANDS ON AS WE GROW

Weather Sensory BottlesPOCKET OF PRESCHOOL

Raining Rainbow Cloud ExperimentHANDS ON AS WE GROW
Human Body Activities for Toddlers:
Explore the human body with their own! This big art activity a great way for toddlers to explore the science of body parts!
Make a body book. From I Can Teach My Child.
Make my face with play dough and pasta.
Have your toddler wash their doll! From Living Montessori Now
Sing these body songs. From English Club.
HUMAN BODY ACTIVITIES FOR TODDLERS

Explore the Human BodyHANDS ON AS WE GROW

Make a Body BookI CAN TEACH MY CHILD

My Face with Play Dough & PastaHANDS ON AS WE GROW

Wash Their DollLIVING MONTESSORI NOW

Science Experiments for Toddlers:
Experiment and make your own lava lamps.
A hands on sensory wave bottle is fun!
Have your toddler gather up some of their favorite toys to see if they float or sink.
Experiment with magic milk and color theory!
Toddlers love the fizzy magic of baking soda and vinegar! Add a color twist!
And take that outside with homemade fizzy sidewalk chalk fun.
Add a new twist to density experiments with a shooting stars in a jar experiment.
Watch the power that soap has on getting germs off your hands with this pepper experiment.
On a sunny day, experiment with ice cubes and learn what makes ice melt the fastest!
SCIENCE EXPERIMENTS FOR TODDLERS

DIY Lava LampsHANDS ON AS WE GROW

Sensory Wave BottleHANDS ON AS WE GROW

Sink or FloatHANDS ON AS WE GROW

Magic Milk Color TheoryHANDS ON AS WE GROW
Colorful Baking Soda & VinegarHANDS ON AS WE GROW

Fizzy Sidewalk ChalkHANDS ON AS WE GROW

Shooting Stars in a JarHANDS ON AS WE GROW

Washing Hands ExperimentHANDS ON AS WE GROW

What Melts Ice FastestHANDS ON AS WE GROW
Find lots of science experiments for preschoolers too!
WHAT SCIENCE ACTIVITIES FOR TODDLERS HAVE YOU TRIED?
Get the FREE Science Experiments Download
FREE Science Experiments Download!
SEND ME THE FREEBIE!
By signing up, you'll also get emails of activities delivered to your inbox every week. You can unsubscribe at any time.
MORE HANDS ON KIDS ACTIVITIES TO TRY


Yes Space kids toddler school aged preschooler

Superscript

Superscript
